How to Save Seeds from Basil & Dill: A Beginner's Guide to Free Herbs for Next Season
Why I Started Saving Basil and Dill Seeds
To begin with, in September 2024, I let my 'Genovese' basil go to seed on purpose for the first time. I'd always pinched off the flower buds because "that's what you're supposed to do"—but I was tired of buying $4 packets of basil seed every spring. So I let three plants bolt, harvested the seeds, stored them in a paper envelope in my kitchen cupboard, and forgot about them until March 2025. I sprinkled those seeds in starter trays on my windowsill, and 94% of them germinated. I haven't bought basil seed since.
In other words, one season's plants can become next season's garden through seed saving. In addition, basil and dill are two of the easiest herbs to start with because they're open-pollinated, produce abundant seeds, and don't require any special techniques or equipment.
Next, you'll learn how to recognize when seeds are ready to harvest, through the actual collection process, to storage and germination testing—plus the mistakes I've made so you can skip them.
Why Basil and Dill Are the Perfect Starter Seeds
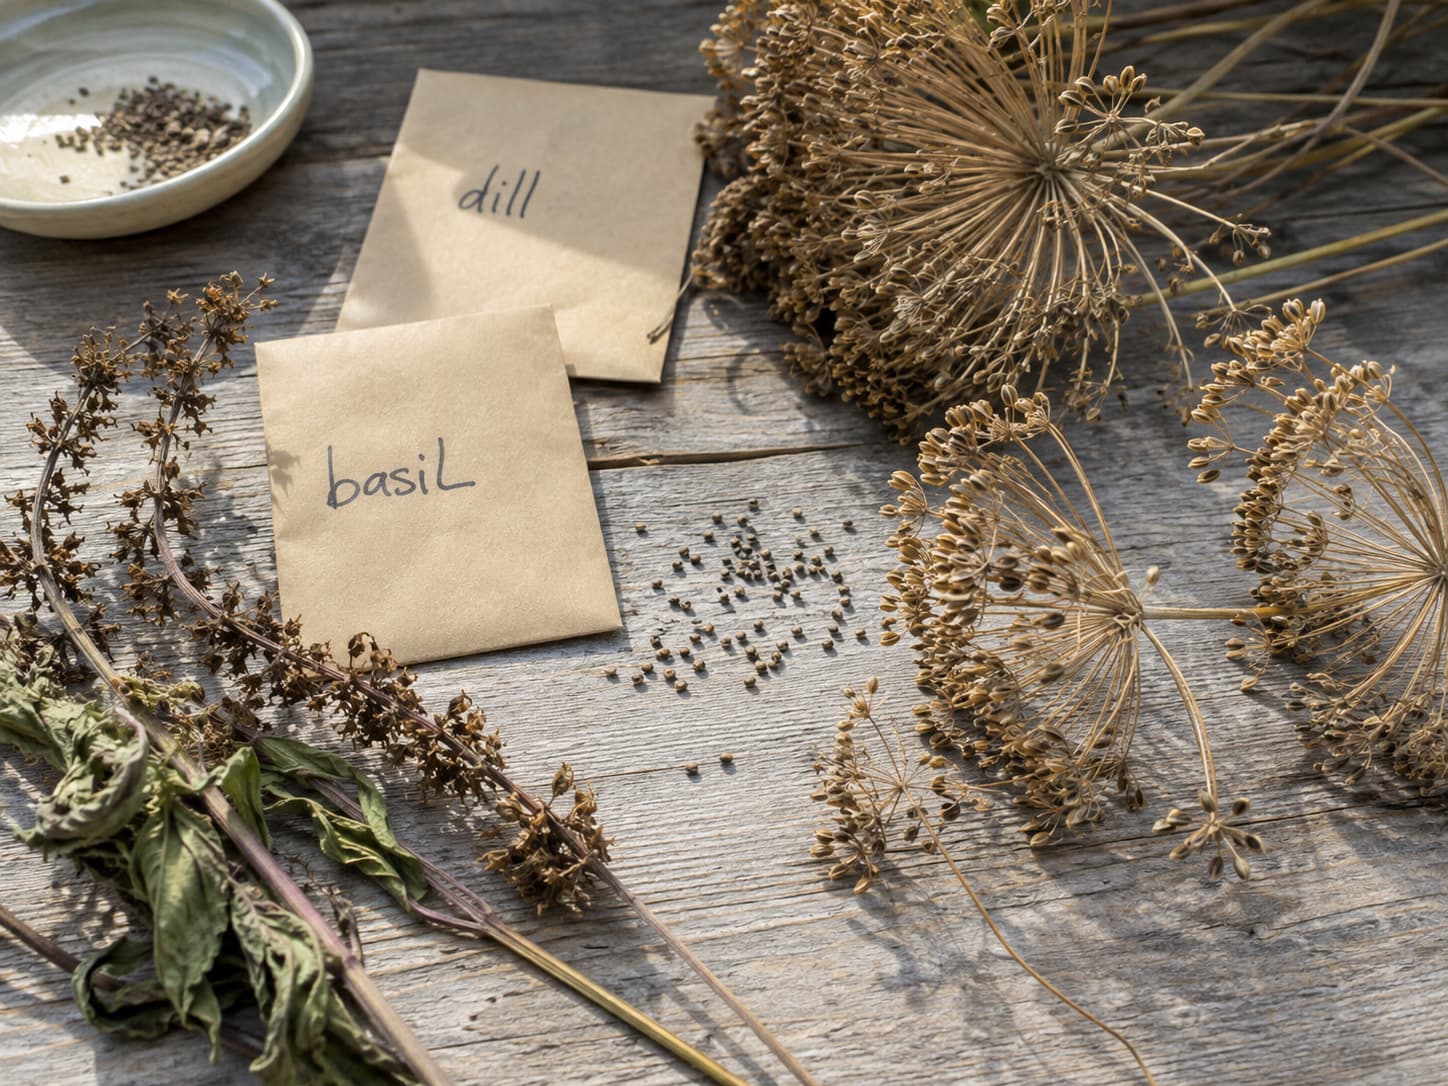
First, not all herbs are equally useful candidates for seed saving. For example, some hybrids may not resemble the parent, while some perennial herbs are easier to propagate another way. By contrast, basil and dill are straightforward starting points because:
| Factor | Basil | Dill |
|---|---|---|
| Open-pollinated? | Yes — most common varieties grow true | Yes — virtually all varieties grow true |
| Seeds per plant | 500–1,000+ | 300–500+ |
| Time from bolting to seed | 3–4 weeks | 2–3 weeks |
| Seed size | Tiny (1 mm), black — need fine sieve | Medium (3-4 mm), oval, flat — easy to handle |
| Viability in storage | 3–5 years | 3–5 years |
| Difficulty level | Easy — just shake dry flower heads | Very easy — snip, dry, shake |
| Special equipment needed | None (fine sieve helpful) | None |
Swipe for more
For comparison, consider herbs like rosemary (slow from seed, better propagated from cuttings—see our Rosemary Growing Guide) or mint (spreads by runners, rarely grown from seed). Therefore, basil and dill are practical first crops for learning the process.
When Are Seeds Ready? The Visual Guide
Next, timing matters because harvesting too early is a common seed-saving mistake. As a result, immature seeds may fail after they have already been separated from the plant. Therefore, judge maturity while the seed heads are still attached.
Basil Seed Readiness
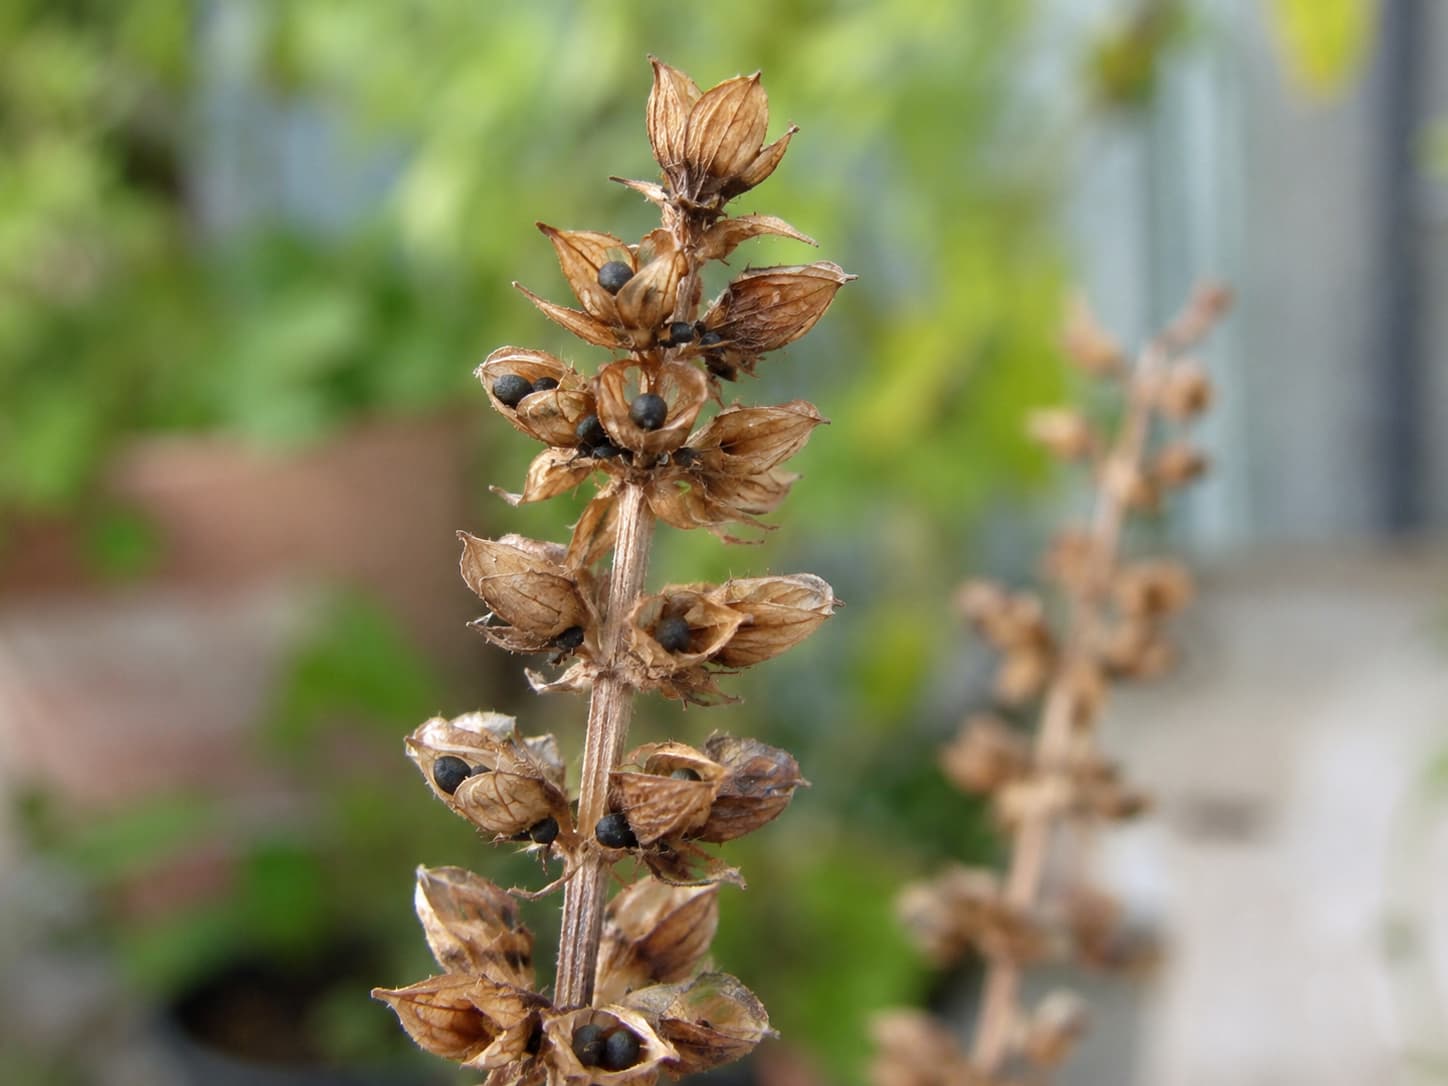
For basil, flowers appear as spikes of small white or purple blossoms. After pollination, each tiny flower leaves behind a small calyx (a tiny green cup) that holds 1-4 seeds. Here's the progression:
| Stage | What You See | Ready? |
|---|---|---|
| Flowering | White/purple open flowers on tall spikes | No — seeds haven't formed yet |
| Petals dropping | Flowers fade and fall; tiny green pods remain | No — seeds are still forming |
| Pods turning brown | Green cups dry and turn brown; stems start to look brittle | Almost — wait 3-5 more days |
| Fully dry and brittle | Brown, papery pods that crumble when you touch them; stem is dry and brown | Yes Yes — harvest now |
Scroll for more
Dill Seed Readiness
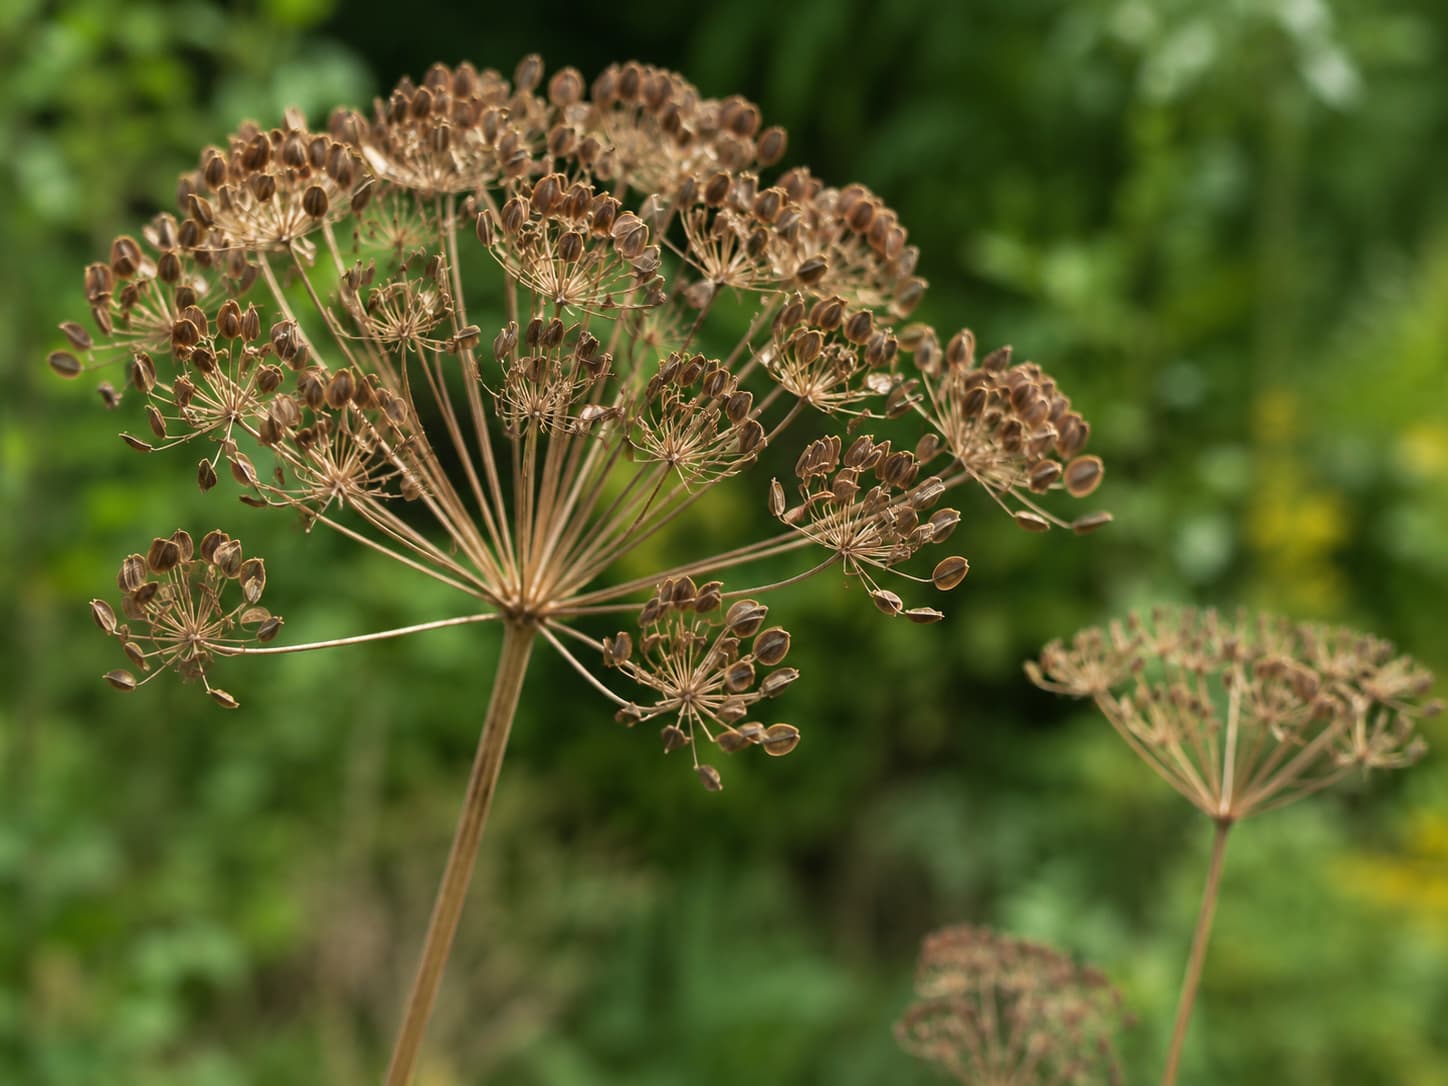
By comparison, dill produces umbrella-shaped flower clusters called umbels. As a result, the maturity change is often easier to see:
| Stage | What You See | Ready? |
|---|---|---|
| Yellow umbels | Bright yellow flat-topped flower clusters | No — pollination in progress |
| Petals dropping | Yellow fades; tiny green seed pellets form on the umbel | No — seeds still green and soft |
| Seeds turning tan | Seeds turn from green to tan/brown; umbel starts curling inward | Almost — wait until fully brown |
| Seeds fully brown, umbel dry | Brown, flat, oval seeds on a dry, brown, curling umbel; seeds pull away easily from the stem | Yes Yes — harvest now |
More columns available
How to Harvest Basil Seeds (Step by Step)
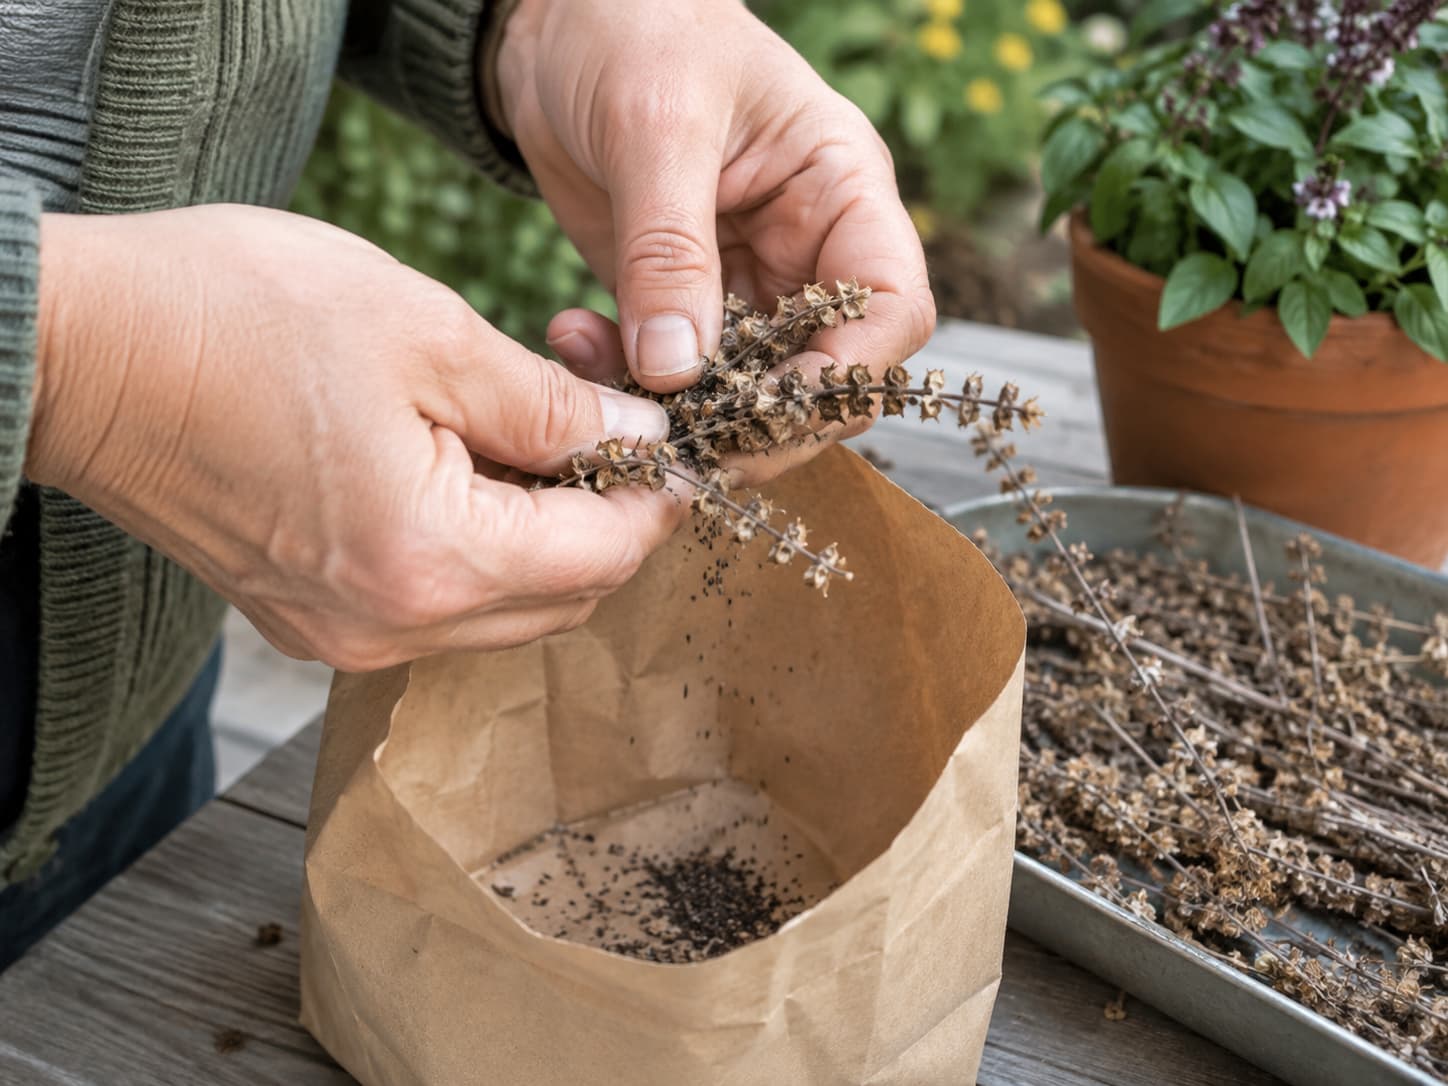
Before you start, gather a paper bag or paper plate, an optional fine-mesh sieve, and choose a dry afternoon.
Method 1: The Shake-and-Catch (For Multiple Plants)
- Choose a dry, windless afternoon. Morning dew or recent rain means wet seeds—wait until everything is bone-dry. Humidity is the enemy of seed viability.
- Cut the entire flower stalk with clean scissors, leaving 6-8 inches of stem below the lowest seed pods.
- Hold the stalk over a paper plate or into a paper bag. Gently rub the dried flower heads between your thumb and fingers. The tiny black seeds will fall out along with dried petal fragments and chaff.
- Separate seeds from chaff. For example, tilt the plate slightly and gently blow across the surface. As a result, lightweight chaff moves away while the heavier seeds remain. Alternatively, use a fine-mesh kitchen sieve ($3-5 at any kitchen store)—the seeds pass through while larger debris stays on top.
- Inspect your seeds. Finally, healthy basil seeds are tiny (about 1 mm), black or dark brown, and plump. Discard anything that's pale, flat, or looks moldy.
Method 2: The Bag Method (For Maximum Yield)
- Cut the flower stalks as above.
- Place the stalks seed-head-down into a brown paper bag.
- Fold the bag closed and hang it upside down in a warm, dry, well-ventilated spot for 7-10 days.
- Shake the bag vigorously—the dried seeds will fall to the bottom.
- Pour out the seeds and clean as in Method 1.
How to Harvest Dill Seeds (Step by Step)
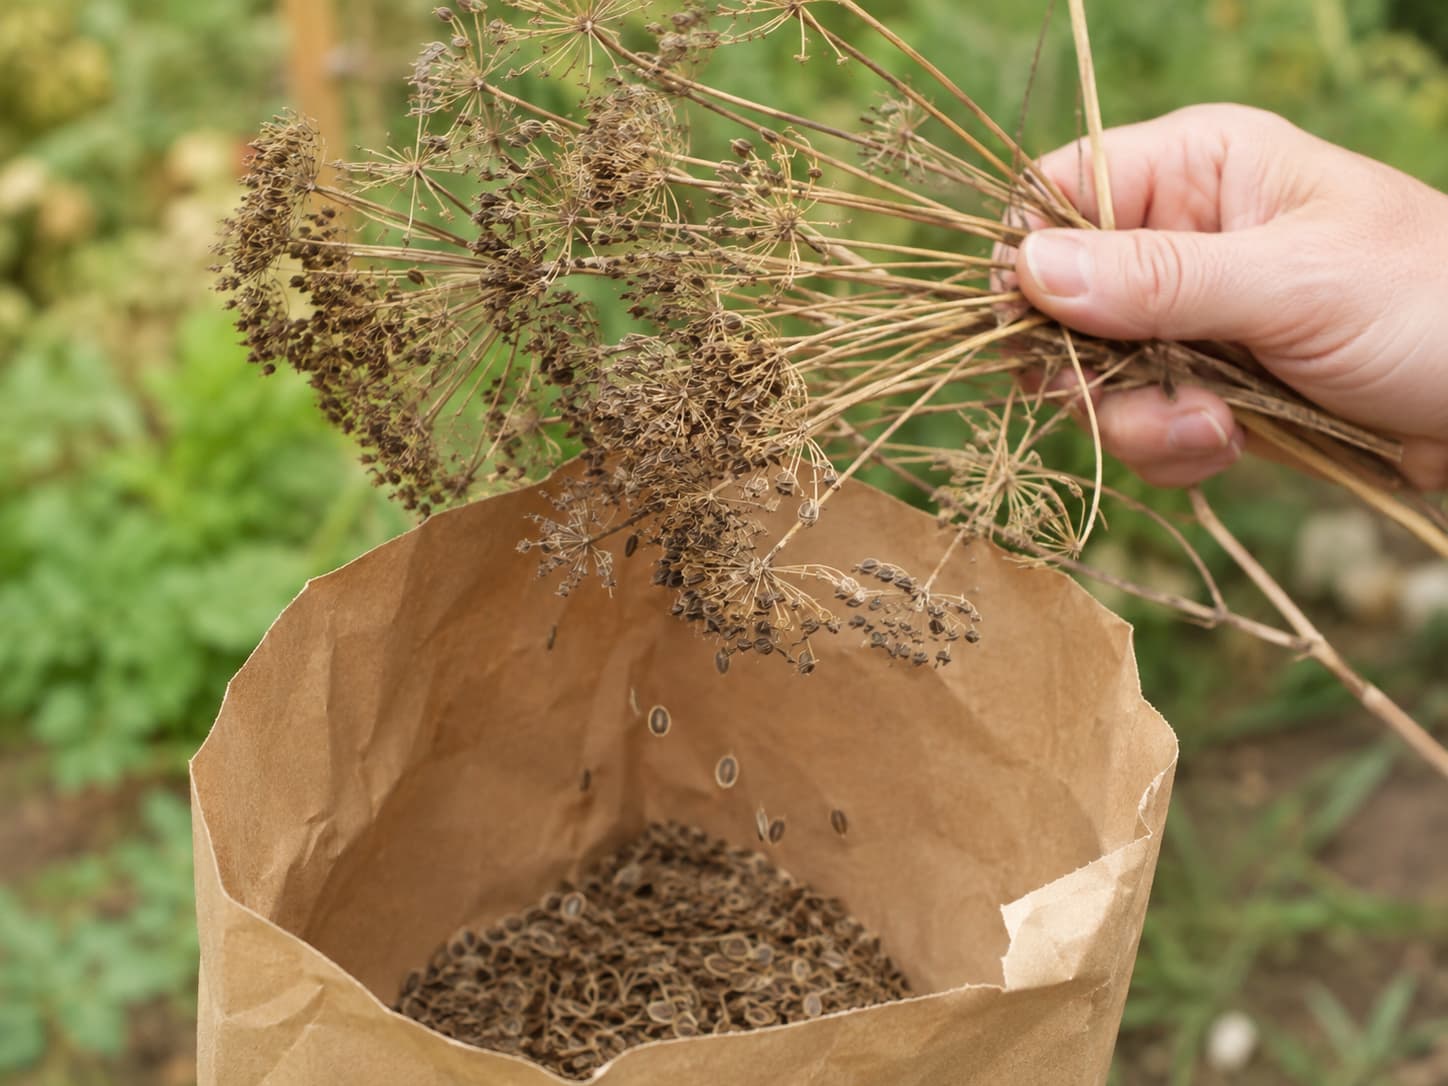
Meanwhile, dill seeds are easier to handle than basil because they're larger and the seed heads are more accessible.
The Paper Bag Method (Best for Dill)
- Wait until the umbel is fully dry and brown. The seeds should separate from the stem easily when you gently pull them.
- Snip the entire umbel off with scissors, leaving 3-4 inches of stem.
- Place the umbel in a brown paper bag, seed-head-down. Don't crowd—3-4 umbels per bag maximum. Airflow prevents mold.
- Fold the top of the bag closed and hang it upside down in a warm, dry place for 5-7 days.
- Shake the bag. The dry seeds will fall to the bottom. Dill seeds release easily—you should get 90%+ of the seeds this way.
- Pick out any remaining stem fragments. Dill seeds are flat, oval, and ridged—easy to distinguish from debris.
The Direct-Rub Method (Quick, For Small Harvests)
- Hold the dry umbel over a paper plate.
- Roll the seed head between your palms. The seeds will fall out readily.
- Pick out any stem pieces. Dill seeds are large enough that you don't need a sieve—just your fingers.
Which Basil Varieties Produce the Best Saved Seeds
However, not every basil variety behaves the same way in seed saving. Therefore, check the original variety before saving seed:
| Variety | Grows True from Seed? | Seed Yield | Notes |
|---|---|---|---|
| 'Genovese' (classic sweet basil) | Yes Yes | High | The gold standard; widely available, excellent germination from saved seed |
| 'Italian Large Leaf' | Yes Yes | High | Nearly identical to Genovese; some growers prefer it for larger leaves |
| 'Lettuce Leaf' | Yes Yes | High | Large, crinkled leaves; seeds produce consistent offspring |
| Thai basil (Siam Queen) | Yes Yes | Medium | Seeds grow true if grown in isolation (cross-pollinates with other basils) |
| Purple basil (Dark Opal) | Caution Partially | Medium | May produce green offspring if cross-pollinated with sweet basil; isolate by 150+ ft if purity matters |
| Any F1 hybrid | No No | Low | Hybrids don't grow true—offspring will be unpredictable. Check the seed packet: if it says "F1" or "hybrid," don't save those seeds |
Swipe sideways if needed
Drying, Storing, and Labeling
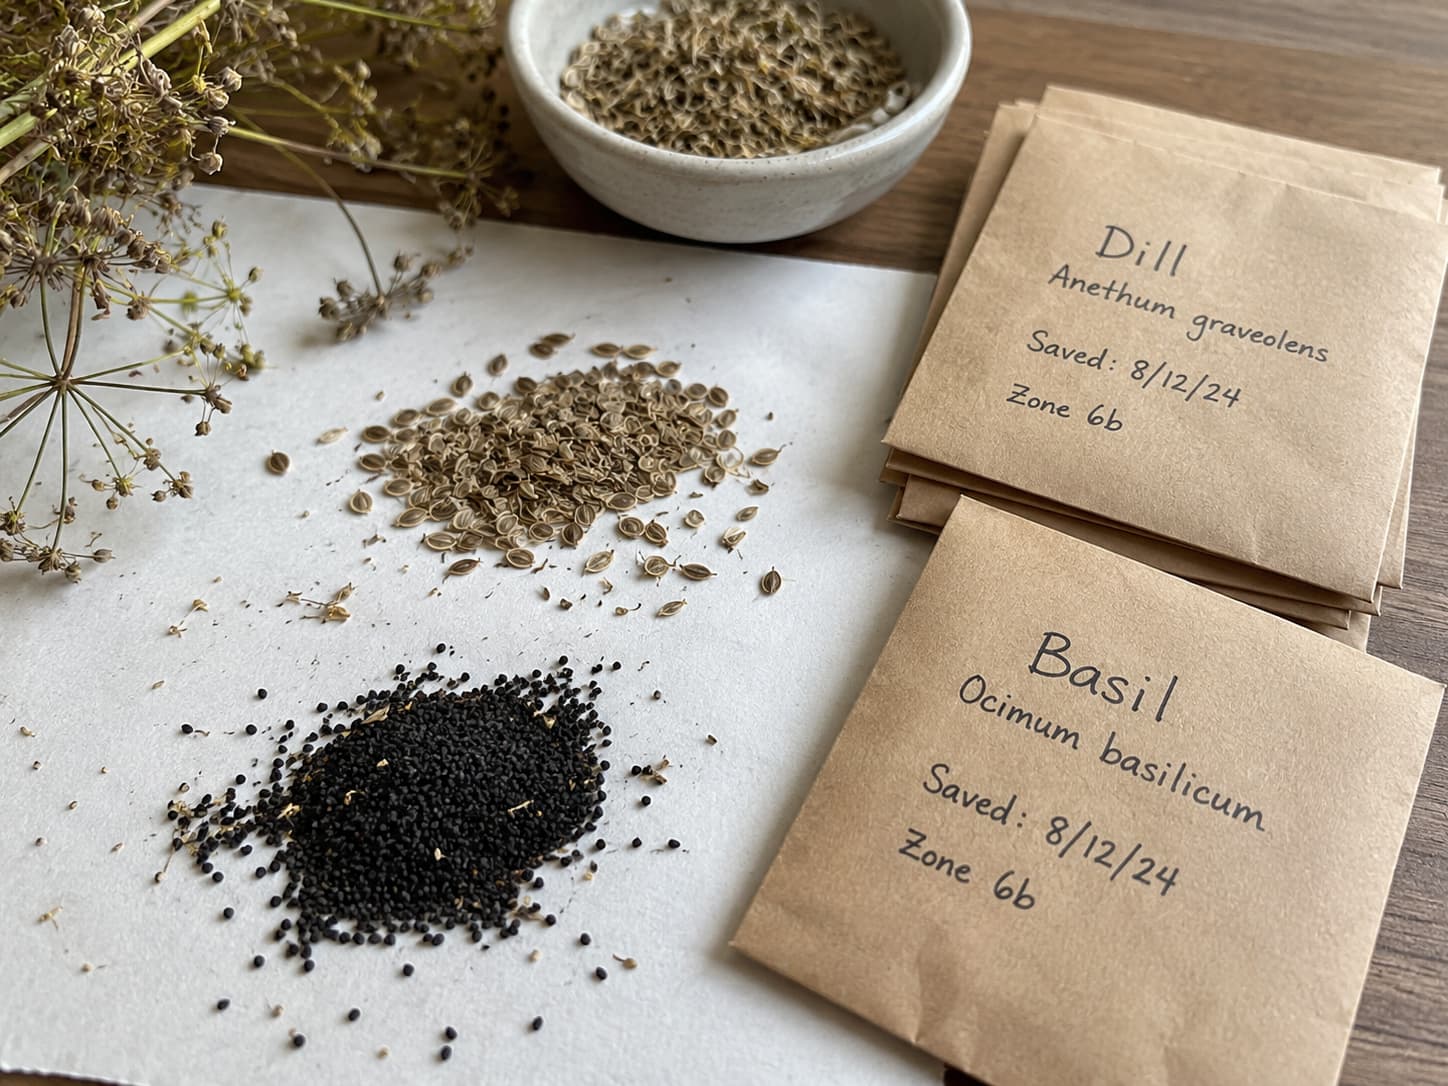
After harvest, drying and storage become just as important. In other words, storage conditions strongly affect whether the seed remains usable.
The Drying Phase (3-7 Days)
For example, seeds that feel dry at harvest can still contain moisture that must evaporate before storage. Therefore, do not rush seeds into long-term storage.
Drying Checklist
- Spread seeds in a single layer on a paper plate, coffee filter, or paper towel (not newspaper—the ink can transfer)
- Place in a warm, dry, well-ventilated spot out of direct sunlight
- Stir or shake gently once a day to promote even drying
- Basil seeds: 3-5 days to fully dry
- Dill seeds: 3-5 days to fully dry (already partially dry from the bag method)
- Test for dryness: Place one seed on a hard surface and press with your fingernail. If it dents, it's still moist inside—keep drying. If it cracks or feels hard, it's ready for storage
Storage Methods Ranked
| Method | Effectiveness | Cost | Pros/Cons |
|---|---|---|---|
| Paper envelope + silica gel packet in a cool cupboard | Excellent | Free–$1 | Best balance: paper breathes, silica absorbs residual moisture, cool cupboard is stable. My method since 2020. |
| Glass jar with tight lid + silica gel | Very good | Free–$2 | Excellent if seeds are completely dry; airtight seal prevents humidity. But if seeds have ANY moisture, the jar traps it and seeds mold. Risky for beginners. |
| Paper envelope only (no silica) | Good | Free | Works in dry climates. In humid regions (Southeast US, UK), ambient moisture will reduce viability within a year. |
| Plastic zip bag | Poor | Free | Traps moisture—seeds mold within months. Don't use this. |
Horizontal scroll available
What to Write on the Label
Finally, label every seed packet with the details you will need next season:
- Herb + variety — "Genovese Basil" or "Bouquet Dill" (not just "basil" or "dill"—you'll never remember which variety it was)
- Harvest date — "Aug 2026" (lets you calculate viability later—most seeds stay viable 3-5 years, but germination drops each year)
- Source — "My balcony" vs "Home Depot packet" (helps you track which seeds perform better over time)
I use small Avery 5407 labels ($8 for 200 labels) or just write directly on the envelope with a Sharpie. Most importantly, the label should stay with the seed so you know what you are planting later.
The Germination Test: Check Before You Plant
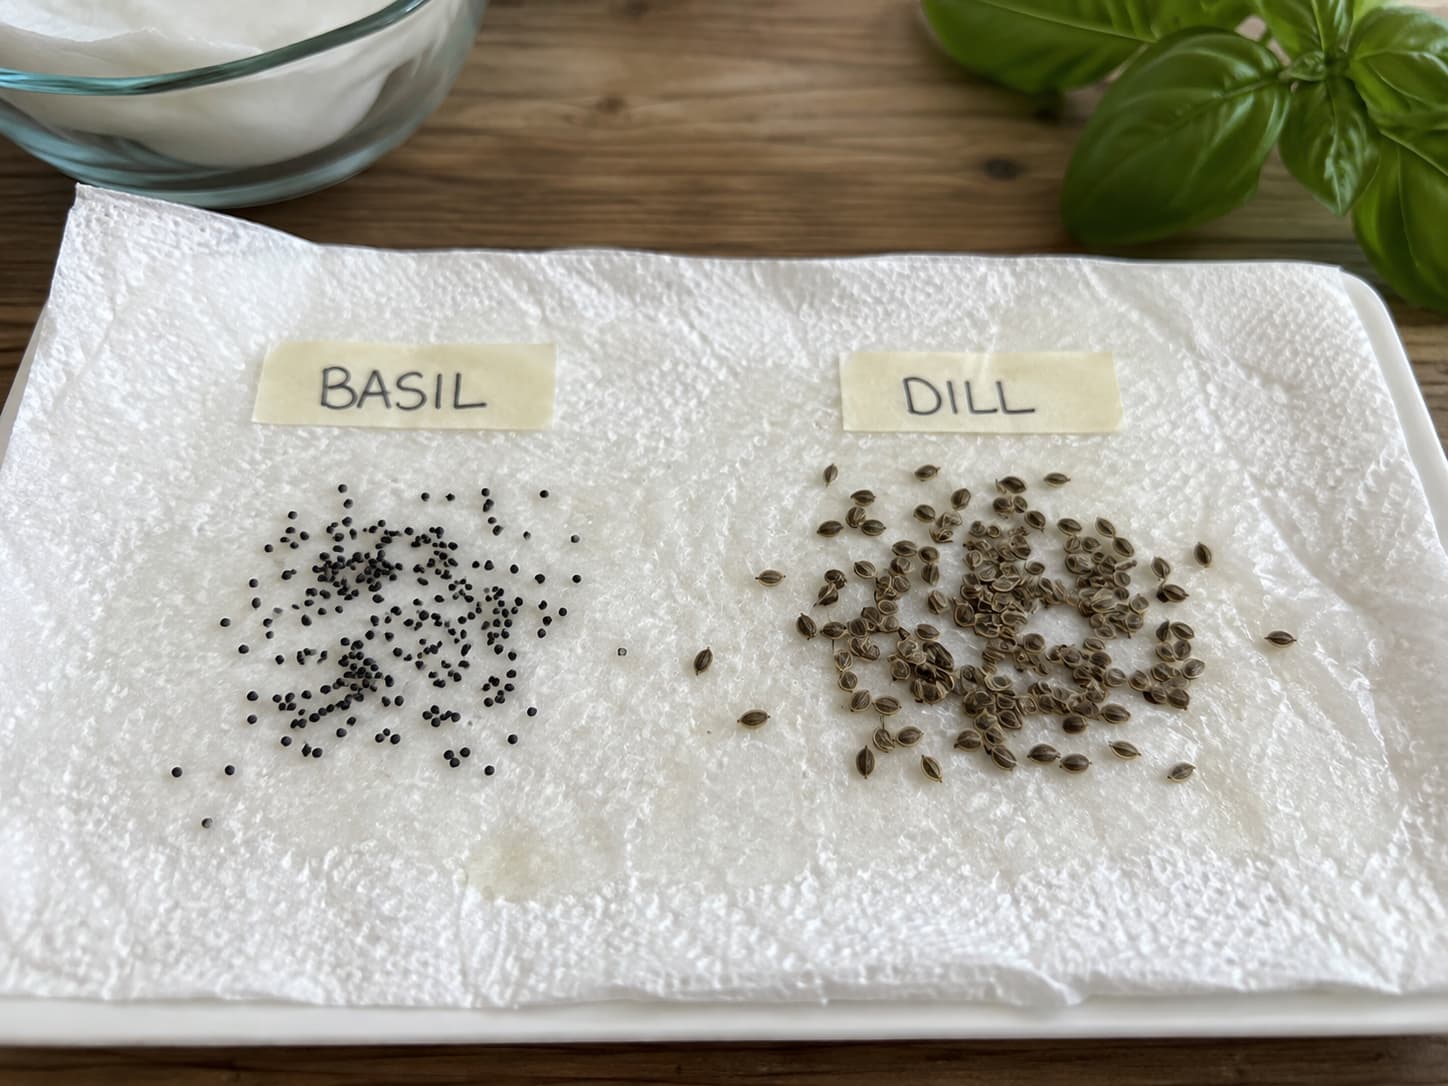
Before planting, test a small sample of saved seed for viability. As a result, a simple test can tell you whether to sow normally or use extra seed.
Paper Towel Germination Test
- Moisten a paper towel (damp, not dripping) and fold it in half.
- Place 10 seeds on the towel, spaced apart. Fold the towel over the seeds.
- Put the towel in a zip-lock bag (this is the one acceptable use of plastic—just for the test, not storage). Seal it.
- Place the bag in a warm spot (70-75°F). On top of the refrigerator works well.
- Check daily. Basil seeds germinate in 4-8 days; dill seeds in 7-14 days.
- Count the sprouts. If 8 out of 10 seeds sprout, your viability is 80%. If 5 or fewer sprout, the seeds are declining—plant extra or get fresh ones.
Seed Saving Timeline: Basil and Dill Through the Year
| Month | Basil | Dill |
|---|---|---|
| April–May | Sow seeds indoors or after last frost | Direct-sow after last frost; dill hates transplanting |
| June–July | Harvest leaves; pinch flower buds until you have enough growth | Harvest fern-like leaves for cooking; some early varieties may bolt |
| July–August | Stop pinching on 2-3 plants; allow them to bolt and flower | Allow umbels to form and mature |
| August–September | Poor Seed harvest window — flowers dry, pods turn brown | Poor Seed harvest window — umbels dry and brown |
| September | Dry seeds 3-5 days; store in labeled envelopes | Dry seeds 3-5 days; store in labeled envelopes |
| October–March | Store in cool, dry, dark cupboard; test germination in late winter | Store in cool, dry, dark cupboard; test germination in late winter |
| March–April | Germination test → sow for next season | Germination test → sow for next season |
Additional columns available
For spring planting, see our guide on when to move basil and other herbs outdoors—basil is extremely cold-sensitive and will die below 50°F, so saved seeds shouldn't go outside until nighttime temps are consistently above 55°F.
Common Mistakes and How I Learned the Hard Way
Seed Harvest and Storage Mistakes
| Mistake | What Happens | What to Do Instead |
|---|---|---|
| Harvesting seeds too early | Seeds are immature; germination rate drops to 20-40% | Wait until seed heads are fully dry and brown on the plant. When in doubt, wait another week. |
| Storing seeds while still moist | Mold grows inside the container; seeds rot within weeks | Always do the fingernail test. If a seed dents, keep drying. Only store seeds that crack when pressed. |
| Using plastic bags for storage | Trapped humidity destroys viability within months | Paper envelopes or glass jars with silica gel—never sealed plastic |
| Skip the label | You will forget what variety it is and when it was harvested. Guaranteed. | Label immediately: herb, variety, date, source. Even a Sharpie on the envelope works. |
| Saving seeds from F1 hybrids | Offspring are unpredictable; may not resemble the parent plant at all | Only save from open-pollinated or heirloom varieties. Check the original seed packet. |
| Letting only one plant go to seed | Genetic bottleneck—next generation has less diversity | Save seeds from at least 3-5 of your healthiest plants to maintain genetic diversity |
| Storing near heat sources | Seeds cook; viability drops rapidly near stoves, heaters, or sunny windowsills | Cool, dark cupboard. Not the fridge (too humid unless you use airtight jars with silica). Not near the stove. |
More table content
My Mold-Storage Lesson
Beyond Basil and Dill: 5 More Easy Herbs to Save Seeds From
Once the basic process feels easy, these herbs are logical next steps—also open-pollinated, also easy:
| Herb | When Seeds Are Ready | Seed Yield | Special Notes |
|---|---|---|---|
| Cilantro / Coriander | Late summer; seeds turn from green to brown on the plant | High (same plant gives cilantro leaves + coriander spice) | Seeds you save are the same coriander you cook with—dual purpose like dill |
| Parsley | Second year (biennial—it overwinters, then flowers and sets seed in year 2) | High | Requires patience; you need to overwinter the plant. In cold zones, mulch heavily or grow in a pot you can bring indoors. |
| Chamomile | Mid-summer; flowers dry and seeds appear in the cone center | Medium | Very tiny seeds—use the bag method. Self-seeds aggressively if you let it. |
| Borage | Late summer; seeds are small, dark, and drop easily from dry flower heads | High | Self-seeds prolifically; you may not need to save seeds at all—it volunteers everywhere |
| Nasturtium | Fall; large green seeds form after flowers drop; wait until they dry and turn tan | Medium | Seeds are large and easy—one of the simplest to save. Also edible (pickled nasturtium seeds taste like capers). |
Scroll sideways if needed
Frequently Asked Questions
Flowering, Seed Life & Storage
1. Do I need to let my basil flower to save seeds? Won't that ruin the leaves?
2. Can I save seeds from store-bought basil or dill?
3. How long do saved basil and dill seeds stay viable?
4. Should I store seeds in the refrigerator?
Dill Uses, Containers & Older Seeds
5. What's the difference between dill seed and dill weed?
6. Can I save seeds from container-grown herbs, or only in-ground plants?
7. I have seeds from 3 years ago—should I still use them?
References
- University of Minnesota Extension — Saving Vegetable Seeds — Comprehensive guide to seed saving including moisture content requirements and germination testing methods
- Seed Savers Exchange — How to Save Seeds — Nonprofit organization's guide to open-pollinated seed saving, including isolation distances for purity
- Royal Horticultural Society — Growing Basil — Cultivation notes including flowering and seed production guidance
- USDA Plant Hardiness Zone Map (2023 Update) — Updated zone map reflecting climate shifts that affect seed adaptation