Perfect for busy gardeners, balcony growers, and backyard enthusiasts
Why Choose a Self-Watering Container?
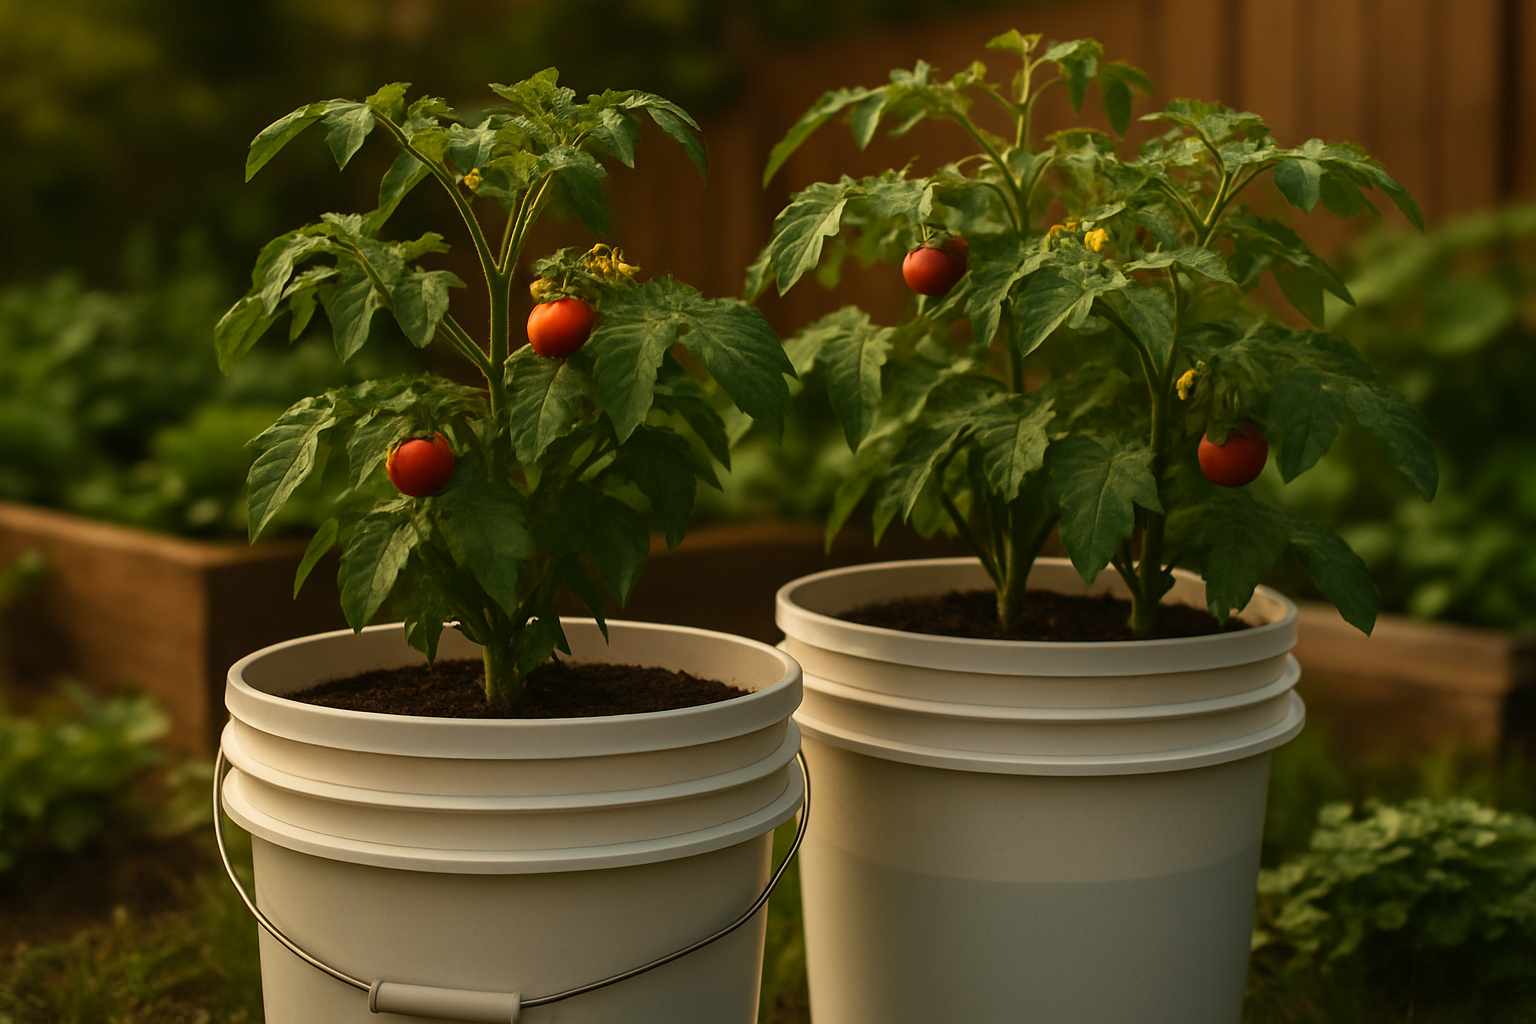
Imagine stepping into your garden on a sunny morning. Instead of worrying about dry soil or drooping plants, you see lush greenery thriving — all because of a simple DIY self-watering container hack.
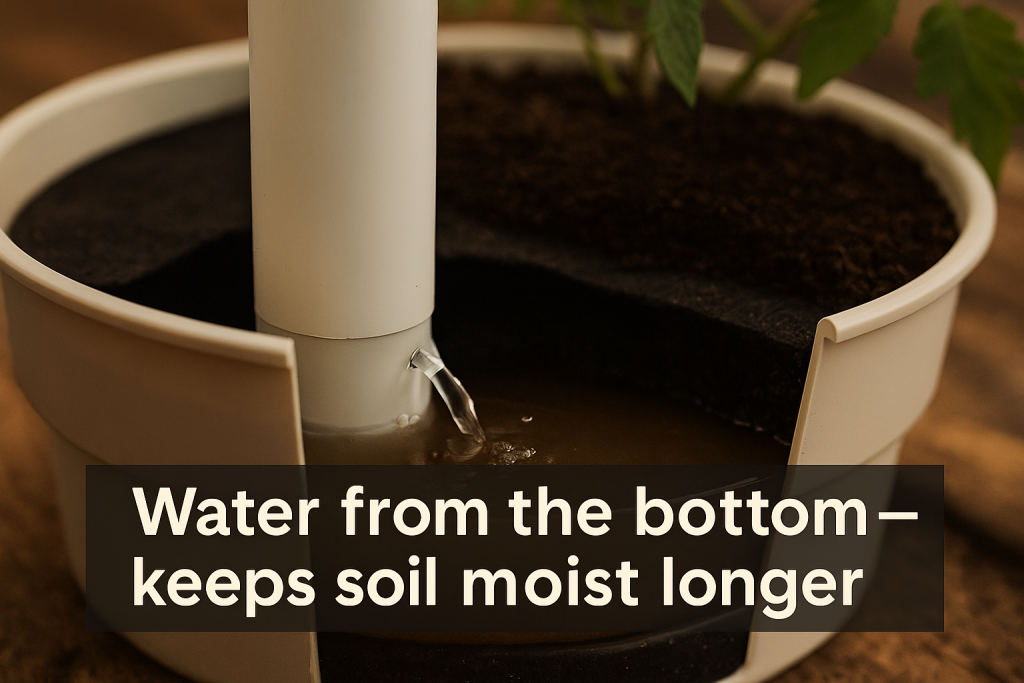
A self-watering container (also called a DIY self-watering planter) allows your plants to drink from the bottom up, keeping soil evenly moist and reducing the need for constant watering. This means healthier plants, fewer chores, and stress-free gardening — especially during hot summers or vacations.
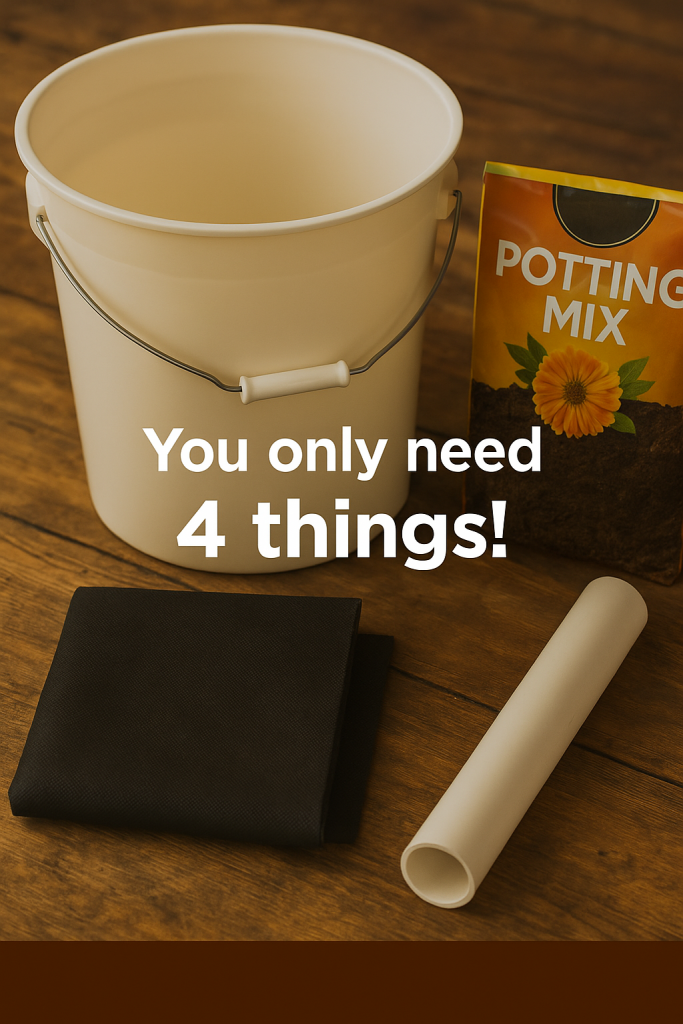
Materials You’ll Need (Only 4 Things!)
To build your own DIY self-watering planter step-by-step, you only need:
- 20L (5-gallon) plastic bucket or large container
- A short length of PVC pipe (for the water inlet)
- Garden fabric or landscape cloth (to separate soil & water)
- High-quality potting soil (light, well-draining, not heavy clay)
Optional: Add a float indicator or a clear side strip to monitor water levels.
Step-by-Step Guide: How to Build a Self-Watering Planter
- Prepare the base – Drill small drainage holes in the bottom of the bucket.
- Create the reservoir – Add a layer of garden fabric to act as a barrier.
- Insert the water pipe – Place the PVC pipe vertically to allow water filling.
- Add soil & plant – Fill with light potting mix and transplant your seedlings.
- Start the system – Fill the pipe with water until the reservoir is ⅓ full.
The capillary action ensures the soil absorbs just the right amount of water.

How It Works — The Science Behind the Hack
Unlike traditional pots, a self-watering container system uses:
- Reservoir at the bottom → Stores water
- Soil above → Wicks up moisture gradually
- PVC pipe → Easy refill without disturbing plants
This design prevents surface evaporation, keeps roots consistently hydrated, and reduces water waste by up to 50%.
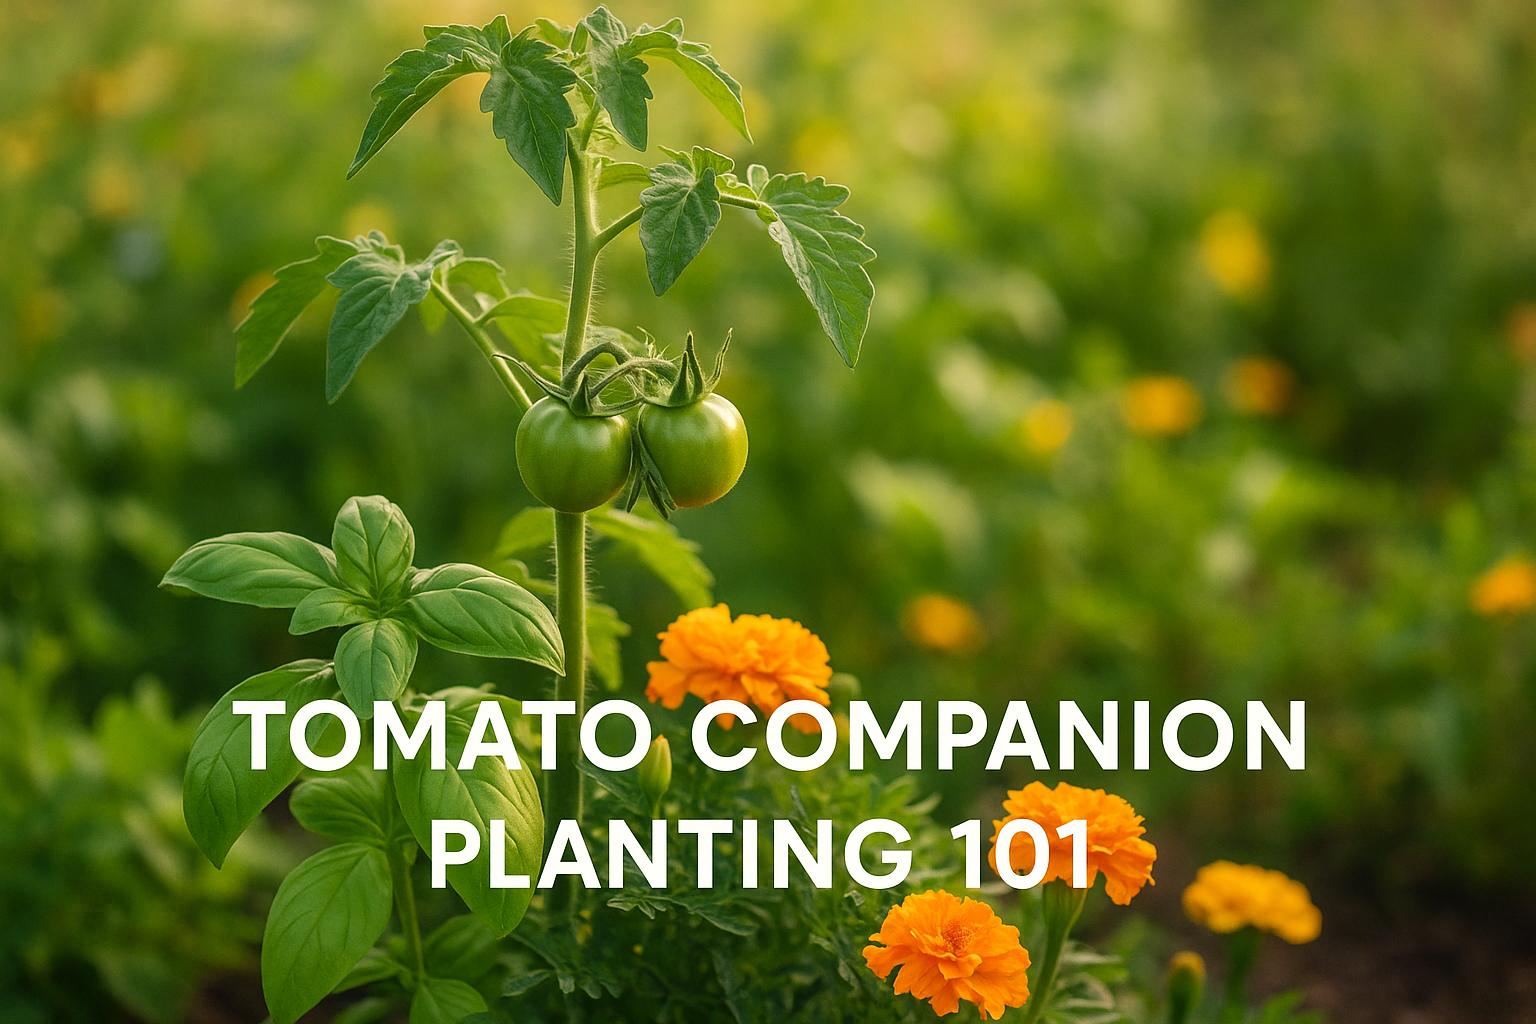
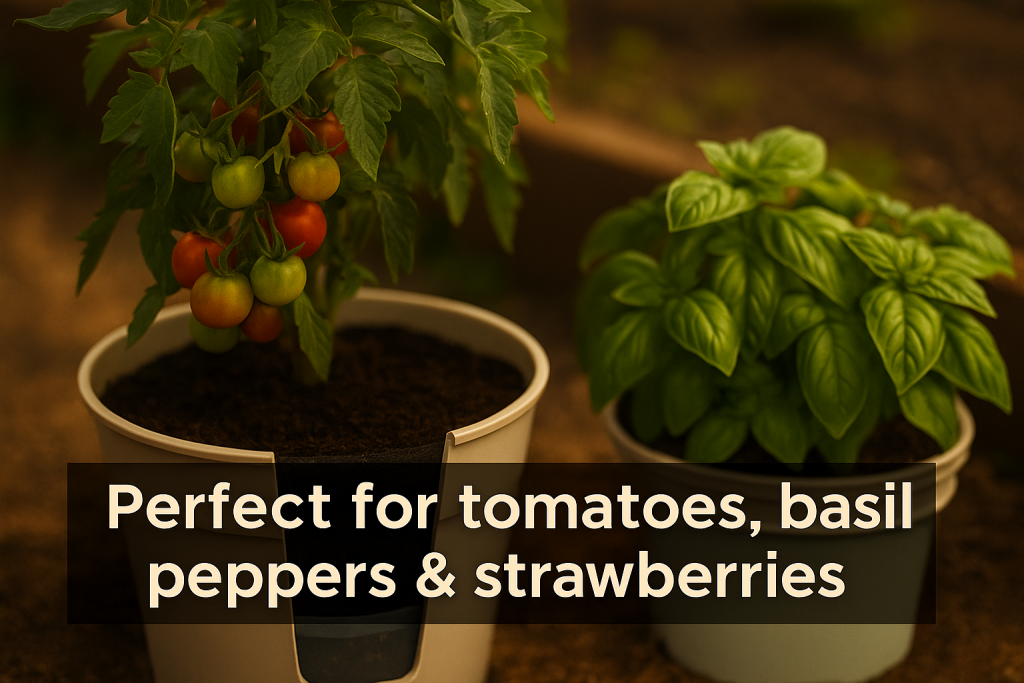
Best Plants for Self-Watering Containers
This gardening hack is especially effective for thirsty crops like:
- Tomatoes
- Cucumbers
- Peppers
- Basil, Mint, Parsley
- Strawberries
Balcony case study: Even in a 2×3 ft balcony, 2 self-watering planters supported 5 tomato plants + 1 pot of basil, providing fresh harvests all summer long!
Seasonal Care & Maintenance
- Summer: Refill every 2–3 days; add mulch to reduce evaporation.
- Winter: If outdoors, empty reservoir to prevent freezing damage.
- Fertilizer: Use liquid feed every 2–3 weeks directly through the pipe.
- Pruning: Keep plants trimmed to avoid overcrowding.
Common Mistakes & How to Avoid Them
🚫 Mistake 1: Using heavy garden soil → Roots suffocate.
✅ Use light potting mix for proper airflow.
🚫 Mistake 2: Algae growth in reservoir → Caused by sunlight.
✅ Cover the bucket sides or paint them dark to block light.
🚫 Mistake 3: Overfilling the reservoir → Root rot risk.
✅ Only keep the bottom ⅓ full; let roots search for moisture.
🚫 Mistake 4: Clogged PVC pipe → Water cannot reach roots.
✅ Clean monthly and add a mesh cap to prevent soil from falling in.
Why Gardeners Love This Hack
- Less work, more growth
- Saves up to 50% water
- Perfect for balconies & backyards
- Stress-free during vacations
“Give your plants the love they deserve — with less work for you.”
Save This Hack for Later!
Self-watering containers are more than just a DIY trick — they are a gardening lifestyle upgrade. Whether you’re a beginner with one pot of basil or managing a full balcony farm, this hack makes gardening easier, greener, and more joyful.
👉 Save this Pin —Visit Greenmuse.io for the full printable guide & step-by-step infographic.
Clara Moss is the gardener behind Greenmuse. Over the past 10+ years, she has grown herbs on windowsills, tested cactus and succulent soil mixes, rescued struggling houseplants, and learned many lessons through trial and error. Greenmuse is where she shares honest, practical plant care advice for real homes — based on hands-on experience, not perfect greenhouse conditions. When she’s not writing, Clara is usually propagating succulents or trying to keep a calathea happy.