How to Plant Garlic in Fall: Planting Dates, Varieties & 6 Common Mistakes
If you're learning how to plant garlic in fall, the basic idea is simple: give healthy cloves time to root before winter, then let cold weather prepare the plant for spring growth. One October morning in 2023, I pushed 48 cloves into the ground, covered them with straw, and forgot about them until March. By July, I harvested 2.5 pounds of the best garlic I've ever tasted—bulbs the size of tennis balls, papery white skins, and a flavor so sharp it made grocery store garlic taste like cardboard. The seed garlic cost $12. Overall, planting and mulching took less than an hour in that first season.
In fact, garlic can be one of the lowest-effort, highest-reward crops in a home garden. However, there's a catch: you have to plant it in fall. By comparison, spring-planted garlic often has less time to establish and bulb up. More importantly, winter cold helps trigger the clove-forming process. As a result, the fall planting window matters.
In this guide, you'll learn when to plant by zone, which varieties to choose, how to plant correctly, and which mistakes can weaken the crop before spring growth begins.
When to Plant Garlic in Fall: Start Before the Ground Freezes
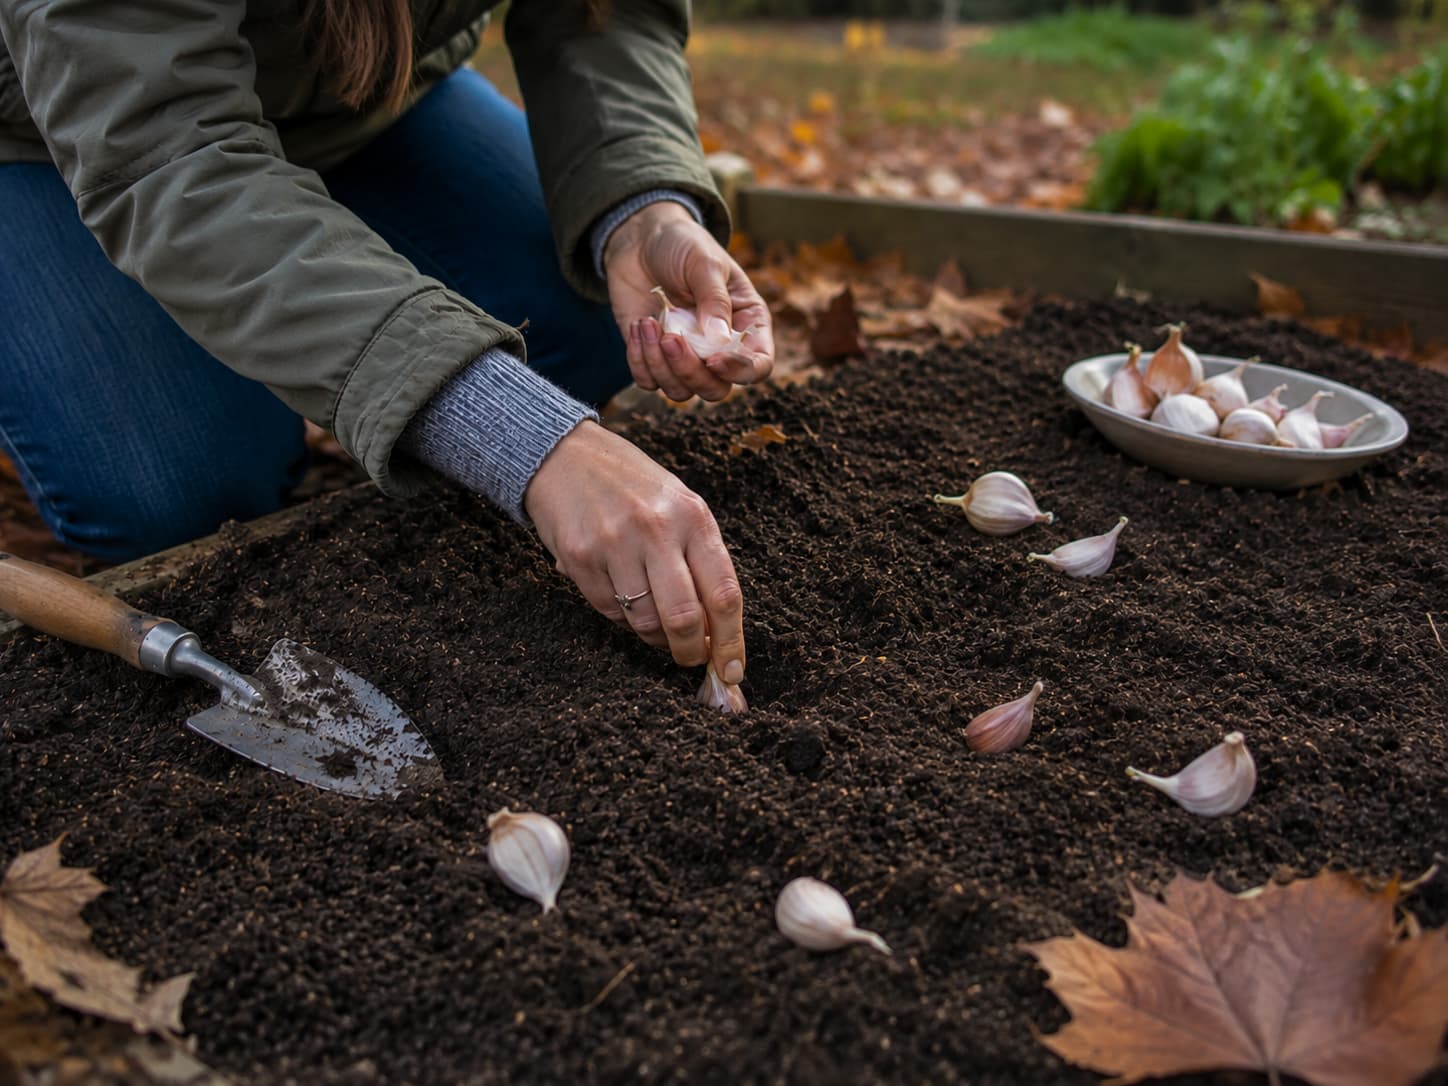
First, knowing how to plant garlic in fall starts with timing. Garlic needs time to establish roots before the ground freezes solid. Ideally, top growth stays limited while roots develop below the surface. That balance is why many gardeners aim to plant several weeks before the ground typically freezes hard for the season.
If you plant too early, garlic may produce more top growth before winter than you want. On the other hand, planting after the ground has frozen can prevent normal root establishment.
Zone-by-Zone Planting Calendar
| USDA Zone | Planting Window | Avg Ground-Freeze Date | Key Notes |
|---|---|---|---|
| Zone 3 | Late August – mid September | Early October | Shortest window; mulch heavily immediately after planting |
| Zone 4 | Early – late September | Mid October | Plant by September 25 or risk frozen ground before roots form |
| Zone 5 | Mid September – mid October | Late October | Ideal window: September 20 – October 10 |
| Zone 6 | Late September – late October | Mid November | My zone; I plant the first week of October every year |
| Zone 7 | October – early November | Early December | Can push to early November in warm years |
| Zone 8 | Late October – late November | Rarely freezes hard | Softneck varieties only; vernalize in fridge 4 weeks before planting |
| Zone 9 | November – early December | Almost never freezes | Mandatory fridge vernalization; softneck only; smaller bulbs expected |
Swipe horizontally or use the bar below to view the remaining columns.
Hardneck vs Softneck: Which Garlic Should You Grow?
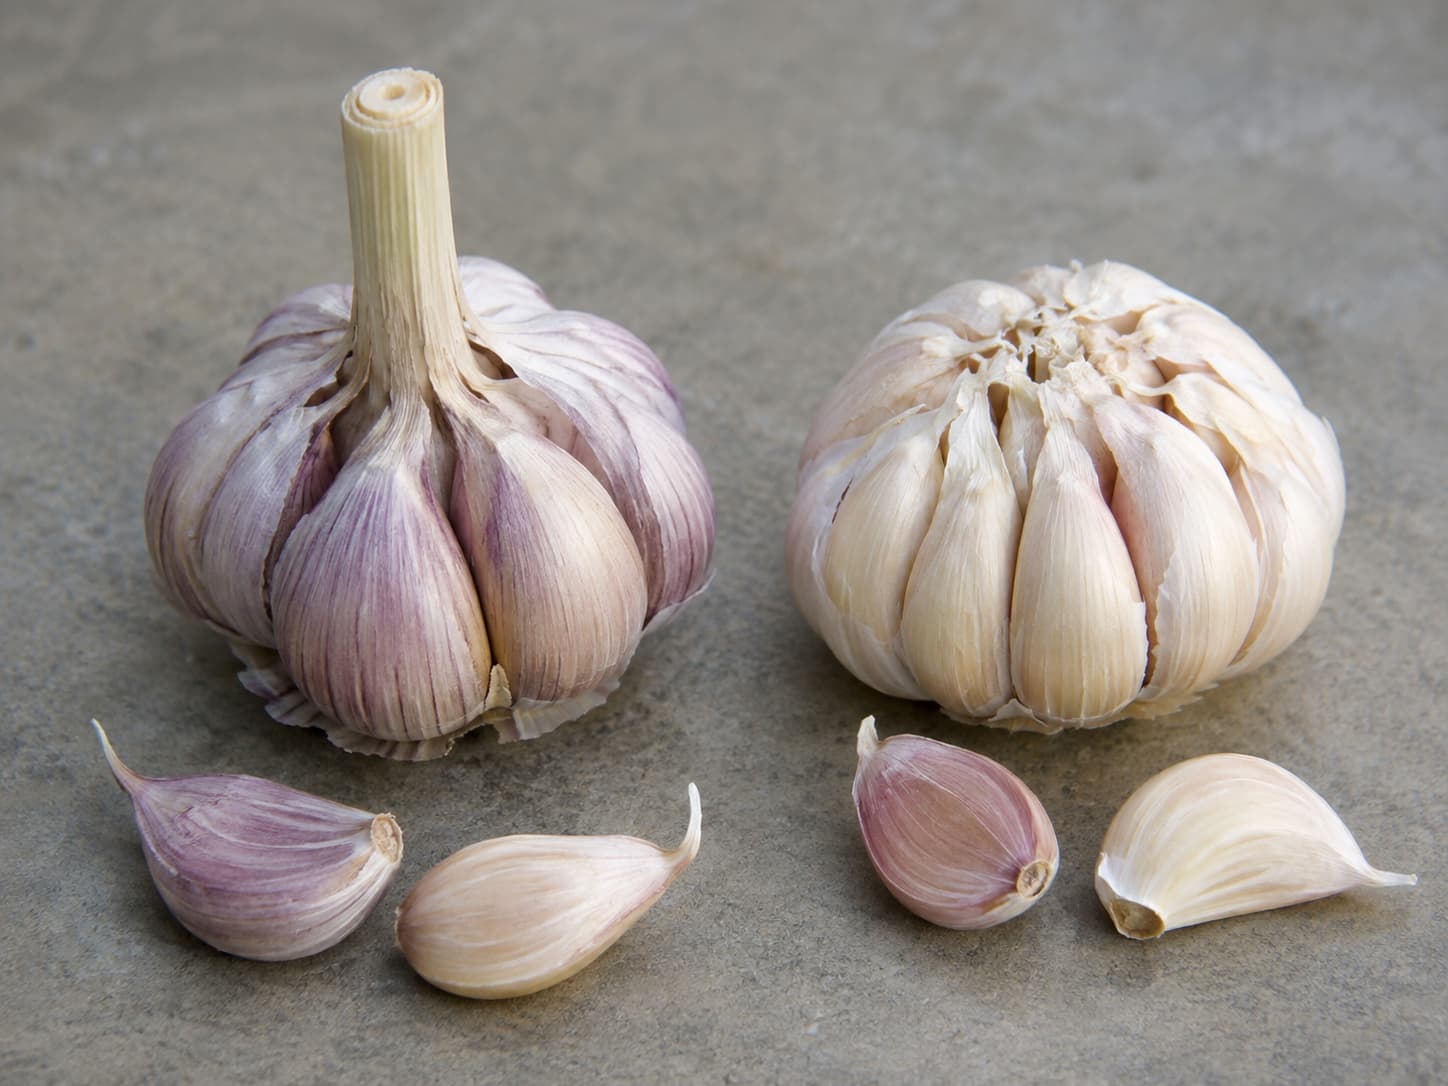
Next, choose between hardneck and softneck garlic. For example, winter cold, summer heat, and storage goals can all affect which type is the better fit:
| Hardneck (Allium sativum var. ophioscorodon) | Softneck (Allium sativum var. sativum) | |
|---|---|---|
| Cold hardiness | Excellent — bred for cold winters (Zones 3–6) | Poor — damaged below 10°F without heavy mulch (Zones 7–9) |
| Clove size | Larger but fewer (4–12 per bulb) | Smaller but more (12–20 per bulb) |
| Flavor | More complex, spicier, varies by variety | Milder, more uniform |
| Storage life | 4–6 months | 8–12 months |
| Scape? | Yes — curly flower stalk in June (edible!) | No scape |
| Braids? | No (stiff stem) | Yes (flexible stem) |
| Best zones | Zones 3–6 | Zones 6–9 |
Use the bar below, or swipe sideways on a touch screen, to see the rest of the table.
Top 5 Hardneck Varieties (for Zones 3–6)
For example, these hardneck types are commonly chosen for cold-winter gardens, but local performance can vary by climate and supplier.
| Variety | Type | Cloves/Bulb | Flavor | Why Grow It |
|---|---|---|---|---|
| Music | Porcelain | 4–6 | Hot, rich, classic garlic | Consistently the largest bulbs; very cold-hardy; #1 for beginners |
| German Extra Hardy | Porcelain | 4–5 | Strong, pungent | Reliable producer; stores 5+ months; widely available seed garlic |
| Chesnok Red | Marbled Purple Stripe | 8–12 | Mild raw, sweet when roasted | Best roasting garlic; beautiful purple stripes; chefs love it |
| Spanish Roja | Rocambole | 8–12 | Deep, complex, "true garlic" | Flavor champion; easy to peel; but shortest storage (3–4 months) |
| Turkish Giant | Porcelain | 5–7 | Hot and spicy | Huge individual cloves; fewer but massive; great for roasting whole |
On smaller screens, swipe horizontally to view the remaining columns.
Top 3 Softneck Varieties (for Zones 7–9)
By contrast, softneck garlic is often easier to grow where winters are milder and long storage is a priority.
| Variety | Type | Cloves/Bulb | Flavor | Why Grow It |
|---|---|---|---|---|
| California Early | Artichoke | 12–16 | Mild, versatile | What grocery stores sell; easy to grow; stores 8+ months |
| Inchelium Red | Artichoke | 12–20 | Mild to moderate | Award-winning flavor; productive; stores 6–9 months |
| Silver Rose | Silverskin | 15–24 | Pungent, long-lasting | Longest storage of any garlic (12 months); best for braiding |
Move the bar below to reveal any columns that extend beyond the screen.
How to Plant Garlic in Fall: 4 Simple Steps
Step 1: Prepare the Bed (1 Week Before Planting)
- First, choose a sunny spot. Garlic performs best with strong sun from spring through summer. A south-facing bed is ideal.
- Next, loosen the soil. Compacted soil can restrict root growth and bulb development. Use a garden fork, not a tiller (tilling destroys soil structure).
- Then, add compost if the soil needs organic matter. Work 2–3 inches of compost into the top 6 inches of soil. In addition, steady nutrition and good drainage support bulb growth. If your soil is heavy clay, add compost and consider raised beds—see our containers vs in-ground planting guide for alternatives.
- Finally, fertilize only when needed. Do not add bone meal automatically; use a soil test or local guidance before adding phosphorus. The phosphorus supports root development through winter.
Step 2: Break Apart the Bulb (Day of Planting)
- First, break the bulb into individual cloves close to planting time. Cloves separated days ahead dry out and lose vigor.
- Next, keep the papery skin intact. That skin protects the clove from soil-borne disease.
- Then, discard damaged, soft, or moldy cloves. Only plant the largest, healthiest cloves—clove size at planting directly determines bulb size at harvest.
- Finally, keep the flat root plate intact. This is where the roots emerge.
Step 3: Plant the Cloves
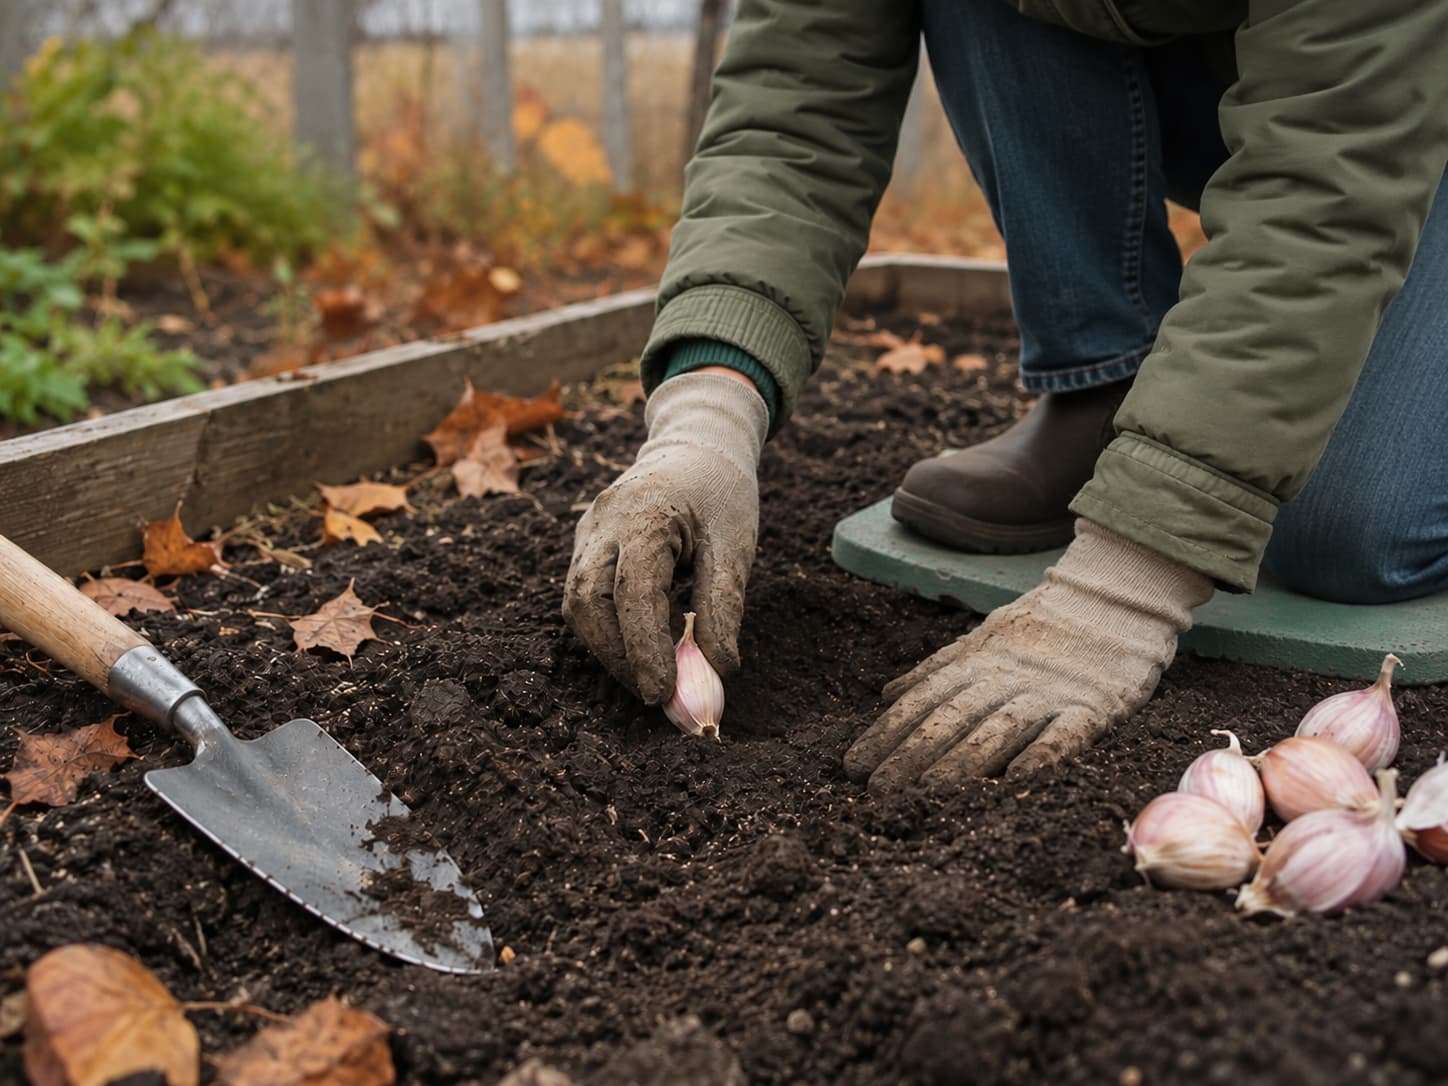
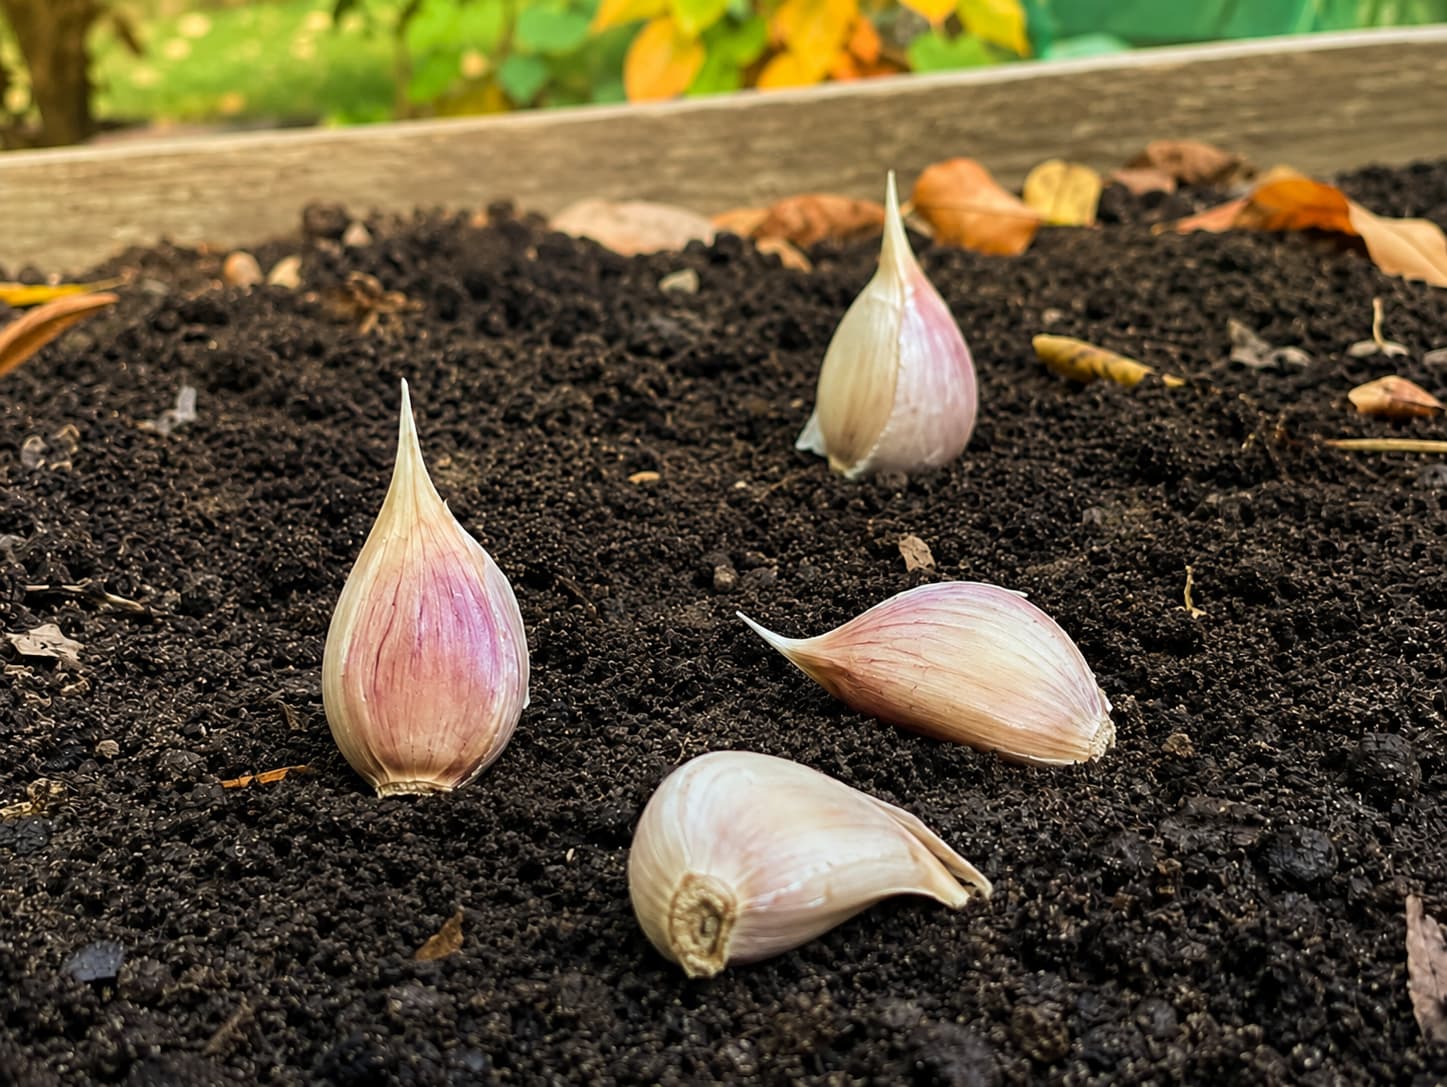
- First, place the pointed end up and the flat root plate down. This sounds obvious, but I've seen people plant them upside down. Upside-down cloves still grow—but the shoot has to curl around under the soil before reaching the surface, wasting energy and producing smaller bulbs.
- Next, set planting depth for your soil and climate. A common starting point is about 2 inches of soil over the top of the clove, with deeper planting sometimes used in colder regions. In Zones 3–4, plant 3–4 inches deep for extra winter insulation.
- Then, give each clove enough space. Around 6 inches between cloves is a common home-garden starting point, but row spacing can vary with the bed system. Crowded garlic = small bulbs. I know 6 inches feels wasteful, but every inch you reduce spacing costs you roughly 15% in bulb size.
- Finally, cover with soil and firm gently. Don't pack it down hard—just firm enough that the clove makes good soil contact.
Step 4: Mulch Heavily
Finally, use mulch when your winter conditions make freeze-thaw protection useful.
- After planting, add a loose organic mulch layer where winter conditions make it useful. This is non-negotiable in Zones 3–6.
- In particular, mulch helps buffer freeze-thaw swings that can heave cloves upward. It also retains moisture and suppresses spring weeds before the garlic emerges.
- For example, clean straw or shredded leaves can work well as winter mulch. By comparison, shredded leaves may mat if applied too densely. Meanwhile, coarse wood chips are better kept as a surface mulch rather than mixed into the planting soil. Finally, avoid thick, wet layers of fresh grass clippings that can mat and reduce airflow.
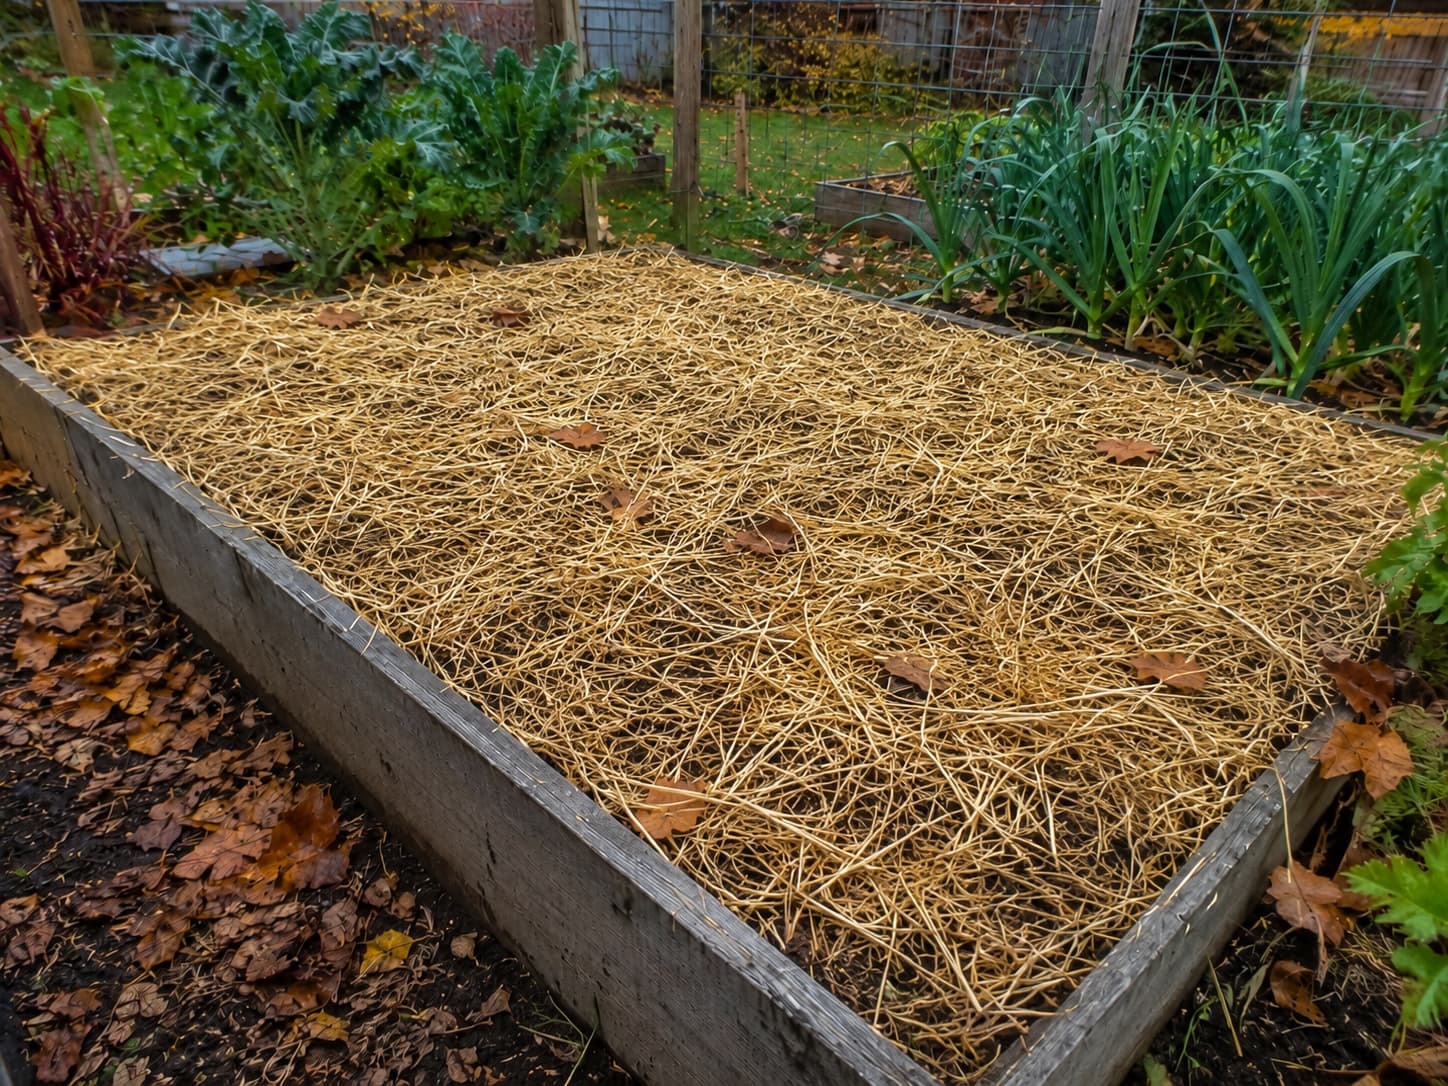
My first year growing garlic, I skipped the mulch because "garlic is cold-hardy, right?" Wrong. In my zone 6b garden, the soil froze and thawed 8 times that first winter, and half my cloves were heaved to the surface by February. The ones that stayed underground produced bulbs twice the size. Since then, I mulch with 6 inches of straw every year, and I haven't lost a single clove to heaving. The straw costs $8 per bale, and one bale covers my entire 4×8 foot garlic bed.
Planting Garlic in Fall in Containers
If you don't have an in-ground bed, you can still use the same basic principles for how to plant garlic in fall in a container. However, pots need extra attention to root space, drainage, and winter exposure:
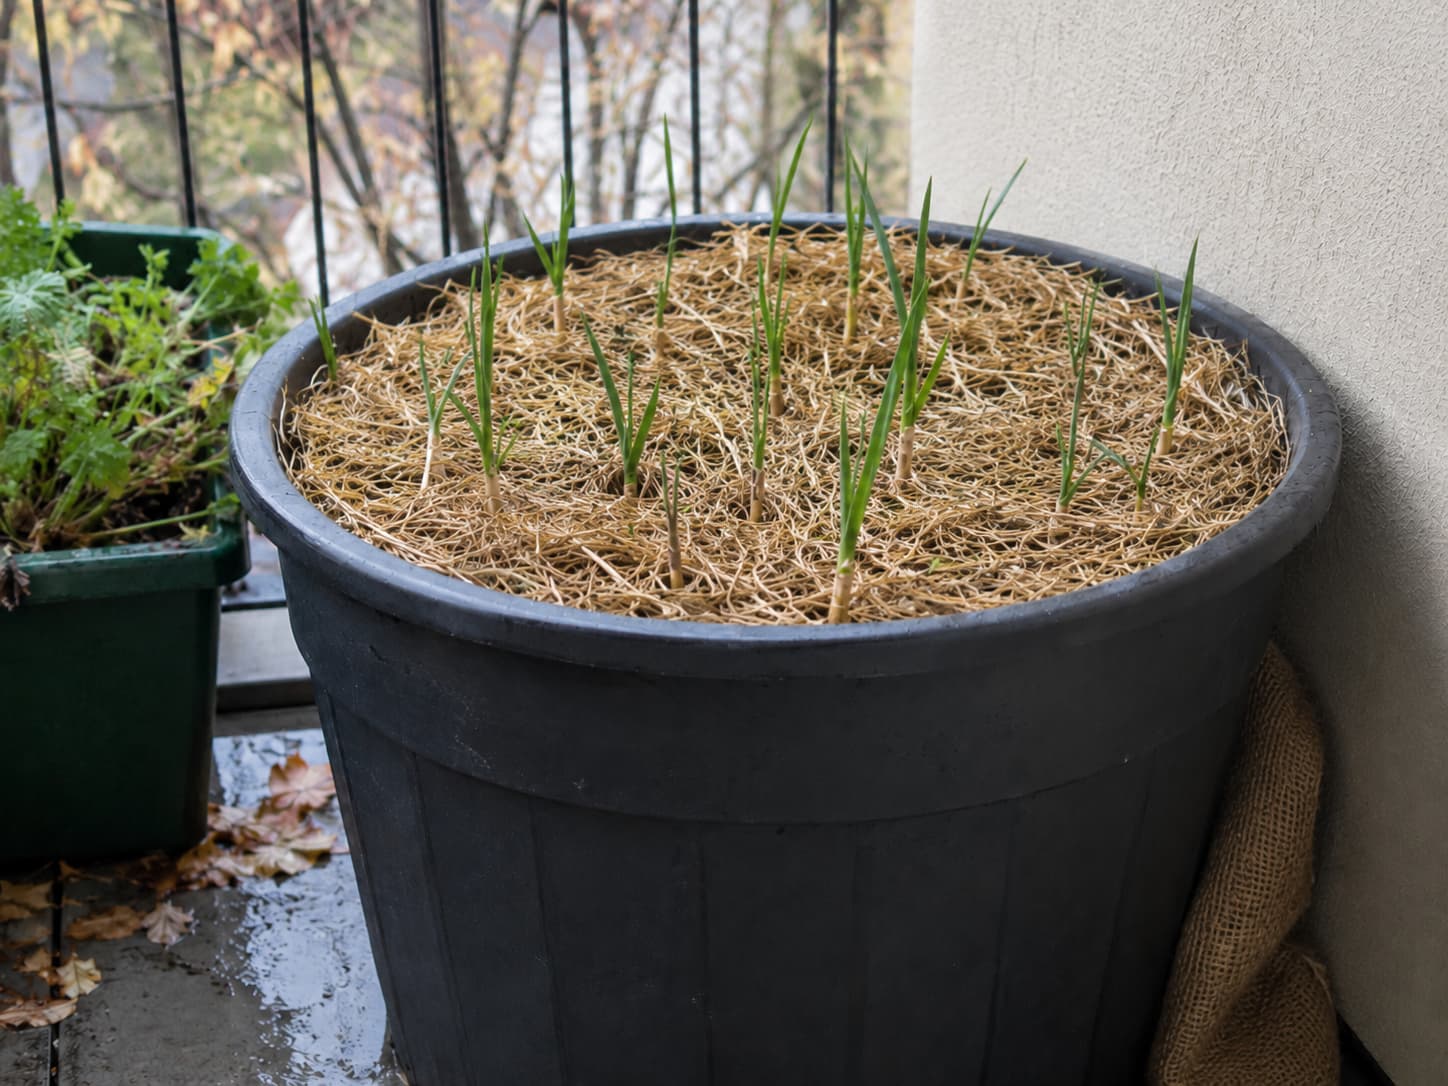
- First, choose a deep enough pot. Garlic roots grow 8+ inches deep. Use a pot that's at least 12 inches deep (a 5-gallon bucket with drainage holes works perfectly). A shallow pot produces small bulbs.
- Next, protect the container from repeated freeze-thaw swings. Soil in containers freezes solid and thaws faster than ground soil, which means more heaving. Wrap the pot in bubble wrap or burlap, and push it against a protected wall. In Zones 5 and colder, move the pot into an unheated garage or shed for the coldest months (December–February).
- Finally, check moisture more often in spring. Container soil dries out faster than ground soil, and garlic needs consistent moisture from March through June. Stick your finger in the soil—if it's dry 2 inches down, water. For more container growing strategies, see our cool-season balcony greens guide.
Fall-Planted Garlic: A Month-by-Month Timeline
After planting, garlic moves through rooting, winter rest, spring leaf growth, bulbing, and harvest. However, the exact calendar shifts with climate and planting date.
| Month | What's Happening Underground | What You See Above Ground | What to Do |
|---|---|---|---|
| October | Roots growing; cloves establishing | Nothing (or tiny green tips in warm zones) | Nothing—leave the mulch alone |
| November | Roots continue growing slowly in cold soil | Maybe small shoots (1–2 inches) in Zones 6+ | Nothing; shoots will freeze back but roots survive |
| Dec–Jan | Dormancy; vernalization happening (cold triggers clove formation) | Dead or no growth | Check after extreme cold: if clove pushed above soil, push it back down and add more mulch |
| February | Roots starting to grow again as soil warms | First green shoots emerging through mulch | Remove some mulch (leave 2 inches) so shoots can emerge |
| March | Rapid root and leaf growth | Strong green shoots 4–8 inches tall | Side-dress with balanced fertilizer (10-10-10) or compost; water if dry |
| April | Bulb begins to form | Tall, vigorous leaves | Keep soil moist but not soggy; weed aggressively (garlic can't compete) |
| May | Bulb expanding; hardneck sends up scape | Scape curls upward from center | Cut scapes when they curl once (eat them!); redirect energy to bulb |
| June | Bulb reaches full size | Lower leaves yellowing from bottom up | Stop watering when bottom 1/3 of leaves are brown |
| July | Cloves separating inside bulb | Half the leaves are brown | HARVEST! Don't wait until all leaves are brown (over-mature bulbs split) |
If the table is wider than your screen, swipe sideways to see the remaining columns.
The Scape Question: To Cut or Not to Cut
If you're growing hardneck garlic, a curly flower stalk called a scape usually appears as the plant approaches bulb development. Eventually, an uncut scape can form bulbils. At that point, you have two choices:
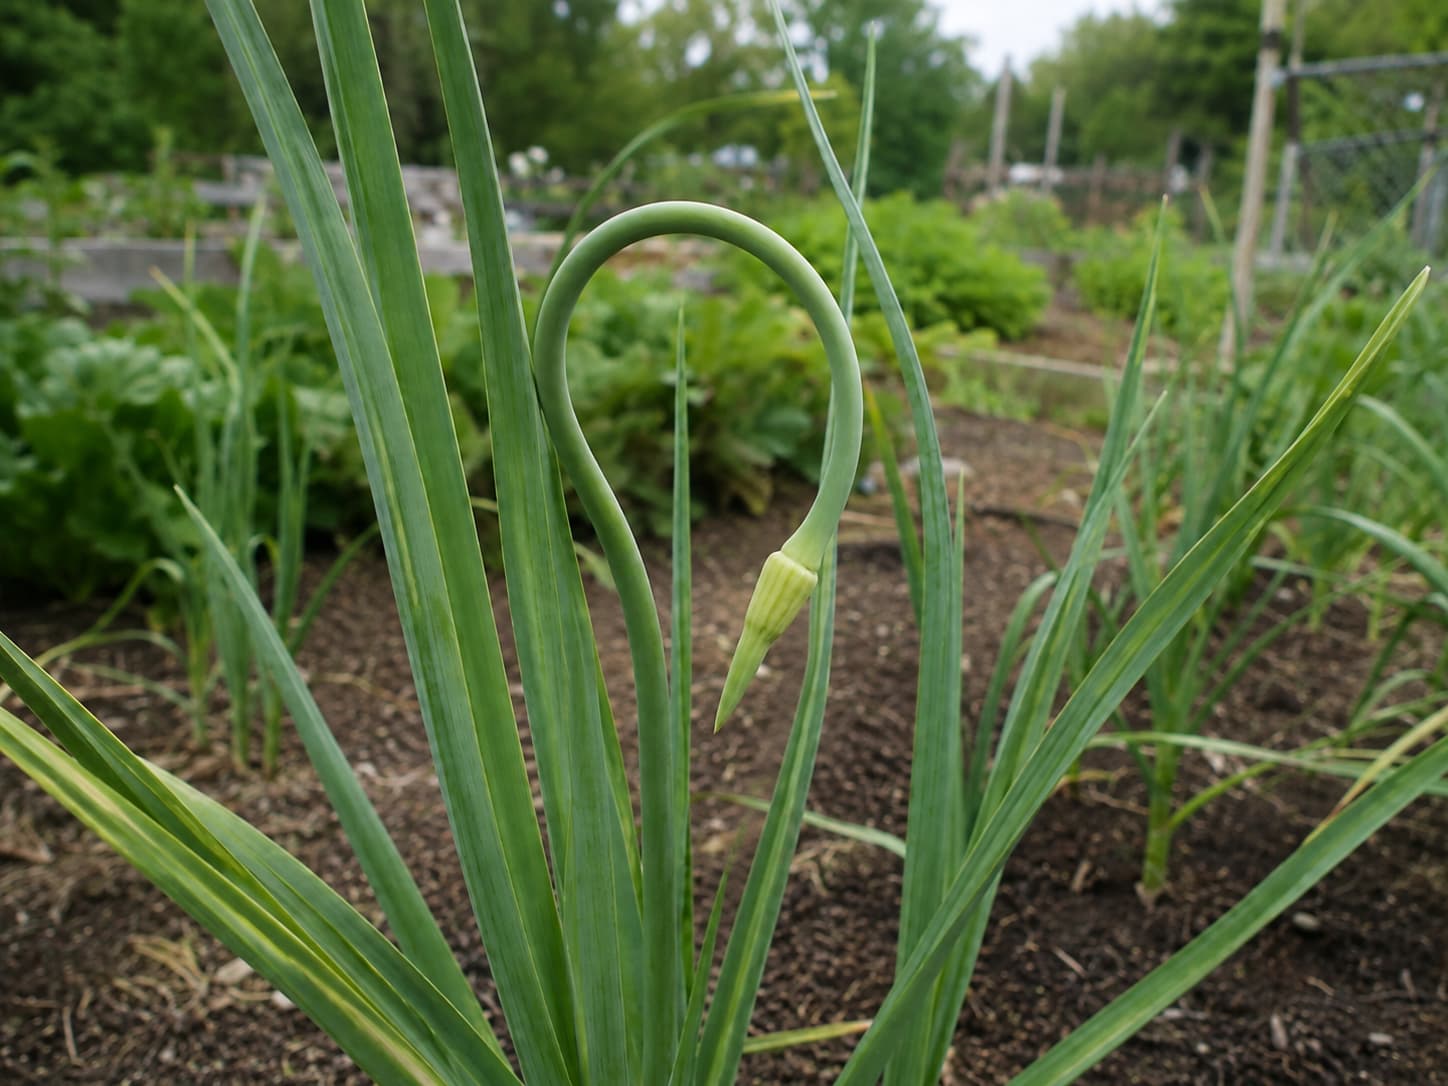
First, you can cut the scape: removing it keeps the plant from investing further in the flower stalk and bulbils. Cut when the scape makes one full curl—snip it off at the base with scissors. The scape is delicious: sautéed in olive oil, blended into pesto, or grilled whole. It tastes like garlic meets asparagus.
Alternatively, you can leave the scape: this allows bulbils to develop for propagation. Bulbil-grown garlic takes 2 years to reach full size (year 1 produces a "round" single clove; year 2 produces a normal bulb). This is how you multiply your seed stock cheaply.
For most kitchen gardens, cutting most scapes is the simpler choice. Meanwhile, leaving a few intact lets you experiment with bulbils. For more seed-saving techniques, see our beginner's guide to saving seeds from herbs.
Harvesting and Curing: Don't Rush This Part
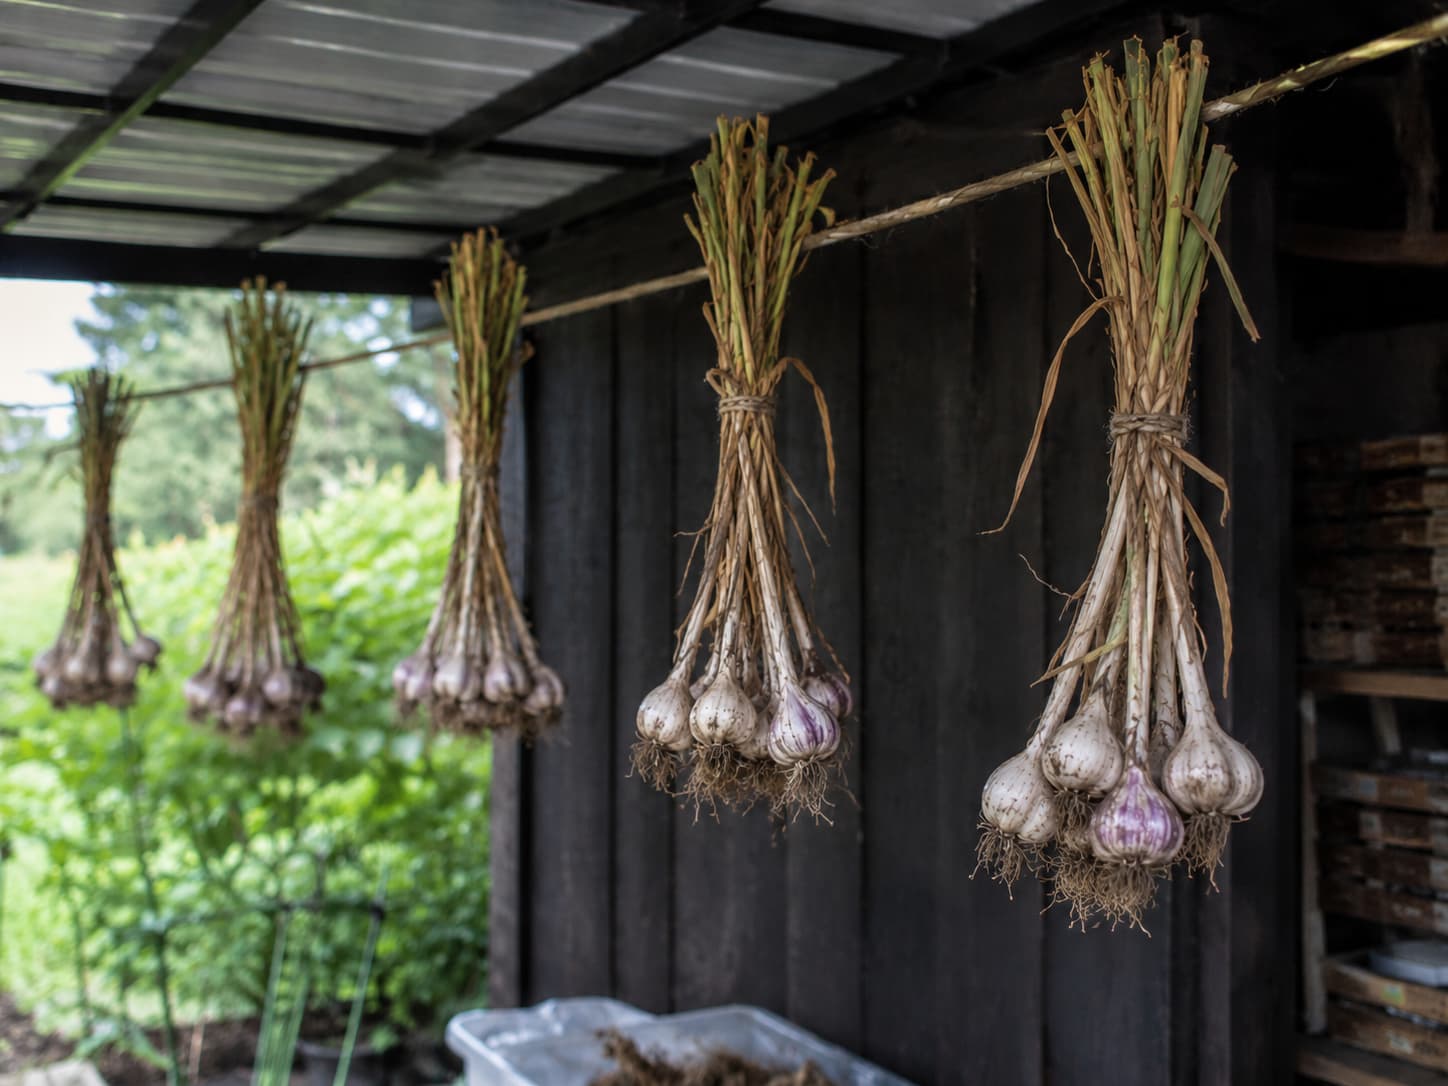
Once the crop matures, harvesting and curing complete the process that began when you learned how to plant garlic in fall. Both steps matter for bulb quality and storage.
When to Harvest
At harvest time, one common mistake is digging too early or too late. Harvest when the bottom 1/3 to 1/2 of the leaves have turned brown but the top leaves are still green. If you wait until all leaves are brown, the bulbs will have split open and won't store well. If you harvest when all leaves are still green, the bulbs won't be fully formed.
To check readiness, dig one bulb with a garden fork rather than pulling by the stem. If the cloves are plump and fill out the papery wrapper, it's time. If the bulb still feels soft or the cloves aren't fully formed, wait another week and test again.
How to Harvest
- First, dig rather than pull. Use a garden fork to loosen the soil 6 inches away from the stem, then lift. Pulling breaks the stem and damages the bulb.
- Next, keep harvested bulbs dry. Brush off loose soil with your hands, but don't rinse with water. Moisture is the enemy of curing.
- Finally, leave the leaves and roots attached during curing. They help the bulb cure—nutrients continue moving from the leaves into the bulb during the drying process.
How to Cure (3-Week Drying Process)
- First, find a dry, well-ventilated spot out of direct sunlight. A covered porch, garage with the door cracked, or even a well-ventilated room indoors works. Temperature: 70–80°F. Humidity: below 70%.
- Next, hang bulbs in small loose bundles or lay them in a single layer on a screen. Don't stack them—air must circulate around each bulb.
- Then, let the bulbs cure until the outer wrappers, necks, and roots are dry. The bulbs are cured when the outer skin is papery and dry, the stem is brittle, and the roots are wiry and dry.
- Finally, trim roots and tops after curing, or braid suitable softneck types.
Improper curing is the reason homegrown garlic rots. In 2023, I harvested beautiful bulbs but got impatient and stored them after only 10 days of curing. Within a month, half had developed black mold at the base. The next year, I waited the full 3 weeks before trimming and storing. Zero mold, zero rot. The lesson: curing isn't optional—it's the difference between garlic that lasts 6 months and garlic that lasts 6 weeks.
6 Fall Garlic Planting Mistakes to Avoid
Mistake 1: Planting Grocery Store Garlic
First, Most grocery garlic is treated with sprout inhibitor and may carry white rot fungus (Stromatinia cepivora), which survives in soil for 20+ years. One infected bulb can contaminate your entire garden permanently. Always buy certified disease-free seed garlic from a reputable supplier.
Mistake 2: Planting Cloves Too Shallow
Next, A clove planted 1 inch deep in a cold climate will heave out of the ground during freeze-thaw cycles. The "2 inches from top of clove to soil surface" rule is a minimum—go 3–4 inches in Zones 3–4. Deep planting also produces taller, straighter necks at harvest, which makes curing easier.
Mistake 3: Skipping the Mulch
In addition, Unmulched garlic in Zones 3–6 will suffer heaving (cloves pushed to surface), winter desiccation, and early weed competition. Weeds are garlic's biggest competitor—garlic has shallow roots and can't outcompete any weed. A 4–6 inch straw mulch eliminates all three problems at once.
Mistake 4: Overwatering in Spring
During spring, Garlic needs consistent moisture from March through May, but the soil should dry slightly between waterings. Constantly soggy soil causes bulb rot and promotes fungal disease. The finger test applies here too: water when the soil is dry 2 inches down. Stop watering entirely 2 weeks before harvest when the lower leaves start browning.
Mistake 5: Letting Weeds Take Over
Meanwhile, Because the leaves are narrow and upright, the crop casts relatively little shade. As a result, weeds can compete strongly for water and nutrients. Hand-weed weekly from March through June. Therefore, a light mulch layer can help reduce weed pressure.
Mistake 6: Harvesting Too Late
Finally, When all the leaves are brown, the bulb has already started splitting open and the wrappers are deteriorating. Split bulbs don't store—they rot within weeks. Harvest when the bottom 40% of leaves are brown. Each green leaf = one layer of wrapper around the bulb. If you harvest with 5 green leaves, you get 5 layers of wrapper (excellent storage). If you wait until only 2 leaves are green, you get 2 layers (poor storage).
Can I Plant Garlic in Spring Instead?
On the other hand, gardeners who already know how to plant garlic in fall may still wonder whether spring planting can work.
Yes, but results vary. Spring planting gives garlic less time for cold exposure and root establishment before bulbing. If you missed the fall window:
- Vernalize the cloves: Put them in a paper bag in the fridge (not freezer) for 4–6 weeks before planting in early spring as soon as the ground can be worked.
- Plant the largest cloves you can find. Spring garlic needs every advantage.
- Expect smaller bulbs and shorter storage. This is a salvage operation, not the optimal approach.
- Softneck varieties respond better to spring planting than hardnecks in most regions.
In many climates, waiting for the next suitable planting window can be the more reliable choice if fall planting was missed. It stores well at room temperature in a paper bag. Don't waste good seed garlic on a subpar spring planting.
Garlic as Companion Plant: What to Grow Nearby
When planning nearby crops, treat companion planting as a layout question rather than a guarantee of pest control. Garlic can share beds with many vegetables, but spacing, crop rotation, light, water, and root competition usually matter more than simple companion lists.
| Great Companions | Why | Never Plant With | Why |
|---|---|---|---|
| Tomatoes | Garlic deters spider mites and aphids | Beans (all types) | Garlic stunts bean growth—sulfur compounds inhibit nitrogen-fixing bacteria |
| Peppers | Same pest deterrent; garlic accumulates sulfur that peppers use for capsaicin | Peas | Same as beans—legumes and alliums are incompatible |
| Roses | Classic companion; garlic repels aphids that attack rose buds | Asparagus | Both are long-term perennials; garlic's late harvest disturbs asparagus roots |
| Spinach, lettuce | Garlic's tall growth provides light shade; deters aphids | Parsley | Competition for same soil nutrients; parsley struggles near alliums |
| Fruit trees | Ring of garlic around trunk deters borers and deer |
Scroll horizontally when needed to view the rest of this table.
For more cool-season ideas, see our cool-season greens guide.
Saving Your Own Seed Garlic for Next Year
As a result, a healthy harvest can also become planting stock for the following season.
After a successful harvest, the cycle of planting garlic in fall can begin again with your own healthy stock. You can save suitable bulbs for replanting instead of buying all-new stock each year. For best results, choose clean, well-formed bulbs from vigorous plants and keep them separate from kitchen garlic.
- Select at harvest time. Don't cure your seed garlic with your eating garlic—cure it separately in a well-ventilated spot. Label it clearly.
- Store at room temperature (60–70°F) in a paper bag or open container. Don't refrigerate—cold storage before planting can cause premature sprouting.
- Plant the largest cloves from the largest bulbs. Size breeds size—small cloves produce small bulbs next year.
- Rotate the bed. Don't plant garlic in the same spot two years running. Allium diseases (white rot, pink root) build up in the soil. A 3-year rotation is ideal. For more on soil health, see our composting guide—compost is the best way to replenish soil after a heavy-feeding garlic crop.
FAQ: How to Plant Garlic in Fall
Planting Depth, Seed Garlic & Early Growth
1. How deep should I plant garlic?
2 inches from the top of the clove to the soil surface in Zones 5–9. 3–4 inches deep in Zones 3–4. Deeper planting in cold zones prevents heaving during freeze-thaw cycles. The root plate (flat end) goes down, the pointy tip goes up.
2. Can I plant garlic from the grocery store?
No. Most grocery garlic is treated with sprout inhibitor and may carry soil-borne diseases that permanently contaminate your garden. Buy certified seed garlic from a reputable supplier like Filaree Garlic Farm, Keene Garlic, or a local farm. It costs $15–25 per pound, and one pound plants 50–80 cloves.
3. What happens if garlic sprouts before winter?
Don't panic. A few inches of green shoot above the soil is fine—the shoot may get frost-nipped but the clove and roots underground are still alive. Add an extra inch of mulch over the shoots for protection. What you want to avoid is 6+ inches of tall growth, which means you planted too early.
Watering, Harvest & Container Growing
4. Do I need to water garlic after planting in fall?
In general, water after planting if the soil is dry enough that the cloves lack good soil contact. Water once after planting to settle the soil around the cloves, then leave it alone. After that, natural precipitation may be enough in many climates. However, dry climates may need occasional moisture checks before the ground freezes.
5. When do I harvest fall-planted garlic?
Typically, fall-planted garlic is harvested in summer, but the exact month depends on planting date, climate, and cultivar. Harvest when the bottom 1/3 to 1/2 of leaves have turned brown but the top leaves are still green. Dig with a fork, don't pull. Cure for 3 weeks in a warm, dry, well-ventilated spot before storing.
6. Can I grow garlic in a container?
Yes, with caveats. Use a pot at least 12 inches deep and 10 inches wide. Plant 4–5 cloves per pot. Insulate the pot in winter (bubble wrap + protected wall). In Zones 5 and colder, move the pot into an unheated garage for December–February. Expect slightly smaller bulbs than in-ground planting.
Sources
- Cornell University Extension. "Growing Garlic in the Home Garden." gardening.cornell.edu, 2024. gardening.cornell.edu
- University of Minnesota Extension. "Growing Garlic in Minnesota." extension.umn.edu, 2023. extension.umn.edu
- University of Vermont Extension. "Fall-Planted Garlic." uvm.edu/extension, 2024. uvm.edu/extension
- USDA Agricultural Research Service. "Plant Hardiness Zone Map." planthardiness.ars.usda.gov, 2023. planthardiness.ars.usda.gov