Winter Sowing: How to Start Seeds Outdoors in Milk Jugs
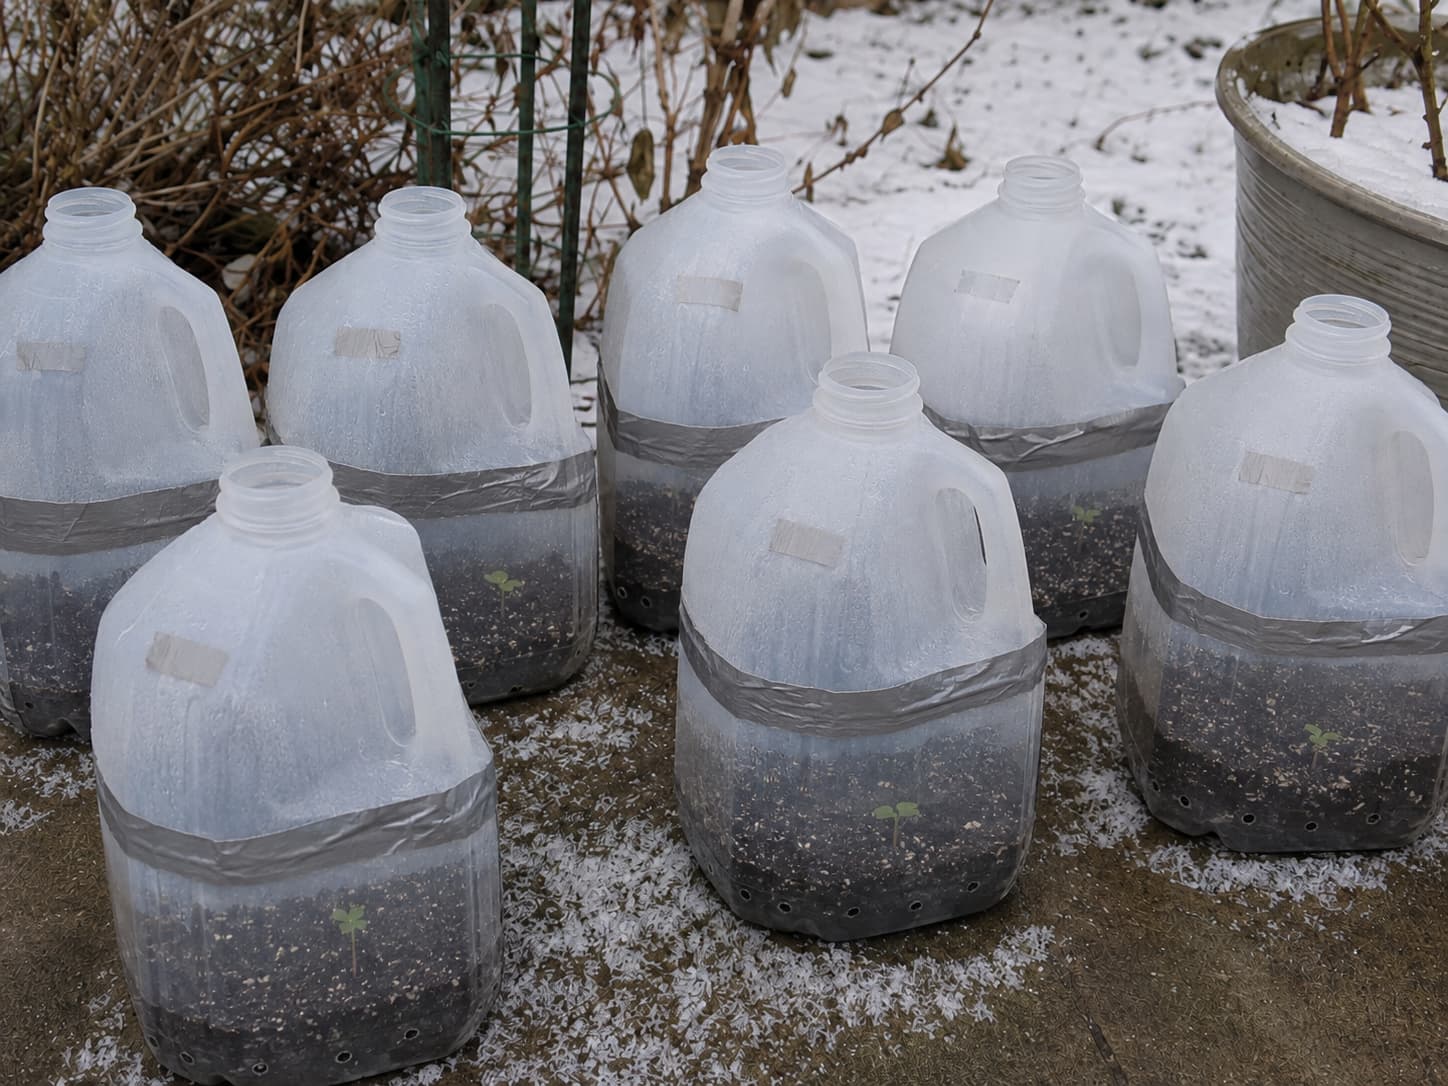
Winter sowing is a low-cost way to start selected seeds outdoors in vented containers—often recycled milk jugs—so they experience real winter and spring conditions while staying in a more protected seed-starting environment.
For example, it is useful for many native perennials and other seeds that benefit from a cold, moist period. It can also work for cool-season vegetables and hardy annuals when they are sown at the right time. However, it does not replace indoor seed starting for every crop. Once seedlings emerge, warm sunny days, drying mix, and airflow need more attention.
Winter Sowing at a Glance
| Factor | Indoor Seed Starting | Winter Sowing |
|---|---|---|
| Equipment | Usually trays, lights and indoor space | Recycled light-transmitting containers, potting mix and labels can be enough |
| Cold stratification | May require a separate refrigerator treatment for some species | Outdoor winter conditions can provide cold, moist exposure naturally |
| Daily care | Light height, watering and airflow need regular attention | Usually lighter maintenance before germination, then closer monitoring in spring |
| Hardening off | Normally required before transplanting outdoors | Outdoor-grown seedlings are already exposed to natural conditions, but jugs still need gradual opening as weather warms |
| Best fit | Warm-season crops and plants needing controlled warmth | Many native perennials, cold-hardy flowers and cool-season crops |
How Winter Sowing Works
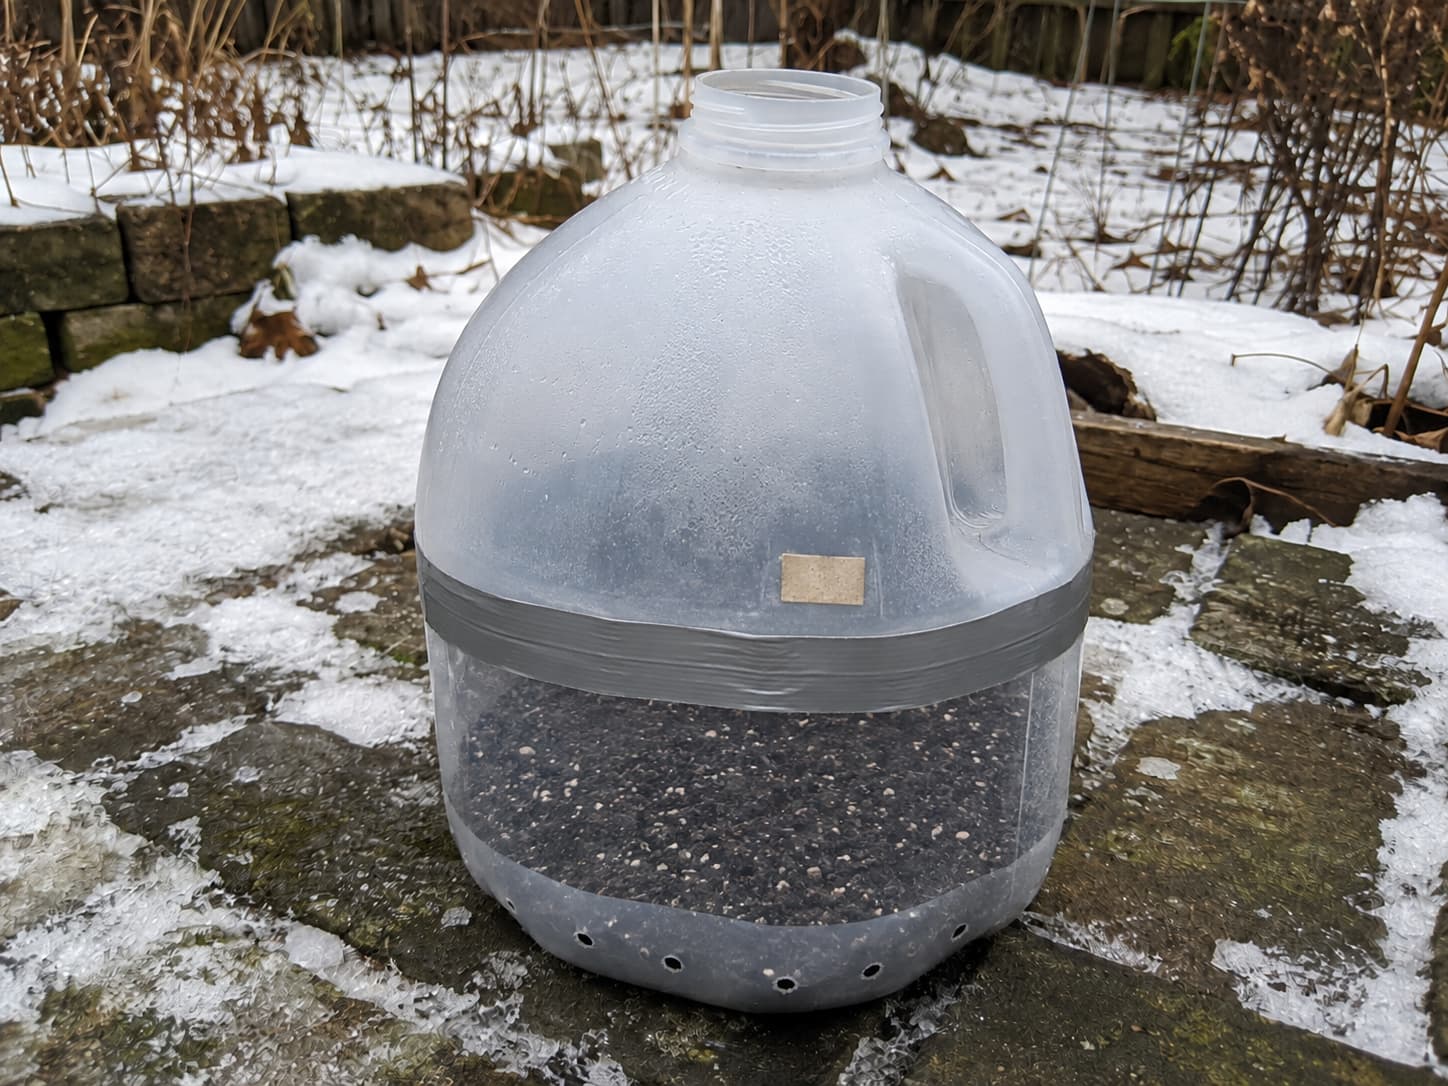
First, a winter-sowing container is not a heated greenhouse. It is a small, vented protective environment that lets seeds experience outdoor temperature swings, moisture and light while reducing some disturbance from heavy rain, birds and surrounding weeds.
For seeds that need cold, moist stratification, winter sowing can provide that cold period naturally. By contrast, other seeds do not need stratification at all; they simply wait until conditions are right for sprouting. Therefore, the seed packet and species requirements matter more than a blanket rule that “all seeds need winter.”
What You Need for a Simple Winter Sowing Setup
| Item | Good Choice | Why It Matters |
|---|---|---|
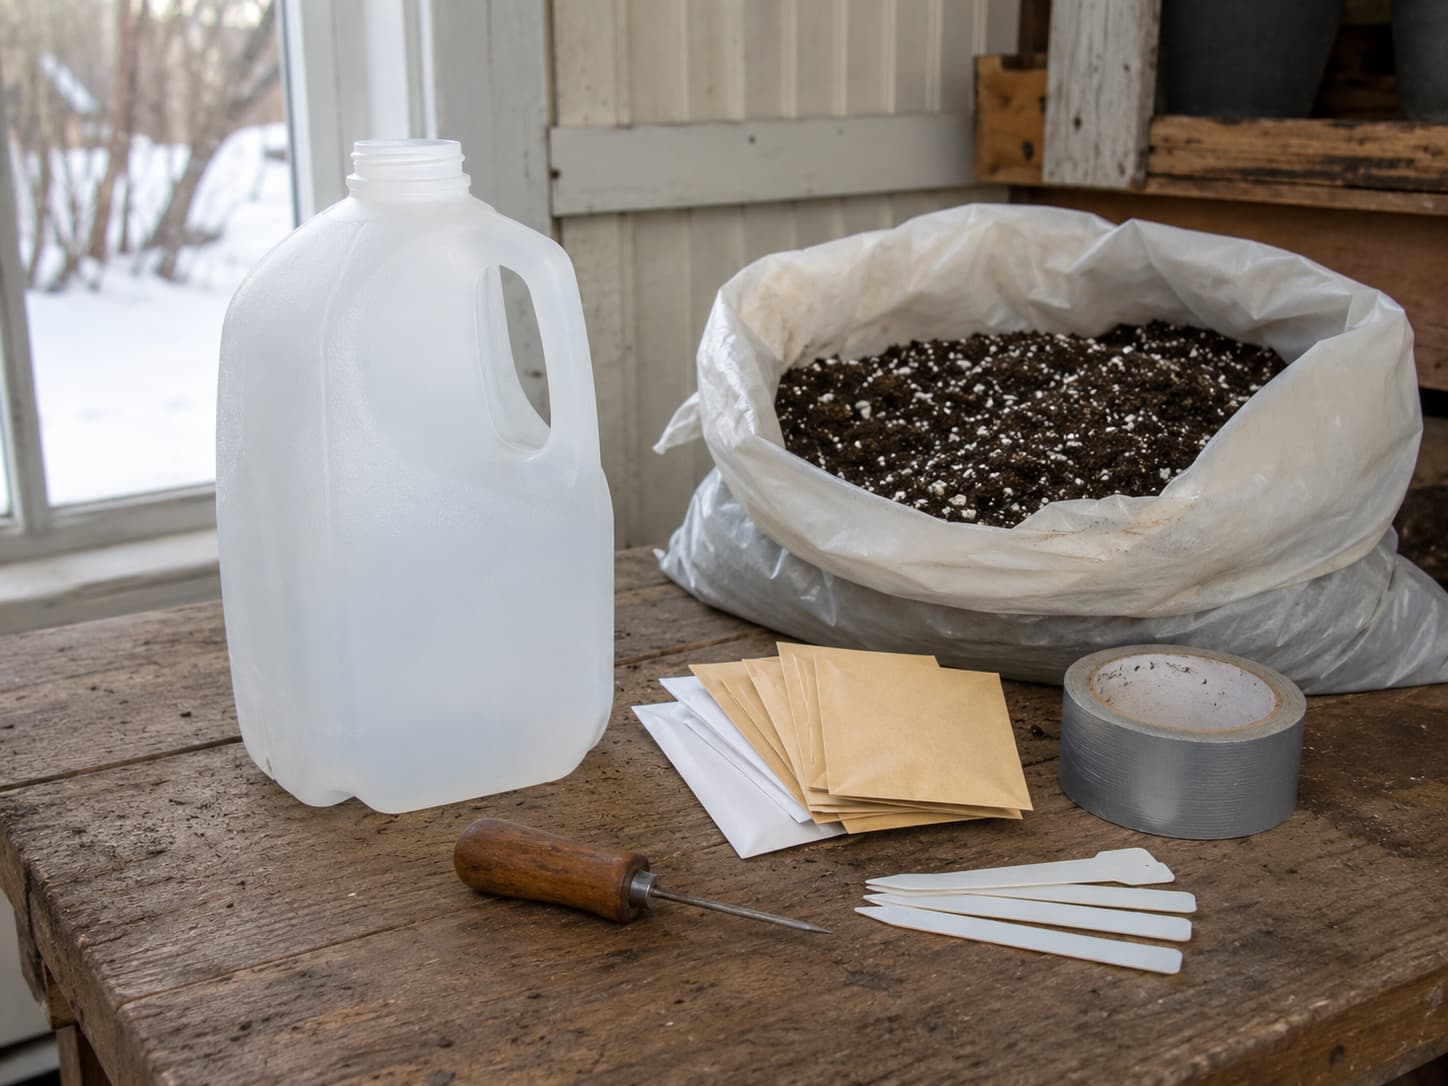
| Container | Clean light-transmitting milk or water jug | Lets light in and provides enough depth for potting mix |
| Growing medium | Fresh, lightweight, well-draining potting or seed-starting mix | Drains more reliably than garden soil |
| Seeds | Species suited to the timing and local climate | Winter exposure helps some seeds and harms or delays others |
| Closure | Duct tape or another weather-resistant fastener | Keeps a cut jug together while leaving airflow at the top |
| Label | Weather-resistant label plus pencil, grease pencil or outdoor marker | Outdoor sun and moisture can erase weak labels |
| Hole-making tool | Awl, drill or other right hand tool | Creates drainage without needing an open flame or hot metal |
How to Build a Milk-Jug Winter Sowing Container in 5 Steps
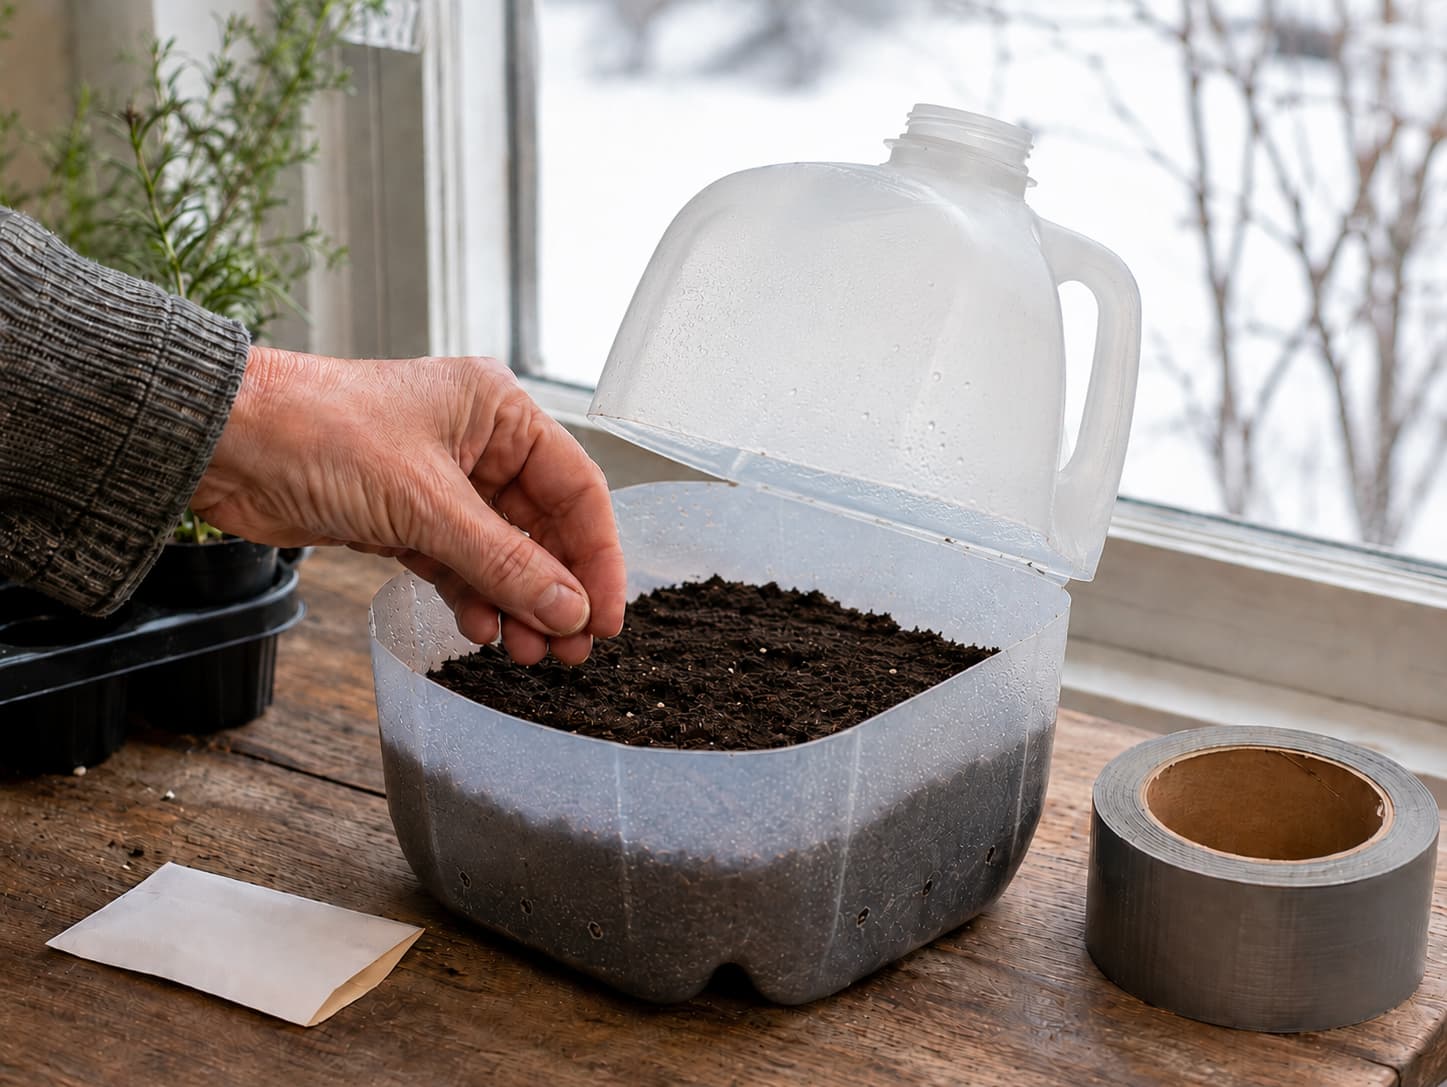
Step 1 · Clean and drain the jug.
First, rinse the container well, discard the cap, and make several drainage holes in the bottom. Some gardeners also add small side holes near the base to improve drainage.
Step 2 · Cut a hinge.
Next, cut around most of the jug several inches above the base, leaving a section attached near the handle so the top opens like a lid.
Step 3 · Add moist mix.
Then, add about 3 inches of well-draining mix. Moisten it thoroughly and allow excess water to drain before sowing. The goal is evenly moist, not waterlogged.
Step 4 · Sow and label.
After that, follow the seed packet for sowing depth. Surface-sow only when the species calls for light at germination. Add a durable label with the plant name and sowing date.
Step 5 · Close and place outdoors.
Finally, tape the cut seam, leave the cap opening uncovered for airflow and rain or snow, and place the jug in a bright outdoor spot protected from strong wind but still exposed to normal winter conditions.
When to Winter Sow: Use Seed Type and Local Weather, Not Zone Alone
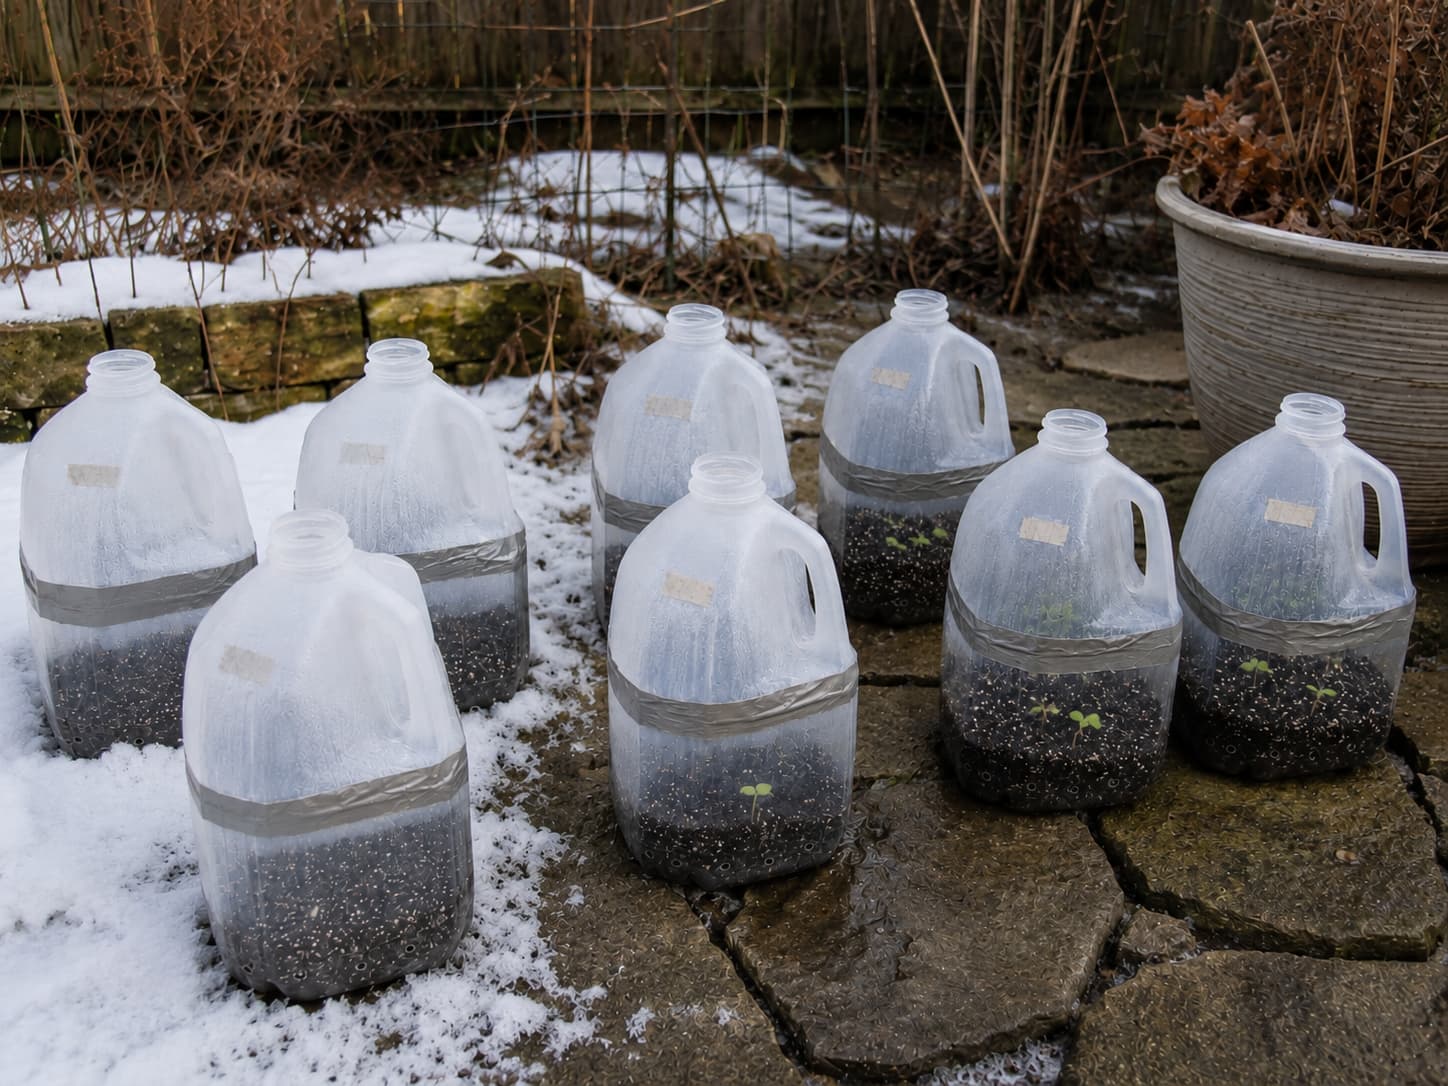
For timing, USDA Plant Hardiness Zones are useful for understanding average annual extreme minimum winter temperatures and perennial cold hardiness. However, they are not frost-date calendars, so a zone number alone cannot tell you the correct day to winter sow.
Instead, use three things together: the seed's sprouting or cold-treatment needs, your local winter pattern, and your expected spring frost period.
| Seed Group | Typical Timing | Examples | What to Watch |
|---|---|---|---|
| Seeds needing cold, moist stratification | Deep winter, with enough cold period remaining | Many native perennials; species-specific milkweed, coneflower, columbine and others when the packet calls for stratification | Required chill duration varies by species |
| Hardy annuals and cool-season vegetables | Late winter into early spring | Kale, lettuce, spinach, broccoli, cabbage, cauliflower, snapdragon | Avoid very early germination followed by severe cold |
| Warm-season crops in the jug method | Later in spring when severe cold is easing | Tomatoes, peppers, cucumbers, zucchini | These do not benefit from a long deep-winter exposure |
What to Winter Sow: Best-Bet Seed Groups
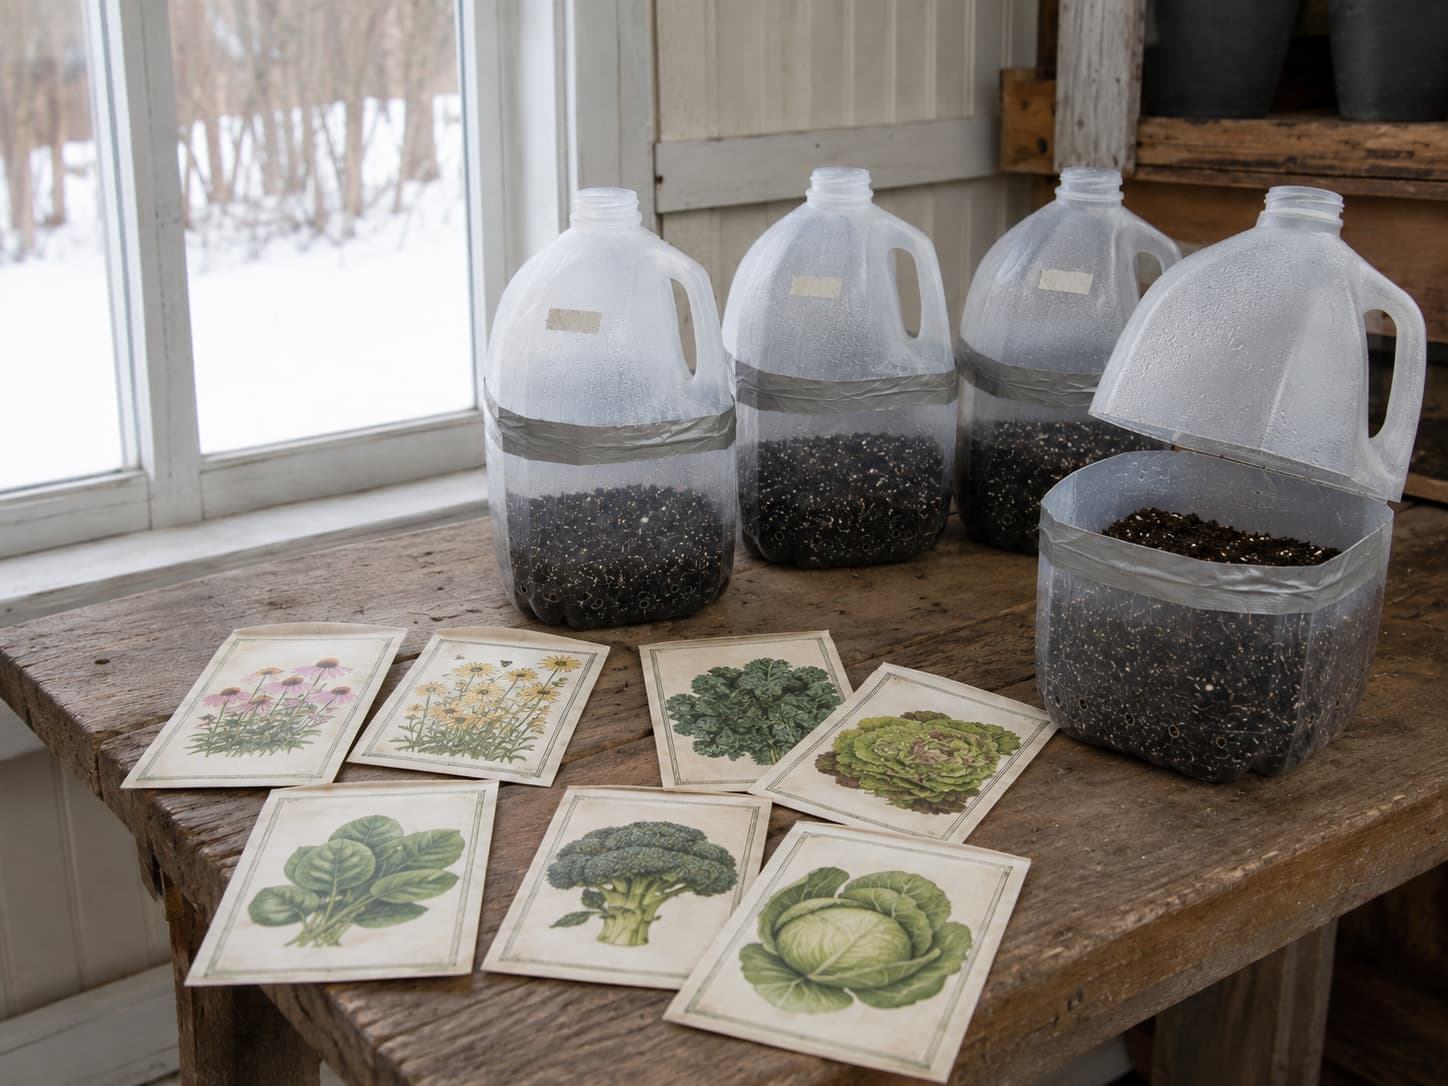
Native and Perennial Flowers
For native perennials, winter sowing can work especially well because many temperate species are adapted to cold, moist conditions before spring growth. Good candidates commonly mentioned by Extension programs include milkweed, black-eyed Susan, purple coneflower, liatris, lobelia, penstemon, dianthus, phlox, gaillardia, Shasta daisy and some poppies. Still, requirements vary by species and seed source, so check the packet rather than assuming every native needs the same treatment.
Cool-Season Vegetables
For cool-season vegetables, late-winter jug sowing can work well for broccoli, cabbage, cauliflower, lettuce, kale and spinach. Even so, young seedlings can still be stressed by extreme weather or an overheated container.
Hardy Annuals and Herbs
Likewise, snapdragons, pansies and selected herbs can fit the method. Oregano, marjoram, thyme, chives and parsley are examples listed by Extension sources, while sowing dates vary with species and local spring conditions.
Seeds to Start Later—or Start Indoors Instead
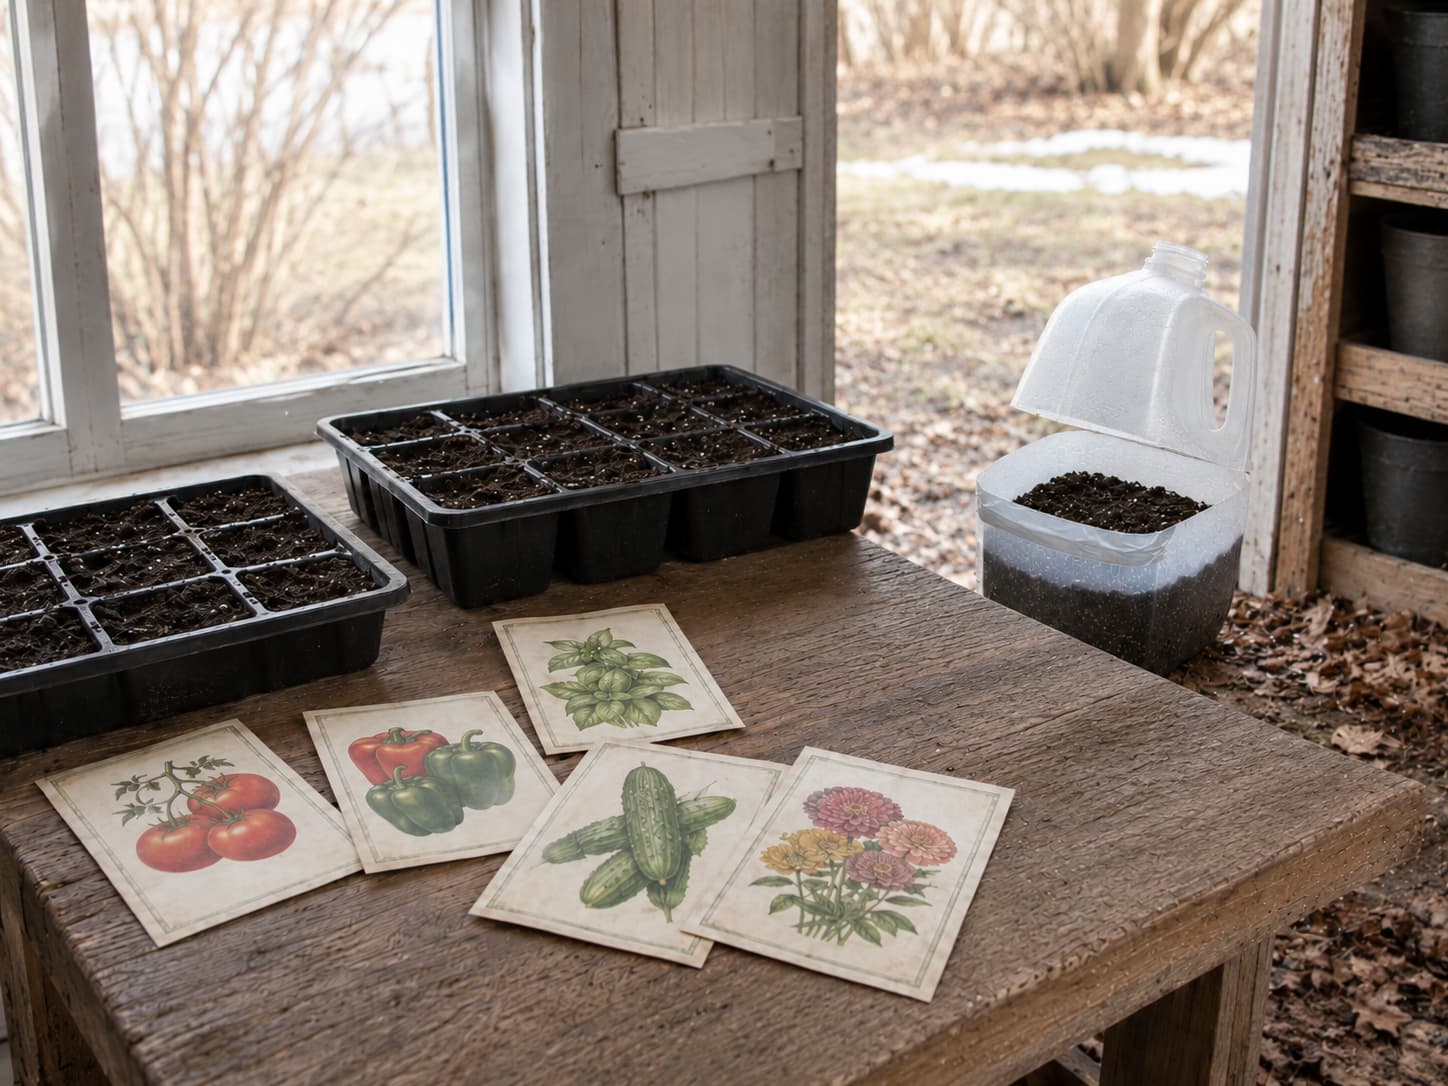
Importantly, winter sowing does not mean every seed should be placed outside in January. Tomatoes, peppers, cucumbers, zucchini, basil, zinnias and other frost-sensitive crops generally belong in a later spring jug sowing or in a standard indoor seed-starting setup, depending on your growing season.
Similarly, plants that dislike root disturbance may be better sown directly where they will grow. Carrots and parsnips are classic examples. Poppies can also be sensitive to transplanting, so direct sowing may be the easier choice even when cool conditions suit germination.
Spring Management: Venting, Watering and Preventing Overheating
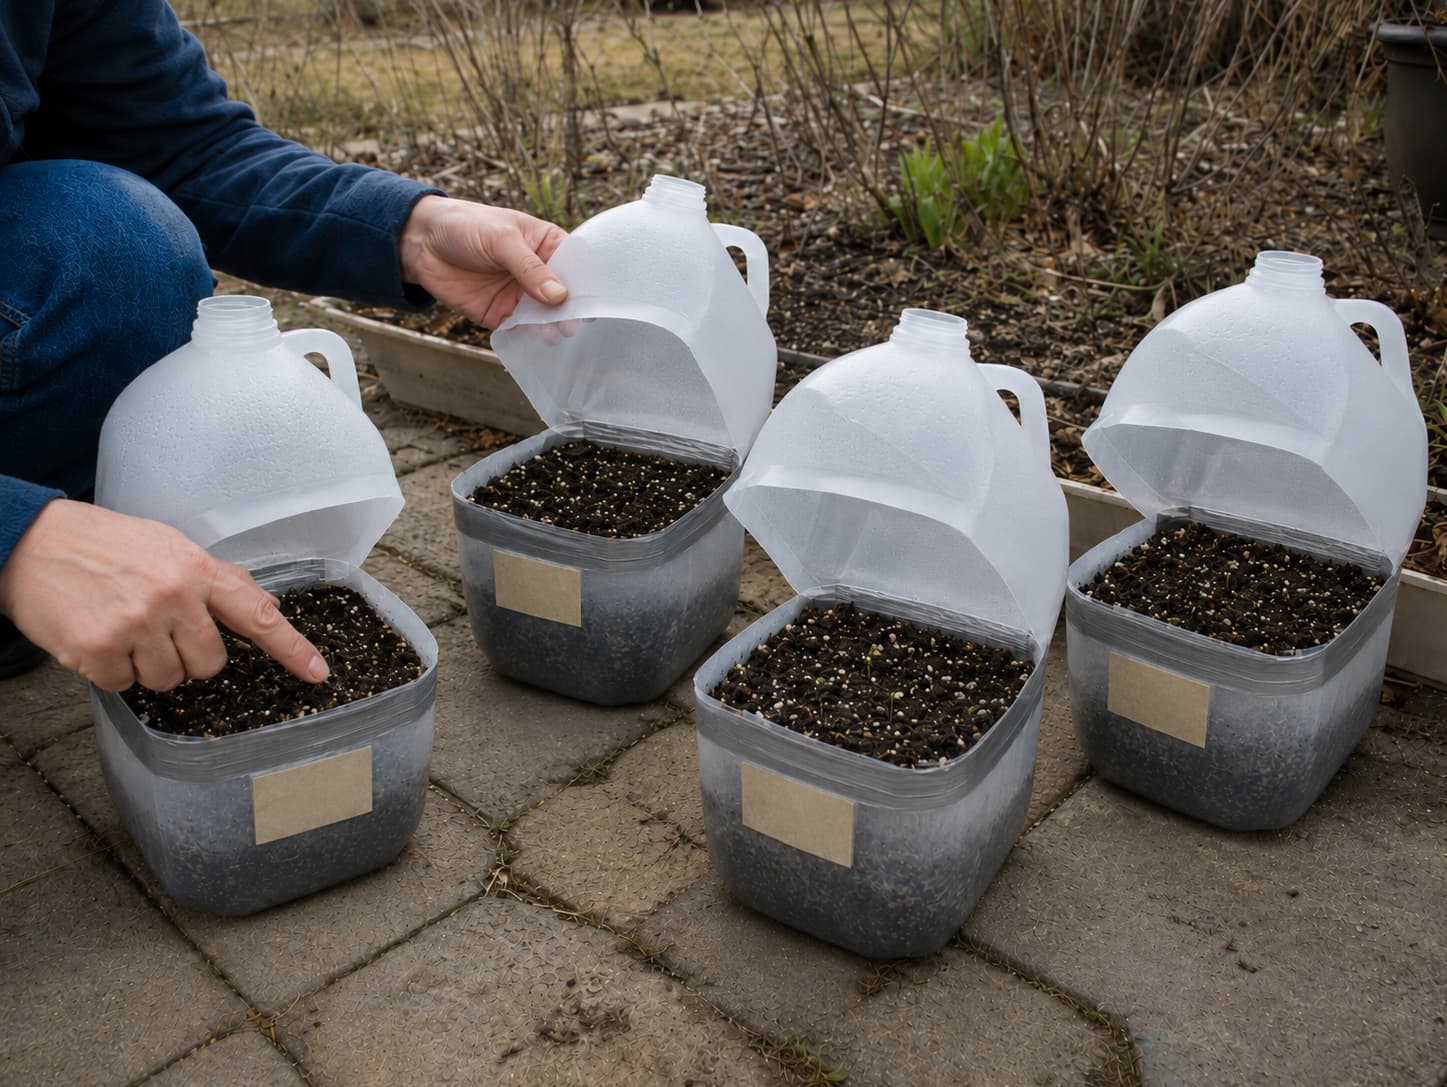
Once seeds sprout, the method becomes less “set it and forget it.” For example, spring sun can heat a small plastic container quickly even when outdoor air still feels cool.
- Vent on warm sunny days. Open the hinged top or increase airflow if the interior becomes hot or seedlings begin to wilt.
- Close again when needed. During cold nights or abrupt weather swings, replace the top if seedlings still need protection.
- Check moisture. Water when the mix is becoming dry; do not follow a fixed calendar.
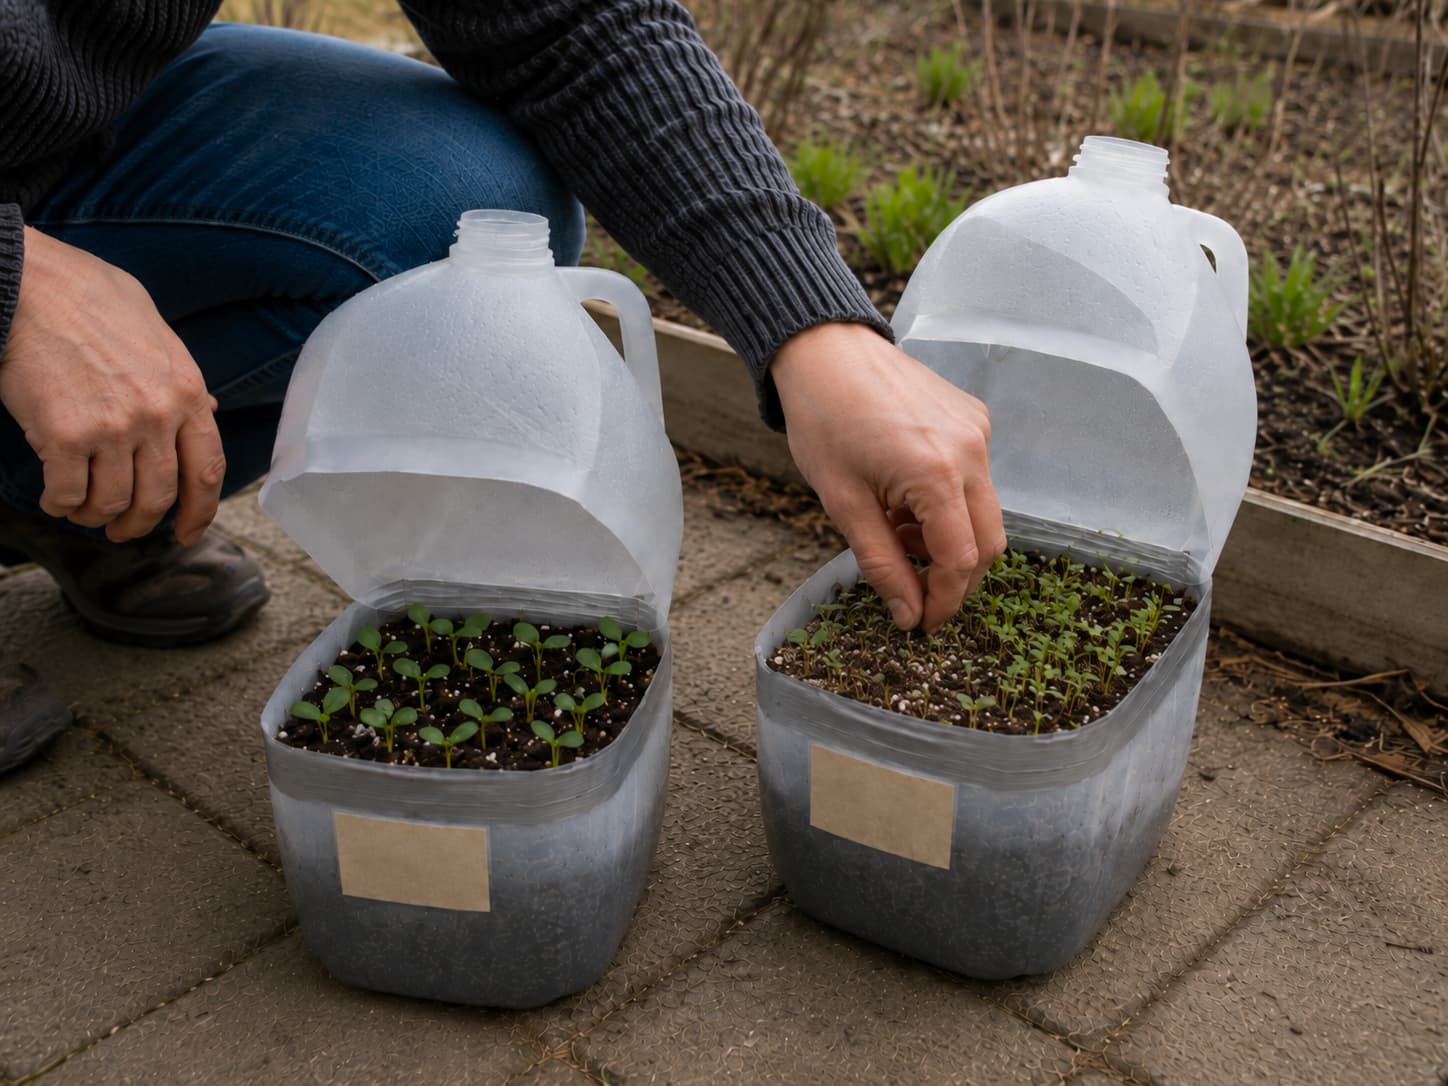
- Watch crowding. Dense seedlings may need thinning or dividing as growth speeds up.
- Keep labels readable. Rewrite fading labels before plant ID becomes a guessing game.
As a result, winter-sown seedlings are already used to outdoor light, temperature, and wind, so their transition is often easier than that of indoor-grown seedlings. However, a protected milk jug is not the same as an open garden bed. Gradual opening as spring warms is a sensible final adjustment step.
From Milk Jug to Garden: When and How to Transplant
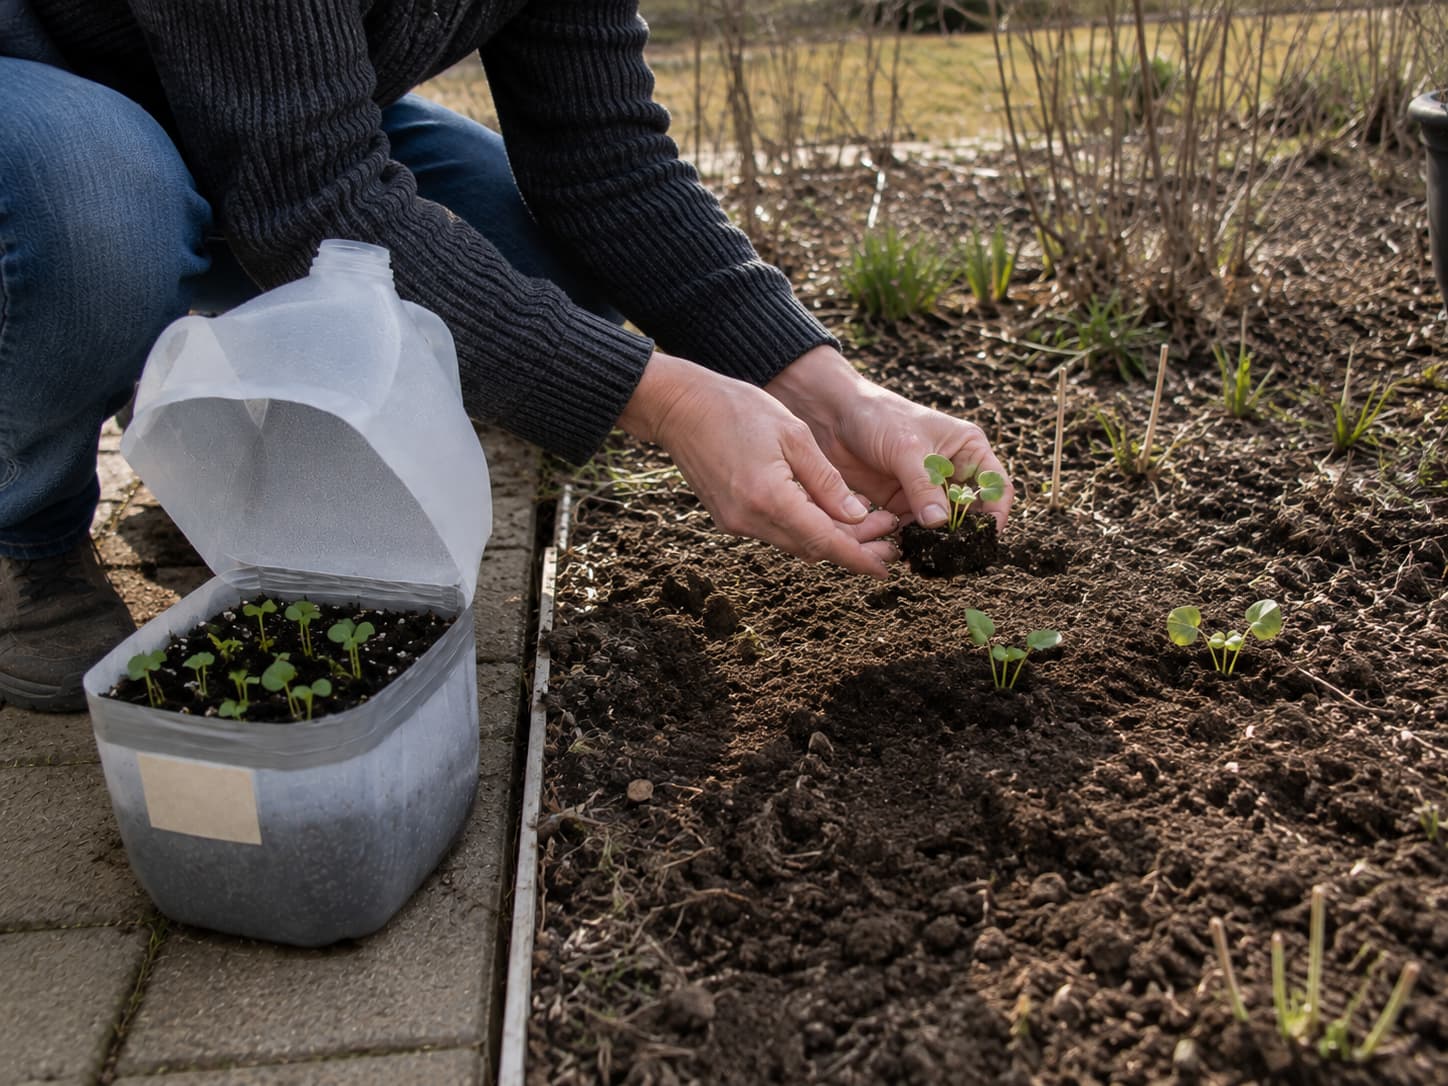
For transplanting, Missouri Extension recommends moving winter-sown seedlings once they are about 2–3 inches tall and have true leaves. However, the calendar still depends on the plant because cold-hardy crops can often move earlier than frost-sensitive species.
Next, open the container, loosen the roots gently, and separate seedlings in small clumps or as individual plants when practical. Avoid pulling by the stem. Water after transplanting and pay attention to an abrupt cold snap, drying wind or unusually strong sun.
Container Options: What Works Best?
| Container | Advantages | Limitations | Best Use |
|---|---|---|---|
| Gallon milk jug | Easy to carry, deep enough for mix, simple hinged design | Plastic may weaken outdoors over time | General-purpose winter sowing |
| 2-liter bottle | Tall and light-transmitting | Narrower access for planting and transplanting | Smaller batches |
| Clear clamshell | Already hinged and easy to open | Often shallow and light in wind | Small or surface-sown seeds |
| Clear tote with vented lid | Stable and reusable | Needs planned drainage and airflow | Larger sowings |
| Propagation tray with dome | Reusable and easy to organize | Costs more and can overheat if poorly vented | Gardeners who already own seed-starting gear |
Winter Sowing vs. Indoor Starting vs. Direct Sowing
| Method | Strongest Advantage | Main Limitation | Good Fit |
|---|---|---|---|
| Winter sowing | Natural cold exposure with less indoor equipment | Weather-dependent and requires spring venting | Many native perennials, cold-tolerant flowers and cool crops |
| Indoor starting | Controlled temperature and a long head start | Needs light, space and hardening off | Tomatoes, peppers and other long-season warm crops |
| Direct sowing | No transplant disturbance | Seeds are more exposed to weather, weeds and animals | Beans, squash, carrots, parsnips and crops that prefer growing in place |
5 Winter Sowing Myths Worth Retiring
Myth 1: Every Seed Needs Cold Stratification
No. Some temperate species need or benefit from a cold, moist period; many common vegetables and annual flowers do not. The seed packet or species-specific propagation guidance should decide.
Myth 2: Colder Is Always Better
No. Cold-adapted dormant seeds can tolerate winter conditions that would damage actively growing frost-sensitive seedlings. Once germination begins, the risk changes. Temperature tolerance depends on the plant and its growth stage.
Myth 3: Winter Sowing Is Completely Maintenance-Free
Before sprouting, care is usually light, but containers still need drainage, readable labels, and occasional moisture checks. Afterward, airflow and watering become more important.
Myth 4: Your USDA Zone Tells You the Exact Sowing Date
USDA hardiness zones describe average annual extreme minimum winter temperatures. They do not encode your last frost date, snow cover, winter thaws or the stratification requirement of a particular seed.
Myth 5: Winter Sowing Replaces Indoor Seed Starting
Instead, it complements indoor starting. Winter sowing excels for selected cold-tolerant and cold-requiring species; indoor propagation remains valuable for long-season warm crops that need controlled heat and an early start.
Troubleshooting Winter Sowing Problems
| Problem | Likely Causes | What to Do |
|---|---|---|
| No germination | Wrong timing, old seed, species-specific dormancy, incorrect depth, or simply not warm enough yet | Check the packet and expected germination conditions before re-sowing |
| Surface mold | Excess moisture and weak airflow | Increase airflow, confirm drainage and avoid keeping the mix saturated |
| Seedlings wilt on sunny days | Container overheating or drying | Vent promptly and check moisture |
| Seedlings stretch | Insufficient light or crowding | Move to a brighter appropriate location and thin if needed |
| Container blows over | Wind exposure and a light container | Group jugs in a stable crate or sheltered position without blocking light and rain or snow |
| Mix dries out | Dry weather, stronger spring sun or increased seedling water use | Water gently until the mix is evenly moist again |
FAQ: Winter Sowing
1. Can I winter sow on an apartment balcony?
Yes, if the balcony provides a safe outdoor place for vented containers and receives adequate light. Secure lightweight jugs from wind, follow building rules, and remember that a covered balcony may not provide natural rain or snow, so you may need to manage moisture yourself.
2. Should I remove the milk-jug cap?
For the classic milk-jug method, yes. Extension instructions commonly recommend discarding the cap so the opening provides airflow and lets rain or snow enter. The bottom still needs drainage holes.
3. When should I open the jug in spring?
Start opening or venting more when seedlings have emerged and warm sunny conditions begin heating the container. There is no single temperature that fits every crop. Watch the seedlings and the interior conditions, and close the top again when cold protection is still useful.
4. Do winter-sown seedlings need hardening off?
They are already exposed to outdoor conditions, so the transition is generally easier than with indoor-grown seedlings. However, seedlings growing under a plastic cover still benefit from gradually increased airflow and exposure before final transplanting.
5. Can I winter sow tomatoes and peppers?
You can use the milk-jug container method for warm-season vegetables later in spring, and Missouri Extension lists tomatoes and peppers among crops that can be started in April. Deep-winter exposure is not the main advantage for these heat-loving crops, so indoor starting may still be the better choice in short-season climates.
6. What is the easiest seed to try first?
Choose a species that your seed packet or local Extension source already recommends for winter or cool-season sowing. For many gardeners, native perennials requiring cold stratification or cool-season vegetables such as kale, lettuce or spinach are straightforward places to start.
Final Takeaway
Ultimately, winter sowing works best when you treat it as a seed-starting method, not a gardening hack with universal rules. Therefore, match the seed to the season, give the container drainage and airflow, monitor moisture, and pay closer attention once seedlings appear. Done that way, recycled jugs can reduce indoor equipment, provide natural cold exposure for the species that need it, and produce sturdy seedlings ready for spring.
Related Reading
Sources
- University of Maine Cooperative Extension — Winter Sowing. Updated 2026 overview of outdoor vented-container propagation, cold stratification and spring monitoring.
- University of Missouri Extension — Winter Sowing Seeds. Milk-jug preparation, seed choices, airflow, watering and transplant guidance.
- Illinois Extension — How to Try Winter Sowing. Native-seed timing, milk-jug setup and spring transplant guidance.
- Cornell Cooperative Extension — Winter Sowing 101. Seed selection and container preparation.
- USDA Plant Hardiness Zone Map — How to Use the Maps. Explains that zones are based on average annual extreme minimum temperatures and are not frost-date calendars.
- University of Minnesota Extension — Jug It and Grow. Winter sowing for native pollinator plants.