How to Propagate Succulents from Leaves: A Practical Guide
Quick Summary
For reliable leaf propagation, start with a succulent that can reproduce from a single leaf, remove the leaf with its base intact, let the wound callus, and keep moisture minimal until roots appear.
Expect the process to take several months. Some healthy-looking leaves will still fail, so begin with more leaves than the number of plants you hope to grow.
My first attempt at succulent propagation was a complete failure. I'd seen a TikTok video showing a leaf sitting on soil, sprouting a tiny pink baby plant, and I thought: how hard can it be? I twisted off a dozen leaves from my Echeveria, laid them on damp potting soil, and waited. Two weeks later, every single leaf had turned to brown mush. I'd made the single most common mistake — and I'd made it twelve times in a row.
Since then, I've propagated hundreds of succulents from leaves. I've learned what works, what doesn't, and why most of the online advice is incomplete. Here's the method that actually produces results, from someone who's made every mistake so you don't have to.
Which Succulents Can You Propagate from Leaves?
Not all succulents propagate from leaves, and this is the first thing most guides fail to mention. If you try to propagate a Haworthia or an Aloe from a leaf, it won't work — those propagate from offsets (pups). Here's a quick reference:
| Propagates from leaves | Does NOT propagate from leaves |
|---|---|
| Echeveria (all varieties) | Aloe vera |
| Graptopetalum | Haworthia |
| Sedum (most varieties) | Gasteria |
| Pachyphytum | Aeonium (low success rate) |
| Graptoveria (hybrids) | Sempervivum (better from offsets) |
| Crassula (Jade plant) | Sansevieria (propagates from leaf cuttings, not single leaves) |
If you're unsure, the general rule is: succulents in the Crassulaceae family (Echeveria, Sedum, Graptopetalum, Pachyphytum, Crassula) propagate from leaves. Succulents in the Asphodelaceae family (Aloe, Haworthia, Gasteria) propagate from offsets. If your succulent produces offsets or pups at the base, it's probably in the latter group.
The Step-by-Step Method That Actually Works
Step 1: Choose the right leaves
Select plump, healthy leaves from the bottom of the plant — the older, lower leaves have more stored energy and root more reliably than younger upper leaves. The leaf should be firm and unblemished, with no signs of damage, rot, or pest activity. A healthy leaf is your single best predictor of propagation success. If the plant has been recently watered, wait a few days before taking leaves — fully hydrated leaves are more prone to rot than slightly dehydrated ones.
Step 2: Remove the leaf cleanly — this is the most critical step
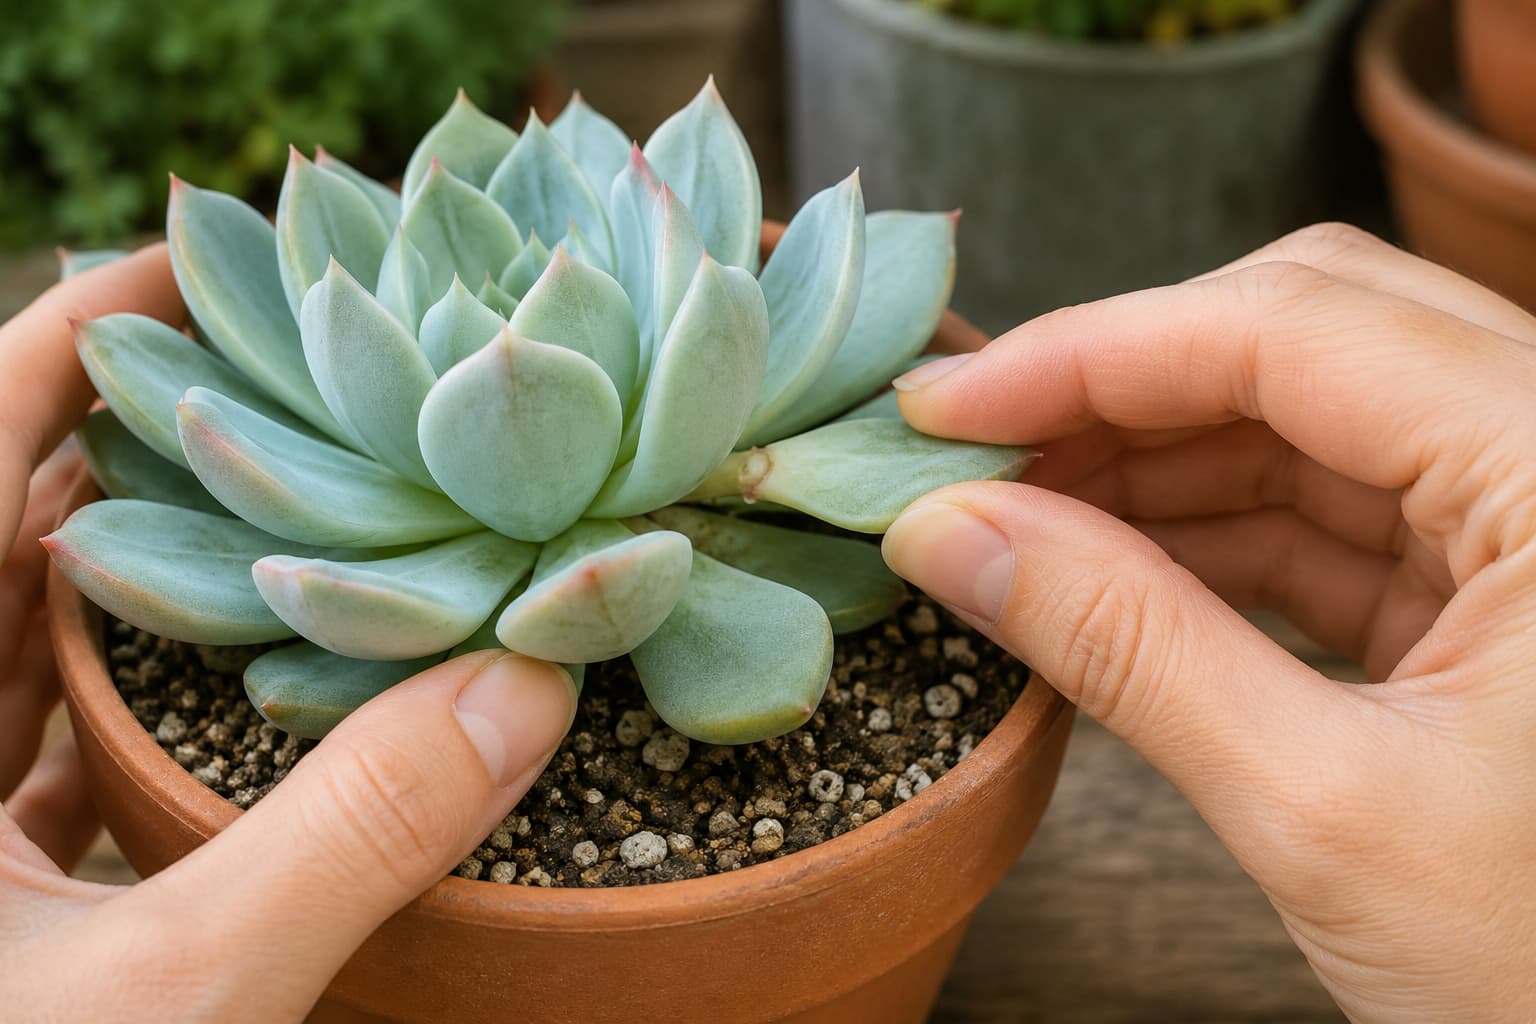
Grasp the leaf near the base and gently wiggle it from side to side while pulling downward. The leaf should separate cleanly from the stem with a small, U-shaped break at the base. This is the meristematic tissue — the cells that will produce both roots and a new plant. If the leaf tears and leaves part of itself on the stem, it won't propagate. If you're struggling to get a clean break, try twisting the leaf gently rather than pulling straight down. This is the step that most beginners get wrong, and it's the reason my first attempt failed — I tore the leaves instead of separating them cleanly.
Step 3: Let the leaves callus — do not skip this
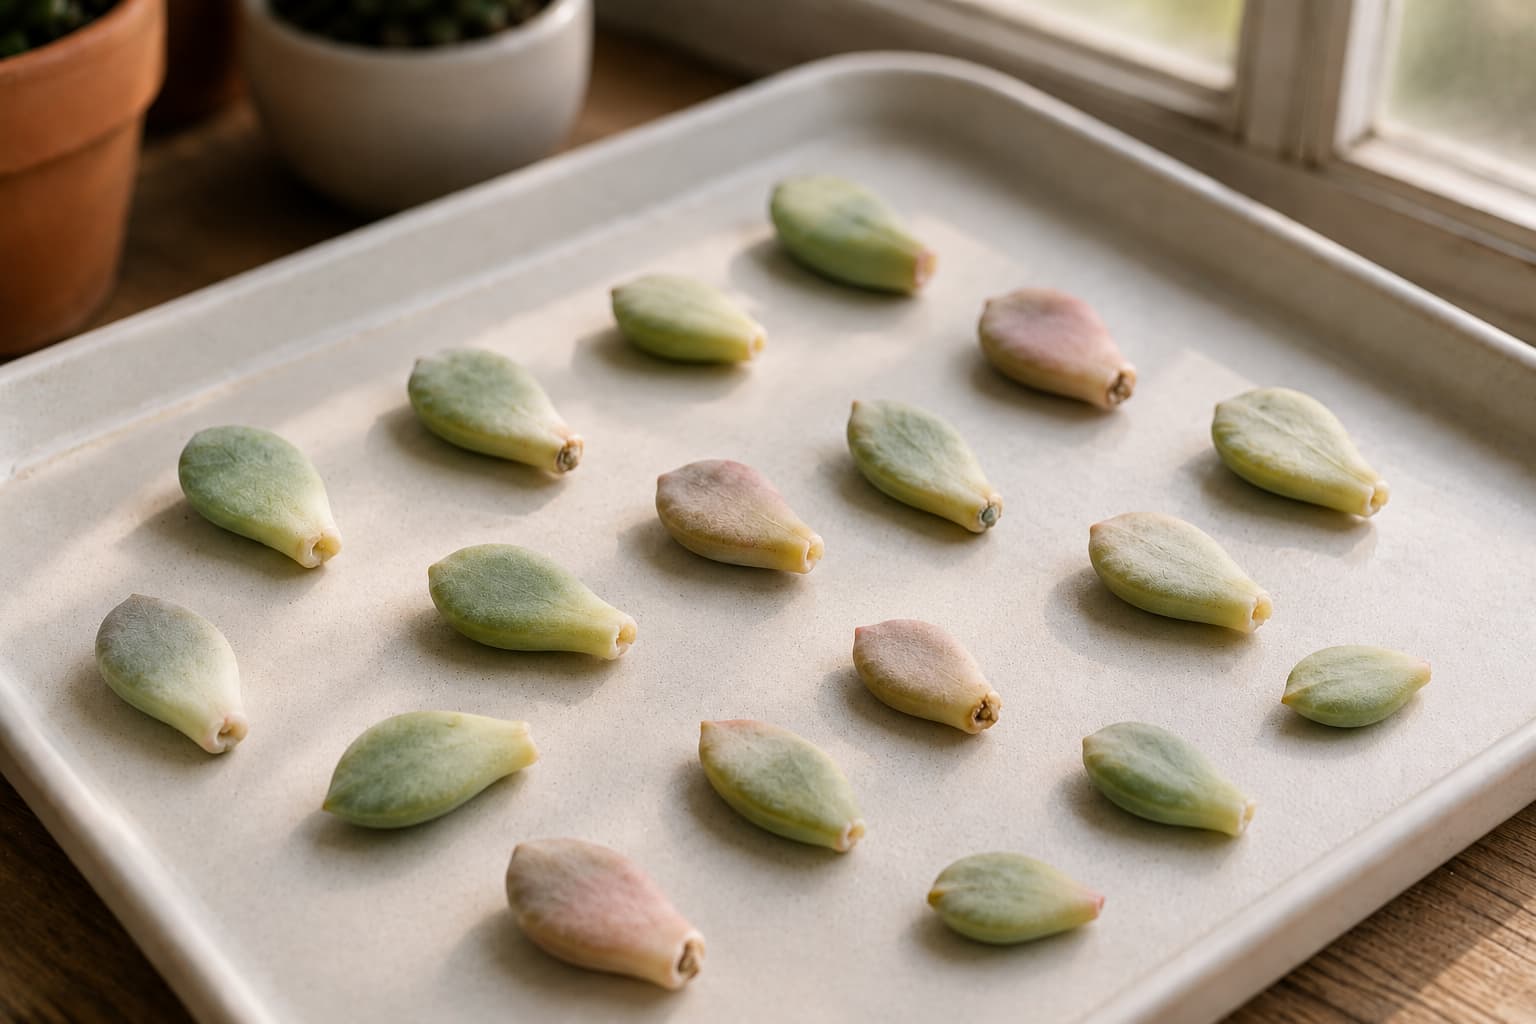
Place the leaves on a dry paper towel or tray in a spot with bright indirect light. Do not put them on soil yet. Do not water them. The cut end needs to dry and form a protective callus — a scab-like layer that seals the wound and prevents rot. This takes 2–5 days, depending on humidity and leaf thickness. Thicker leaves (Graptopetalum, Pachyphytum) take longer; thinner leaves (Sedum) callus faster. You'll know the leaf is ready when the cut end looks dry and slightly shriveled, not wet or fleshy.
The #1 reason leaf propagation fails: Putting fresh leaves on wet soil before they've callused. The open wound absorbs water, bacteria enter, and the leaf rots within days. I learned this the hard way — twelve mushy leaves in a row. Wait for the callus. It's the most important step in the entire process.
Step 4: Set up the propagation tray
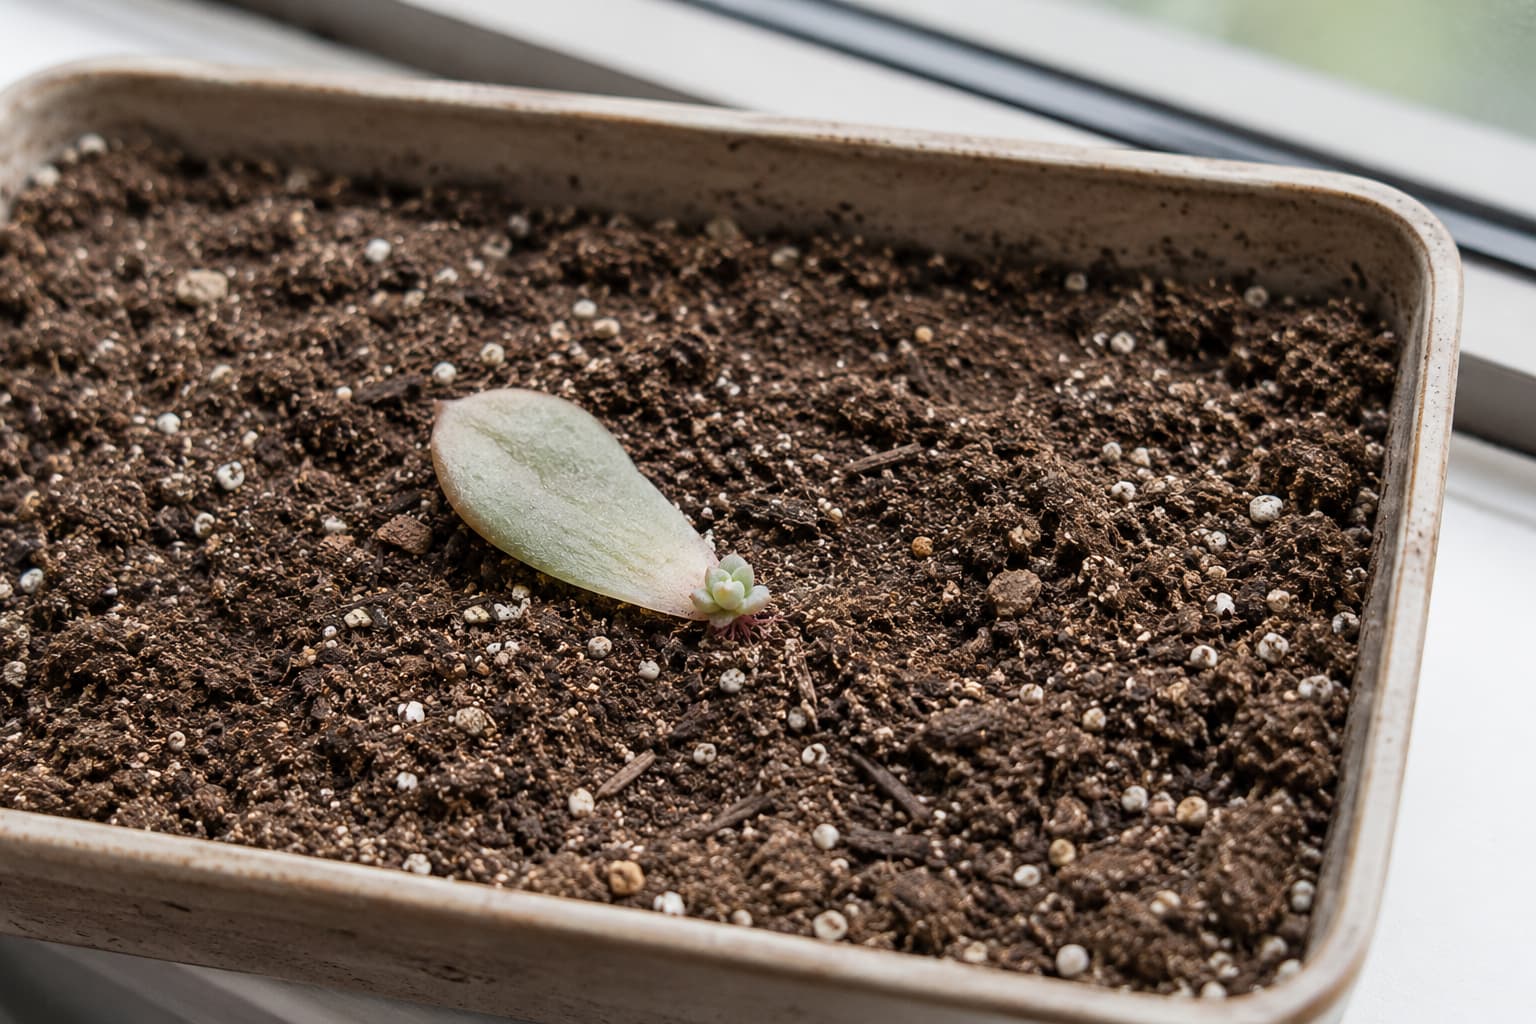
Use a shallow tray or saucer filled with a well-draining succulent mix — 1 part potting soil to 1 part perlite or coarse sand works well. The soil should be barely moist, not wet. Lay the callused leaves on top of the soil — do not bury them, do not push the cut end into the soil. The leaves just need to make contact with the surface. Place the tray in bright indirect light. Direct sun at this stage will dry out the leaves before they can root. A north or east-facing window is ideal, or a spot set back from a brighter window.
Step 5: Water sparingly — very sparingly
This is where most guides go wrong. The mother leaf contains all the water and nutrients the developing plant needs for the first several weeks. Additional water before roots have formed is not just unnecessary — it's harmful. Mist the soil surface lightly once every 5–7 days, just enough to dampen the top layer. The goal is to provide a tiny amount of moisture to encourage root growth without creating the wet conditions that cause rot. Once roots are visible and the baby plant has formed (usually 3–6 weeks), you can water slightly more, but still sparingly.
Step 6: Wait — and don't move things around
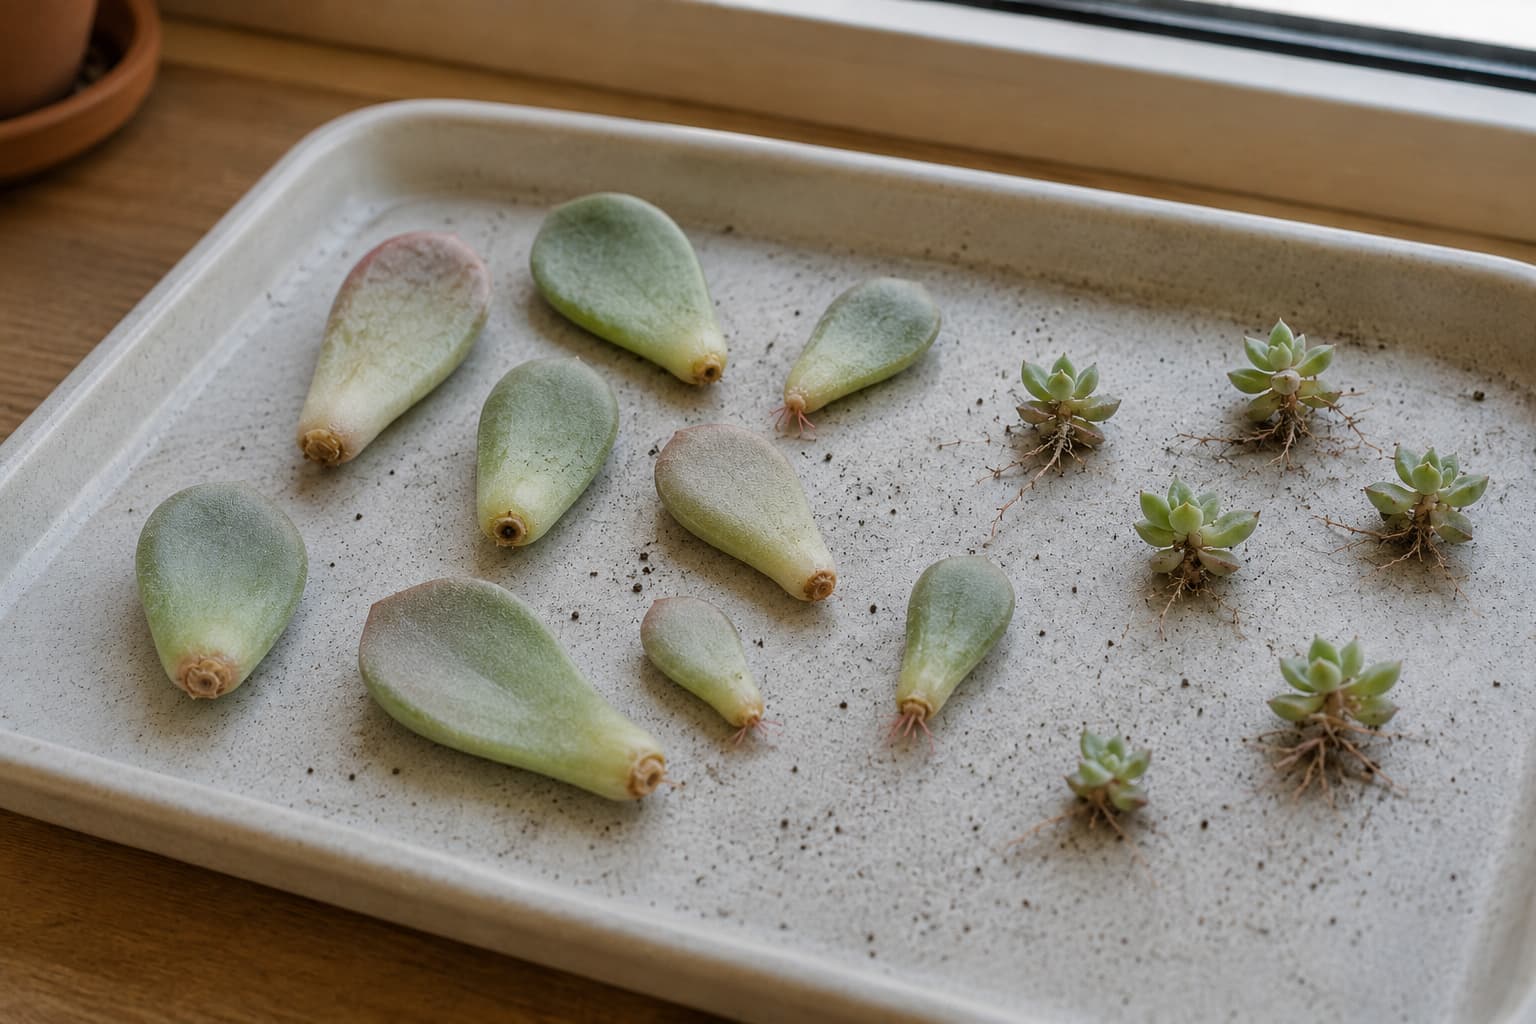
Roots typically appear within 2–4 weeks, followed by a tiny rosette at the base of the leaf. The mother leaf will slowly shrivel and dry up as the new plant consumes its stored water and nutrients — this is normal and expected. Do not remove the mother leaf until it's completely dry and papery. The new plant is still drawing energy from it. The entire process, from leaf to a plant large enough to pot individually, takes 3–6 months. Succulent propagation is a slow process. The best thing you can do is set up the tray and mostly ignore it.
Why Your Leaves Aren't Propagating: Troubleshooting
| Problem | Likely cause | Fix |
|---|---|---|
| Leaves turn brown and mushy | Too much water before callus formed | Start over with new leaves; let them callus 3–5 days before placing on soil |
| Leaves shrivel without producing roots | Too much direct sun or too little humidity | Move to bright indirect light; mist soil surface lightly every 5 days |
| Roots appear but no baby plant | Normal — sometimes roots come first, plant follows | Wait. This can take 6–8 weeks. Some leaves produce roots without a plant; these won't develop further |
| Baby plant forms but mother leaf rots | Too much water after roots formed | Reduce watering; the baby plant can survive on its own once it has a few leaves |
| Nothing happens at all | Leaf wasn't viable or was removed incorrectly | Try again with a cleanly removed leaf from a healthy plant; some leaves just don't take |
Realistic expectations: In my experience, about 60–70% of properly removed, properly callused leaves will produce a viable plant. Some leaves just won't take, no matter what you do. This is normal. If you want 10 new plants, start with 15–20 leaves. The ones that don't make it aren't a reflection of your skills — some leaves are simply more viable than others.
Quick Answers
01Can I propagate succulent leaves in water?
Some people have success suspending leaves above water (not in it) so the callused end is near the water surface but not touching. Roots will grow toward the humidity. This method works but requires more attention than soil propagation — the water needs changing, and the humidity needs to be consistent. The soil method is more reliable for beginners.
02When can I move the baby plant to its own pot?
Wait until the baby plant has at least 4–6 leaves of its own and the mother leaf has completely dried up. This usually takes 3–4 months from the start of propagation. Moving it too early, when it's still dependent on the mother leaf, will stunt its growth.
03Do I need rooting hormone for succulent leaves?
No. Succulent leaves contain all the hormones they need to produce roots and a new plant. Rooting hormone is unnecessary and can actually interfere with the natural process. The leaf's own meristematic tissue is more than capable of initiating root growth on its own.
04What's the best time of year to propagate succulents?
Spring and early summer, when the plants are naturally entering their active growth phase. Propagation is possible year-round indoors, but the success rate is highest during the growing season. Avoid propagating during winter dormancy — the leaves take much longer to root and are more prone to rot.
The Bottom Line
Succulent leaf propagation is genuinely one of the most satisfying things you can do as a plant person — watching a single leaf produce an entire new plant feels like magic, even when you understand the biology. The key is patience and restraint: clean leaf removal, a proper callus period, and minimal water. The plant already has everything it needs inside that single leaf. Your job is mostly to stay out of its way.