Turn your herbs into next year's garden—no extra cost, just a little know-how.
Table of Contents
- Why Save Seeds?
- When Are Basil and Dill Seeds Ready?
- How to Harvest Basil Seeds
- How to Harvest Dill Seeds
- Drying, Storing & Labeling Tips
- Common Mistakes to Avoid
- Bonus: Free Seed Saving Printable
Why Save Seeds?
Saving seeds isn’t just sustainable—it’s empowering. By collecting seeds from your healthiest basil and dill plants, you:
- Save money on next season’s herbs
- Encourage plant adaptation to your local environment
- Reduce packaging and store-bought waste
- Feel like a garden magician (seriously, it’s fun)
Basil and dill are open-pollinated, which means their seeds usually grow true to type—unlike many hybrids.
When Are Basil and Dill Seeds Ready?
Timing is everything. Here’s what to look for:
- Basil: After flowering, basil produces tiny seed pods that dry and turn brown. Wait until they’re fully dry before harvesting.
- Dill: Look for dry, brown seed heads. You’ll often see the umbrella-like flowers curling inward as seeds mature.
Rule of thumb: If the plant looks like it’s “done,” it’s probably time to harvest the seeds.
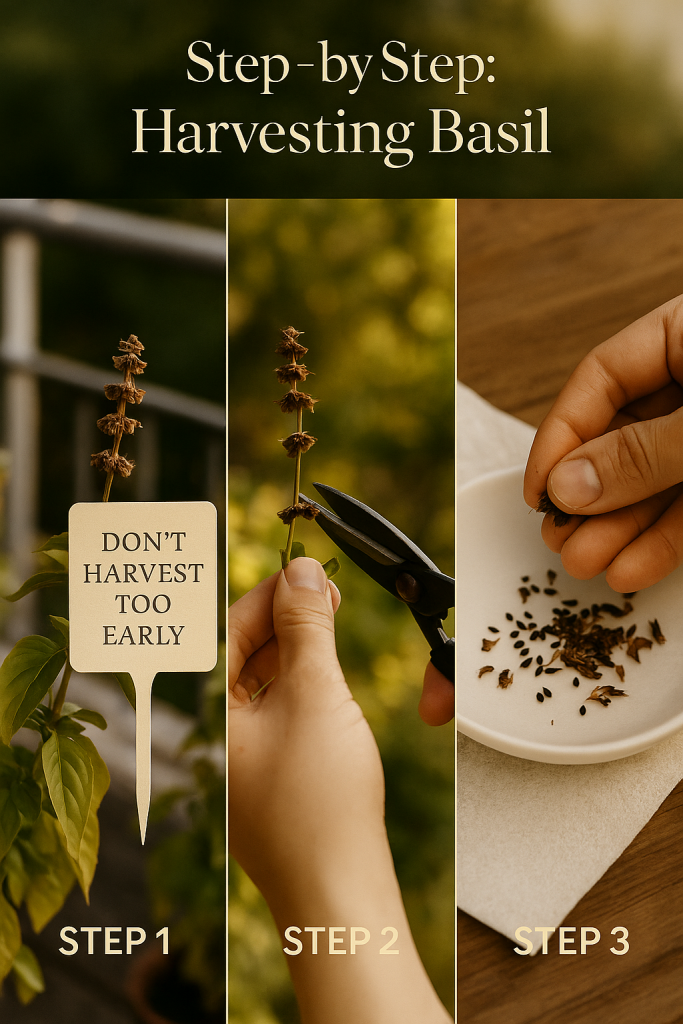
How to Harvest Basil Seeds
- Locate the dry flower heads (they look like tiny brown cups)
- Hold a paper bag or tray underneath
- Gently rub or shake the flower stalk to release the seeds
- Separate seeds from chaff by blowing gently or using a fine sieve
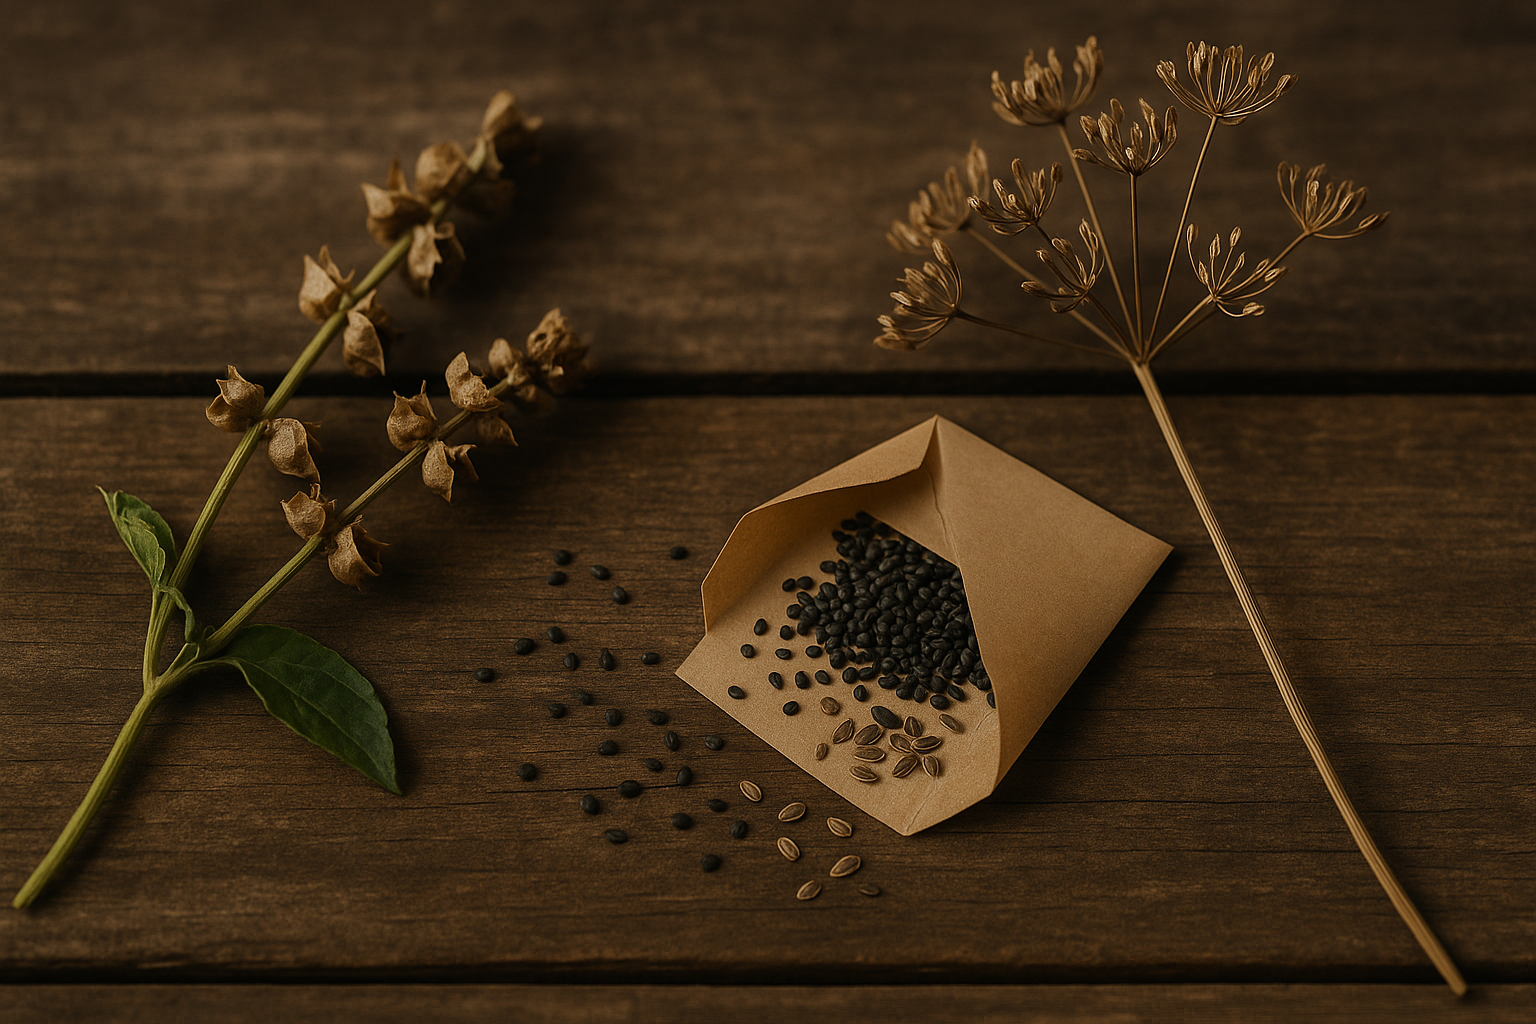
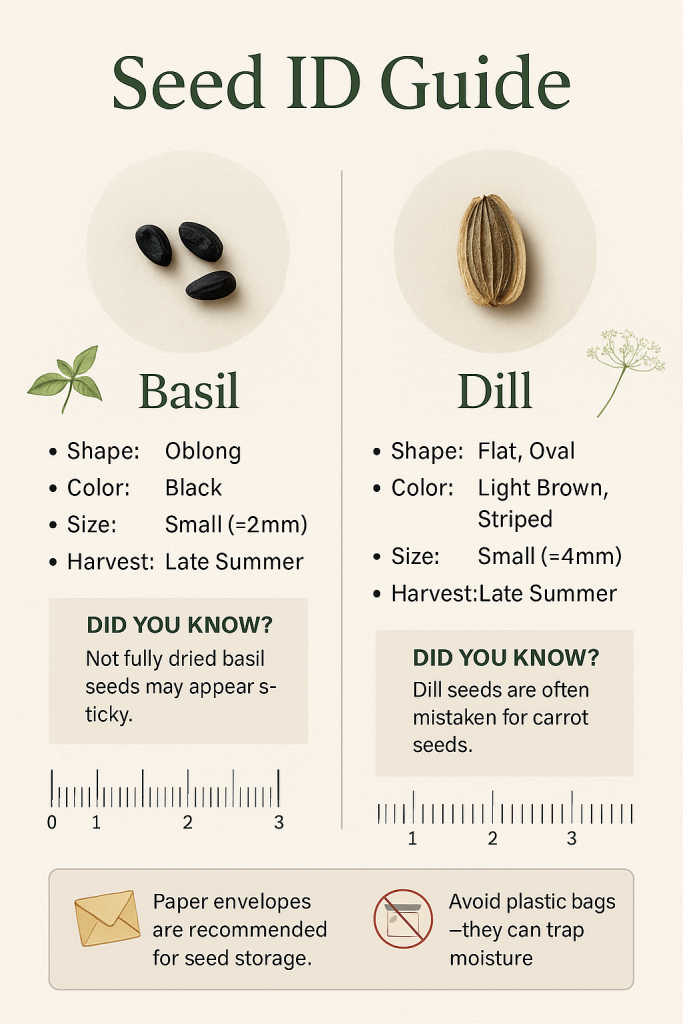
Basil seeds are very small and black—don’t confuse them with debris!
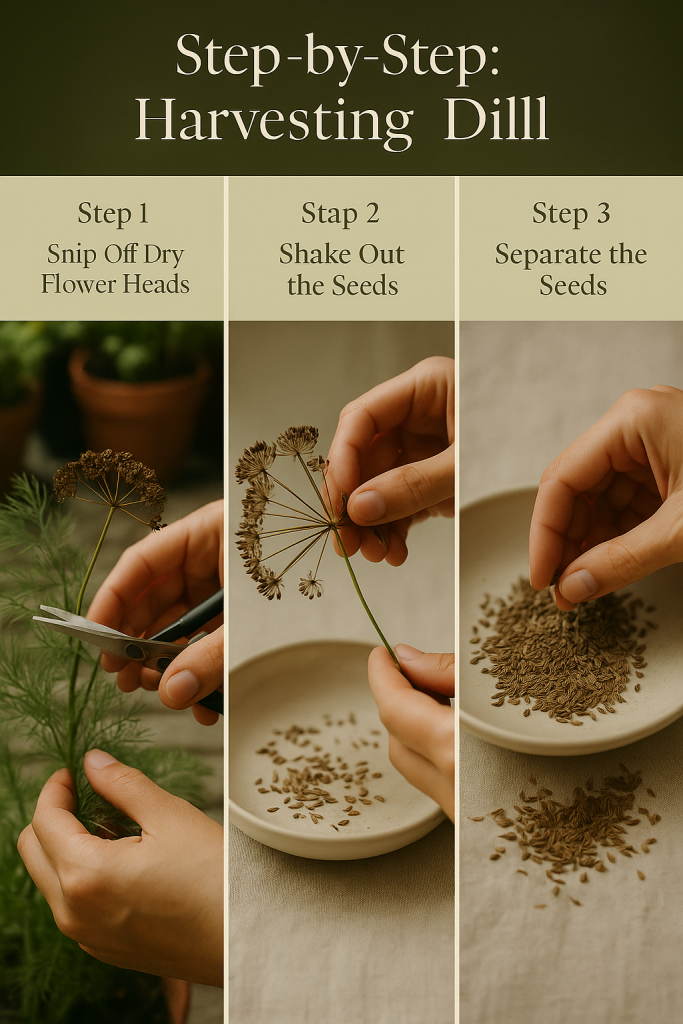
How to Harvest Dill Seeds
- Wait until the dill seed heads are dry and turning brown
- Snip off entire seed heads and place in a paper bag
- Hang the bag upside down in a dry spot for 5–7 days
- Shake the bag to release the seeds, then collect and clean
Dill seeds are larger and oval-shaped—easier to handle than basil seeds.
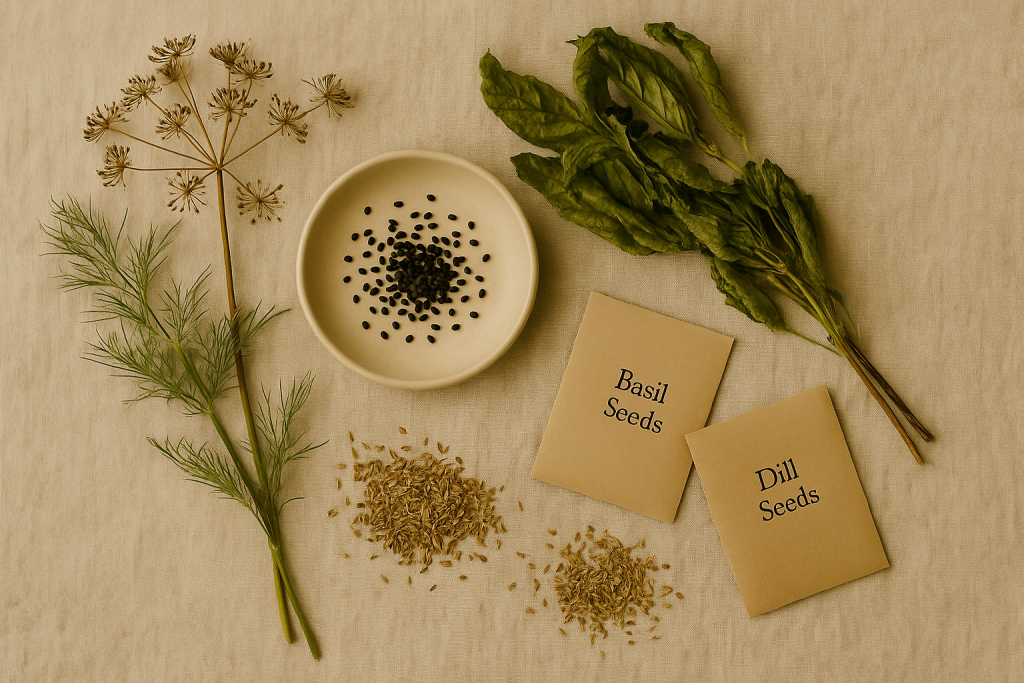
Drying, Storing & Labeling Tips
✅ Spread seeds on a paper towel or mesh tray for 3–5 days in a dry, shaded spot
✅ Store in a labeled envelope or glass jar with silica packet
✅ Keep in a cool, dry place (like a cupboard, not the fridge)
Don’t forget to label: Herb type, variety, and harvest date.

Common Mistakes to Avoid
- ❌ Harvesting too early (seeds must be fully dry)
- ❌ Storing seeds while still moist (leads to mold)
- ❌ Skipping the label (you WILL forget what they are!)
- ❌ Using plastic bags (trap moisture)
FAQ: Why Didn’t My Basil Seeds Sprout?
Even when seeds look “fine,” several invisible factors could reduce germination:
- Immature Harvest: Seeds harvested before fully dry may lack the energy to germinate.
- Improper Storage: Exposure to humidity causes mold or rot. Seeds need dry, dark, and cool conditions.
- Heat Damage: If stored near a stove, heater, or windowsill, excess heat can kill viability.
- Age: Most basil seeds stay viable for ~3 years, but older seeds lose vigor.
- Poor Soil or Light: Even healthy seeds won’t germinate in soggy or nutrient-depleted soil, or without warmth and sun.
✅ Tip: Always do a quick paper towel germination test before planting your saved seeds.
Bonus: Free Seed Saving Printable
Want a step-by-step checklist and seed envelope template?
✅ Download the Greenmuse Seed Saving Kit (PDF) to print at home.
Includes:
- Basil & dill seed ID guide
- Harvest tracking sheet
- Printable seed packets
👉 Click here to get your free download
Final Thoughts
Seed saving is the ultimate beginner-friendly garden win. You don’t need fancy tools—just your herbs, your hands, and a little patience.
Next season’s garden is already in your backyard. You just have to gather it.
Have you saved seeds before? Share your tips below or tag us @Greenmuse with your herb seed stash!
Next season’s garden is already in your backyard.