Prickly Pear Cactus Care:How to Grow, Prune& Harvest Opuntia
Good prickly pear cactus care starts with one important detail: Opuntia is a large genus, not a single cactus with one fixed climate rule. Most garden types want strong light and excellent drainage, but cold tolerance, mature size, spine density, fruit quality, and edible use vary by species and cultivar. Once you choose the right plant for your climate, the routine is simple: keep the root zone well drained, water according to actual drying, handle pads with tools rather than bare hands, and prune or propagate at the joints.
Grow prickly pear in the sunniest suitable position for the species, in sharply draining soil or cactus mix. Water deeply when needed, then allow the root zone to dry substantially before watering again; cold or dormant plants need less. In containers, always use drainage holes. For propagation, let a healthy mature pad callus before planting it shallowly upright. For pruning and harvest, use long tongs as the primary handling tool because tiny barbed glochids can remain even on plants sold as “spineless.”
Prickly Pear Cactus at a Glance
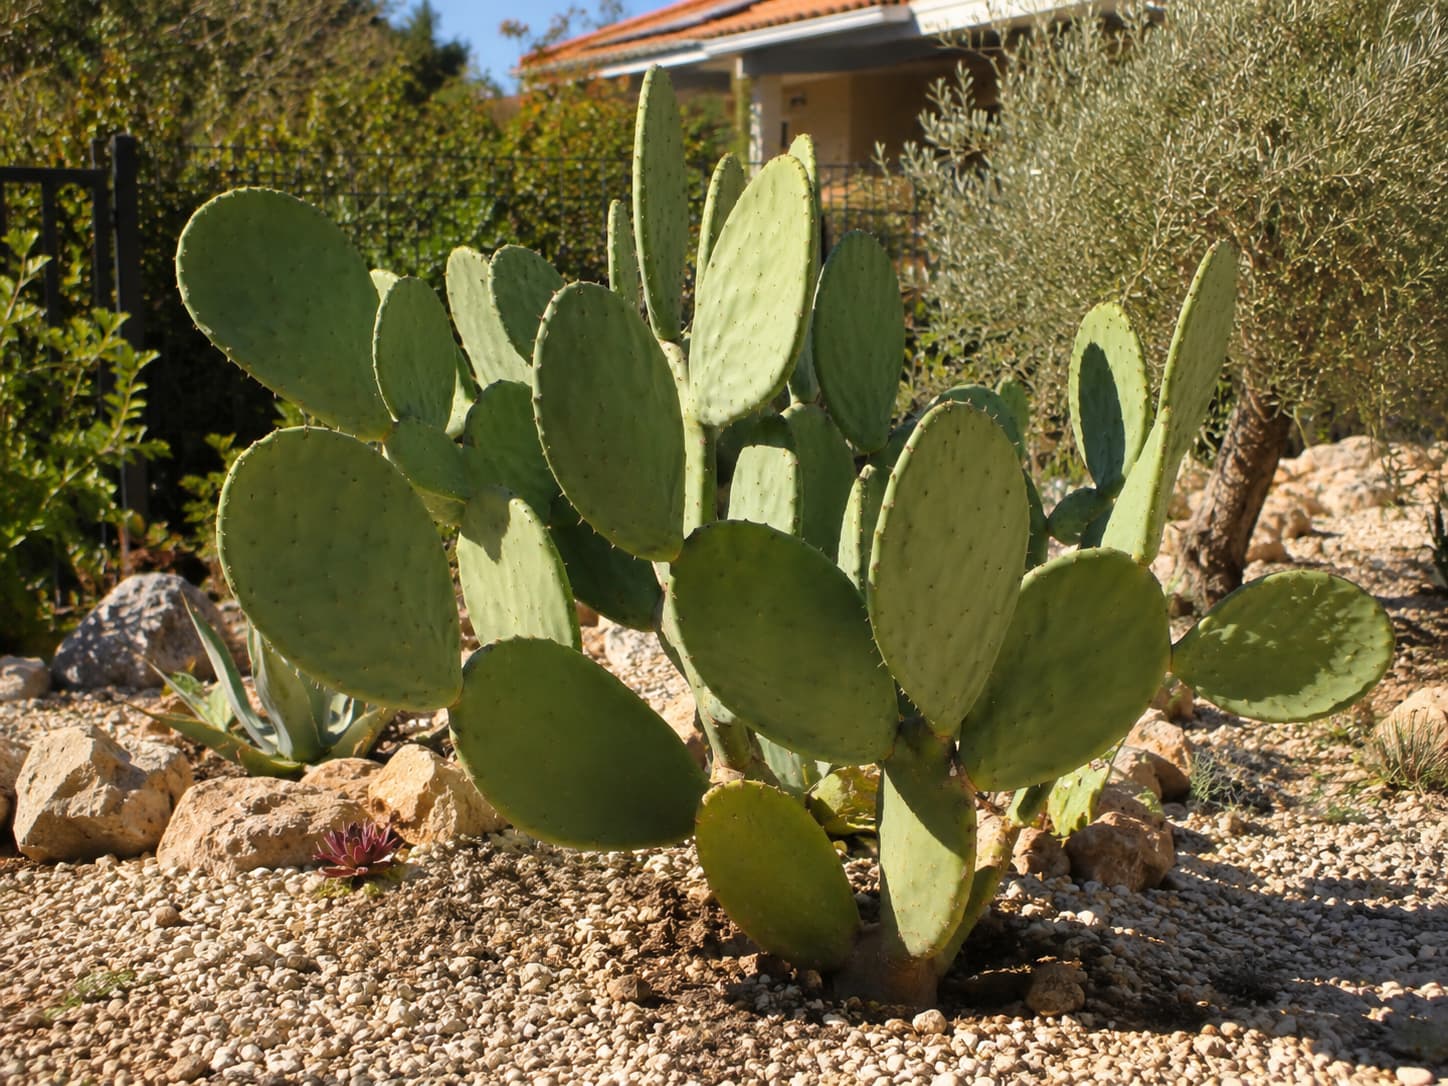
Prickly pears are Opuntia cacti with flattened green stem segments commonly called pads. Botanically, those pads are cladodes—modified stems, not ordinary leaves. Small areoles on the pads can produce obvious spines as well as much smaller barbed bristles called glochids. Flowers form on mature pads and may be yellow, orange, red, pink, purple, or white depending on the species; many are followed by fleshy fruits.
| Need | Practical starting point | Watch for |
|---|---|---|
| Light | Strong light; most landscape types perform best in full sun | Sunburn after a sudden move from shade or greenhouse conditions |
| Soil | Sharp drainage; sandy, rocky, or mineral-rich cactus mix | Dense soil that stays wet around the crown |
| Water | Water thoroughly when needed, then allow substantial drying | Frequent watering in cool or poorly drained conditions |
| Handling | Use long tongs; treat every pad as if glochids are present | Relying on “spineless” appearance or gloves alone |
| Cold | Match species to your climate | Applying one hardiness zone to the entire genus |
1. Choose the Right Opuntia for Your Climate
The biggest mistake in broad prickly pear advice is treating every Opuntia as equally hardy. The genus includes species native to very different environments, from cold-winter regions of North America to warm, dry climates. Some low-growing eastern prickly pears tolerate freezing winters, while cultivated Indian fig types are much better suited to mild or warm climates.
Before planting outdoors permanently, identify the species or cultivar as closely as you can and check a reputable regional source for its cold tolerance. If a plant is only labeled “prickly pear,” do not assume that a hardiness claim for a different Opuntia applies to it.
2. Give Prickly Pear Strong Light—But Acclimate Sudden Changes
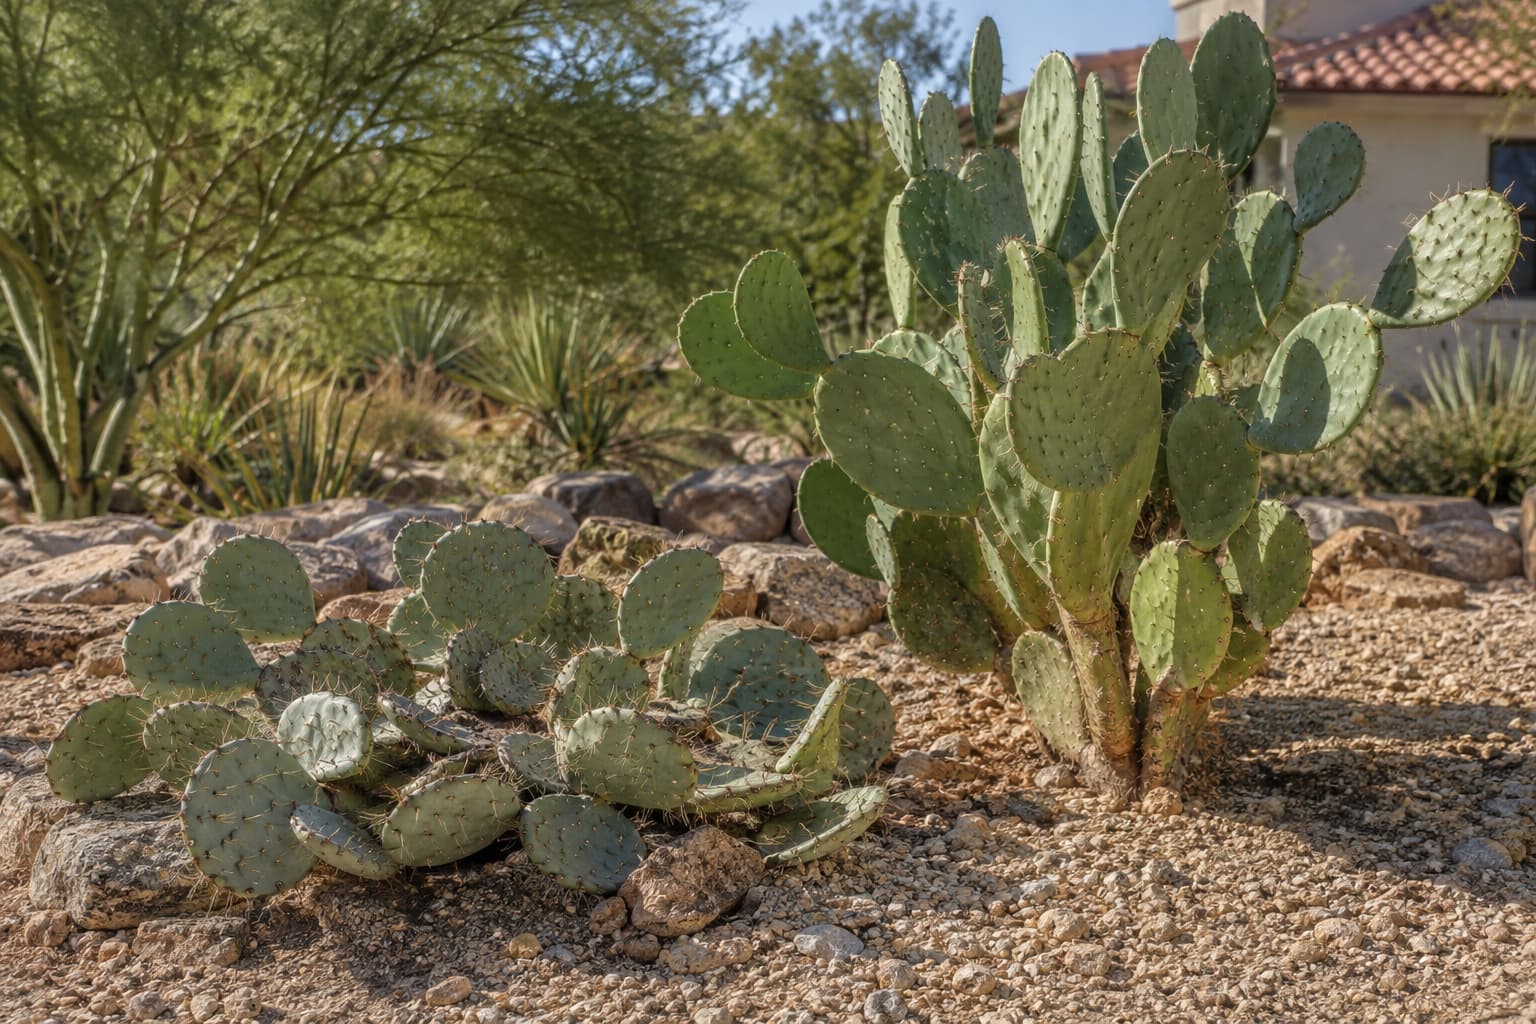
Most commonly grown prickly pears flower and maintain sturdy pads best in strong light, and many landscape species are full-sun plants. Indoors or under glass, give the plant the brightest position you can provide.
A cactus that has spent weeks in a nursery, shaded patio, or indoor room can still scorch if moved abruptly into intense sun. Increase exposure gradually, especially in hot climates. Sunburn often appears as pale tan or bleached patches on the exposed side of a pad and does not reverse once the tissue is permanently scarred.
3. Use Fast Drainage, Not a Complicated Soil Recipe
Prickly pear roots need air as much as they need water. In the ground, sandy, gravelly, rocky, or sloped positions are often easier than low spots where water sits after rain. In a pot, start with cactus or succulent mix and add mineral material such as pumice or coarse grit if the base mix remains wet for too long in your conditions.
There is no single perfect percentage of sand, perlite, and soil for every climate. The test that matters is drainage: after watering, the root zone should not remain wet and heavy for long periods.
4. Water According to Drying, Season, and Root Conditions
Established outdoor prickly pears are drought tolerant, but “drought tolerant” does not mean they never use water. During active warm-season growth, a plant in fast-draining soil can be watered deeply and then allowed to dry substantially before the next irrigation. Containers may need checking more often because their smaller root volume changes temperature and dries faster.
In cool weather, during dormancy, or when growth slows, the soil usually stays wet longer and water demand falls. This is when a fixed summer-style schedule becomes risky. If pads are soft while the root zone is still damp, improve drainage and inspect the roots before adding more water.
Some hardy prickly pears naturally wrinkle, flatten, or lean during winter. A soft pad combined with cold, wet soil is a different situation from a firm plant drying during active growth. Check season, soil moisture, and the base of the plant before watering automatically.
5. How to Grow Prickly Pear Cactus in Pots
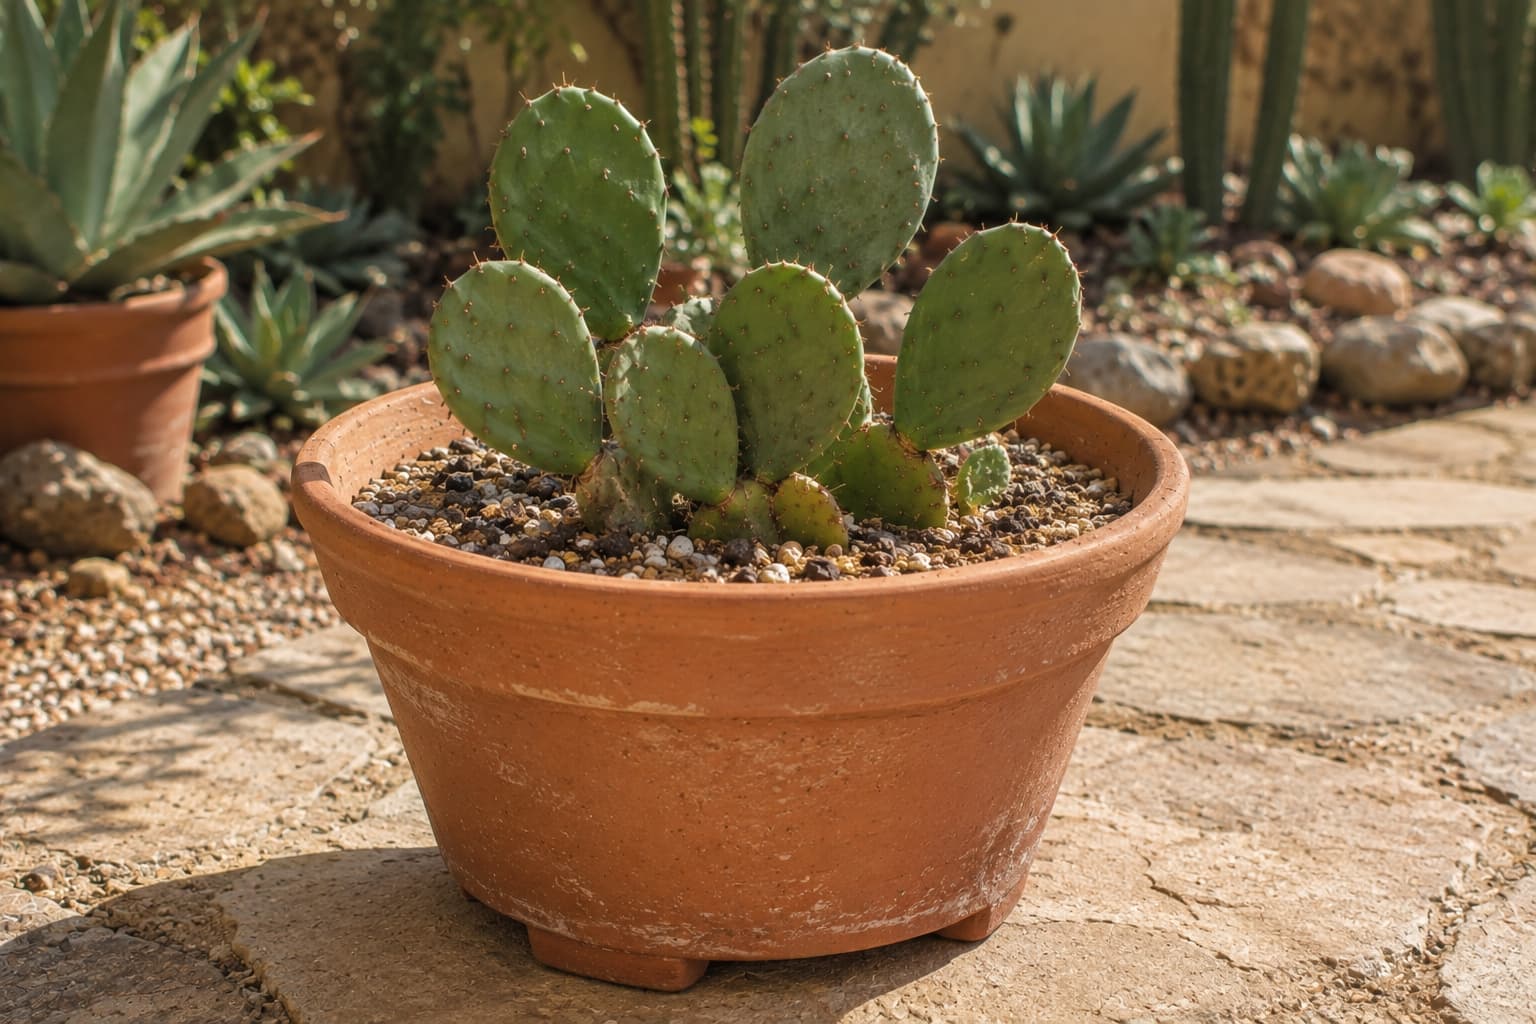
Containers are useful when your winter climate is colder or wetter than a particular Opuntia can tolerate outdoors. Choose a stable pot with drainage holes and enough weight to support the upper pads. Terracotta can be helpful because it breathes and adds weight, although it may require more frequent moisture checks in very hot or windy weather.
- Use a pot only modestly larger than the root system rather than an oversized volume of wet mix.
- Keep the crown at roughly its previous planting depth.
- Do not let the pot sit in a water-filled saucer.
- Turn or move the pot carefully—pads can detach at the joints.
- If overwintering indoors, keep the plant very bright and avoid combining low light with frequent watering.
6. How to Propagate Prickly Pear From a Pad
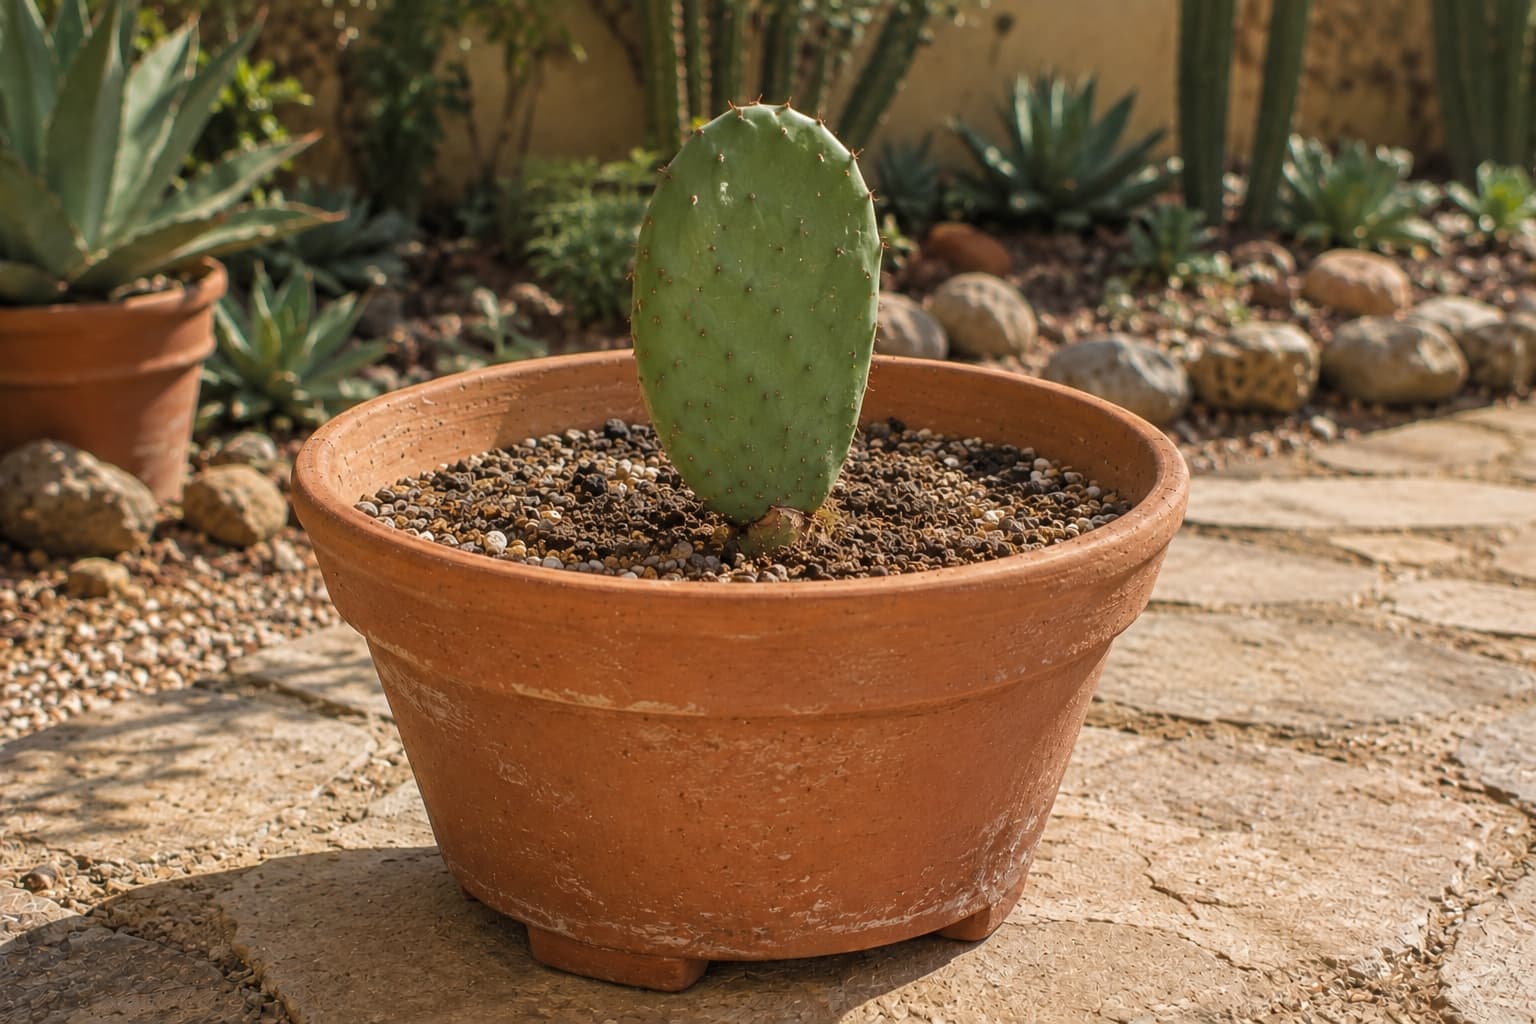
Pad propagation is usually faster and simpler than seed. Choose a healthy, mature pad and remove it cleanly at the natural joint. Handle it with tongs and place it in a dry, protected spot until the cut surface has formed a dry callus. In warm, dry conditions this may take around a week or two; humid weather can take longer.
Plant the Pad Shallowly
- Choose a small pot or sharply drained garden position.
- Stand the callused pad upright with the cut end down.
- Set only enough of the base into the mix to keep the pad stable; for cultivated prickly pears this may be around 2–3 cm (about 1 in).
- Support it temporarily if necessary rather than burying half the pad.
- Keep conditions on the dry side while the wound is still vulnerable, then water cautiously as rooting begins.
Deep planting increases the amount of stem tissue sitting in moist soil and can encourage rot. Do not fertilize an unrooted pad in an attempt to make it root faster.
7. How to Prune Opuntia Safely
Prickly pear does not need routine shaping like a hedge. Prune to remove damaged pads, reduce an overgrown clump, improve access, or keep a plant balanced in a container.
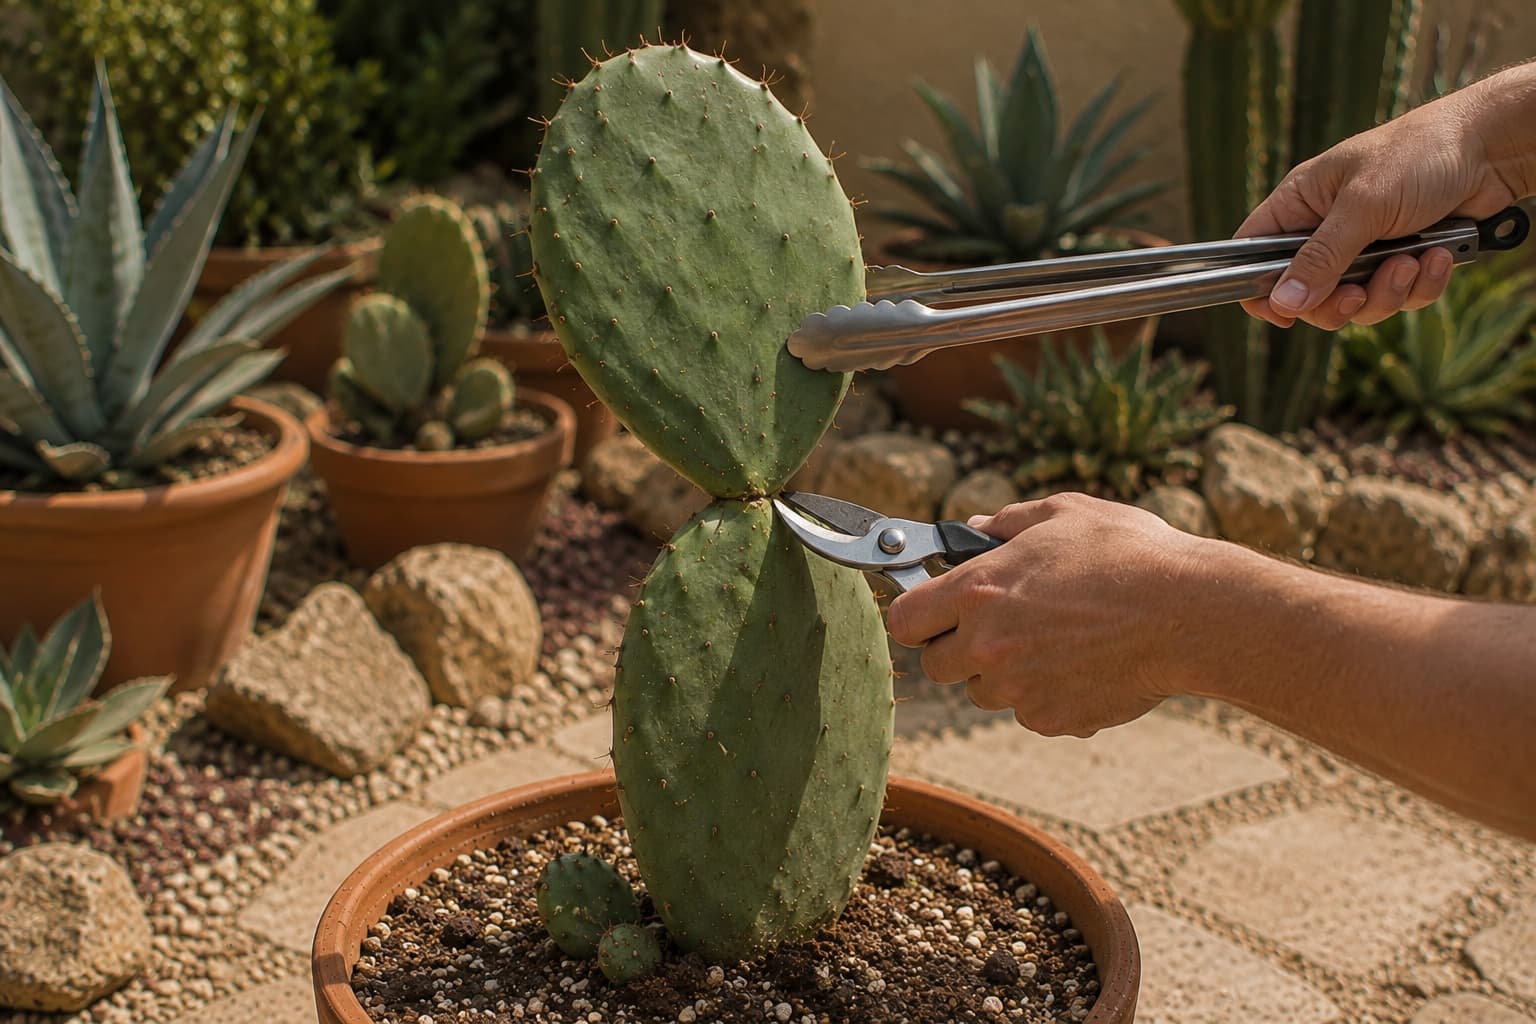
Whenever possible, remove an unwanted pad at the natural joint where it meets the older pad. This leaves a smaller wound than cutting across the middle of a healthy segment.
A Safer Pruning Routine
- Keep children and pets away from the work area.
- Use long metal tongs to hold or steady the pad.
- Use clean, sharp pruners or a knife to cut at the joint.
- Place removed pads directly into a rigid container or on newspaper/cardboard—never where someone may step on glochids later.
- Check the remaining plant for torn tissue and allow fresh wounds to stay dry while they begin to callus.
8. Glochids: The Part You Should Not Ignore
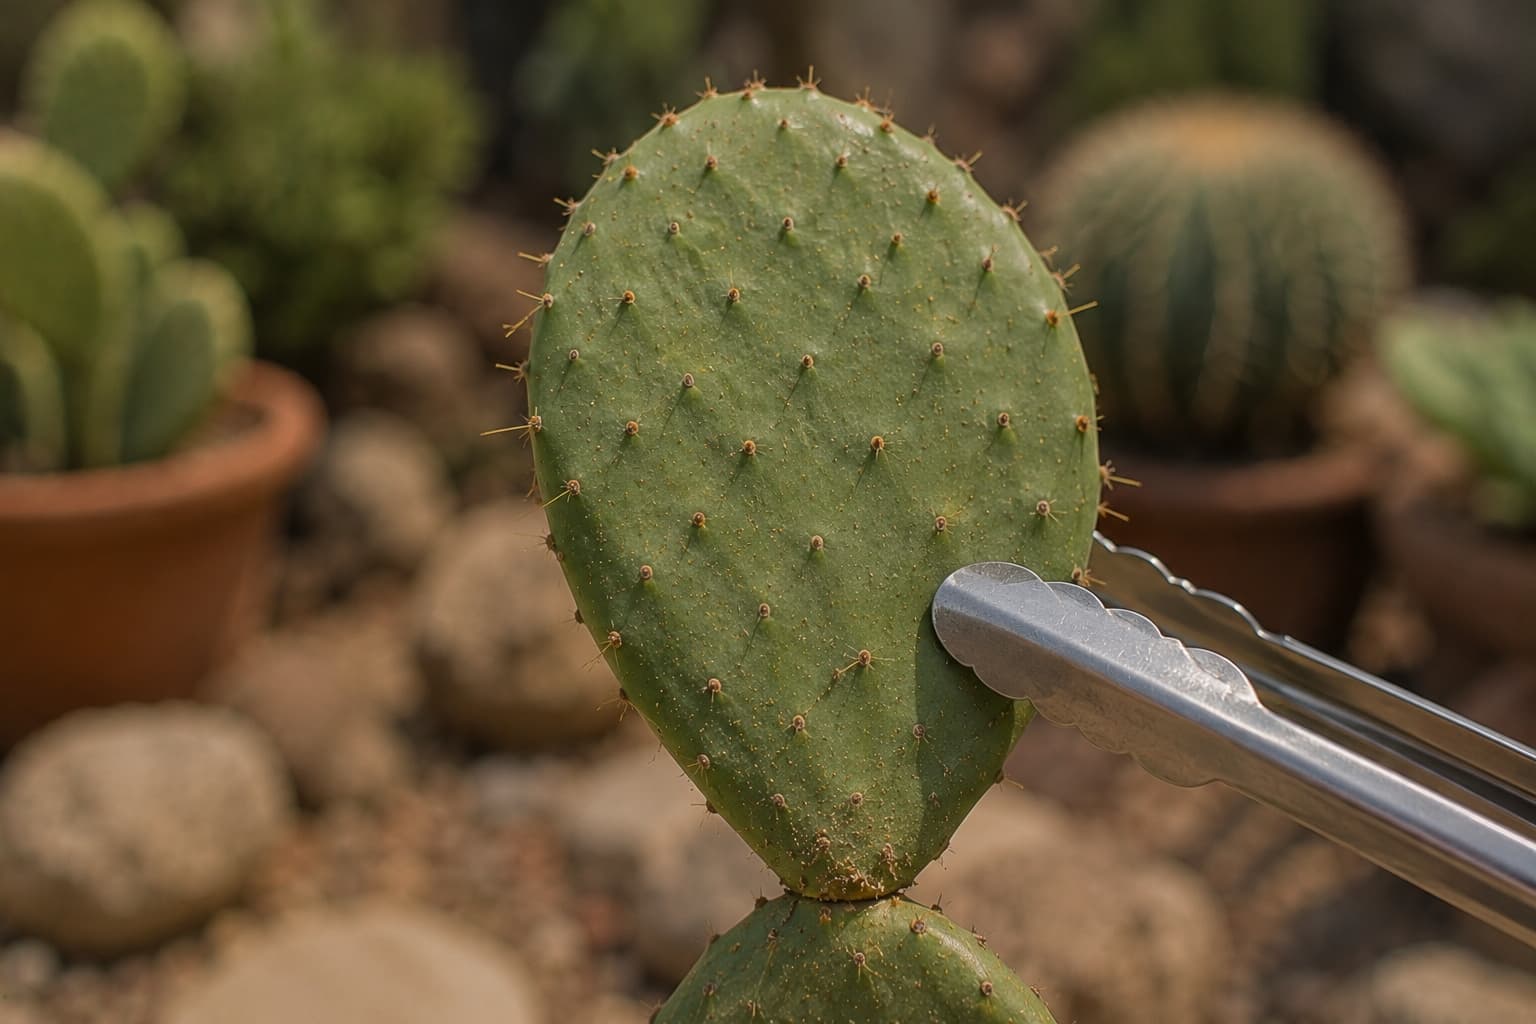
Large cactus spines are easy to see. Glochids are the less obvious hazard: tiny barbed bristles clustered in the areoles of many Opuntia. They detach easily and can lodge in skin, clothing, towels, and gloves.
A plant sold as “spineless” may lack prominent long spines but still carry glochids. Treat visual appearance as a poor safety test. Use long tongs for handling, avoid brushing against pads, and do not use bare hands to test whether a surface feels smooth.
9. Flowers, Fruit, and Why Your Prickly Pear May Not Bloom
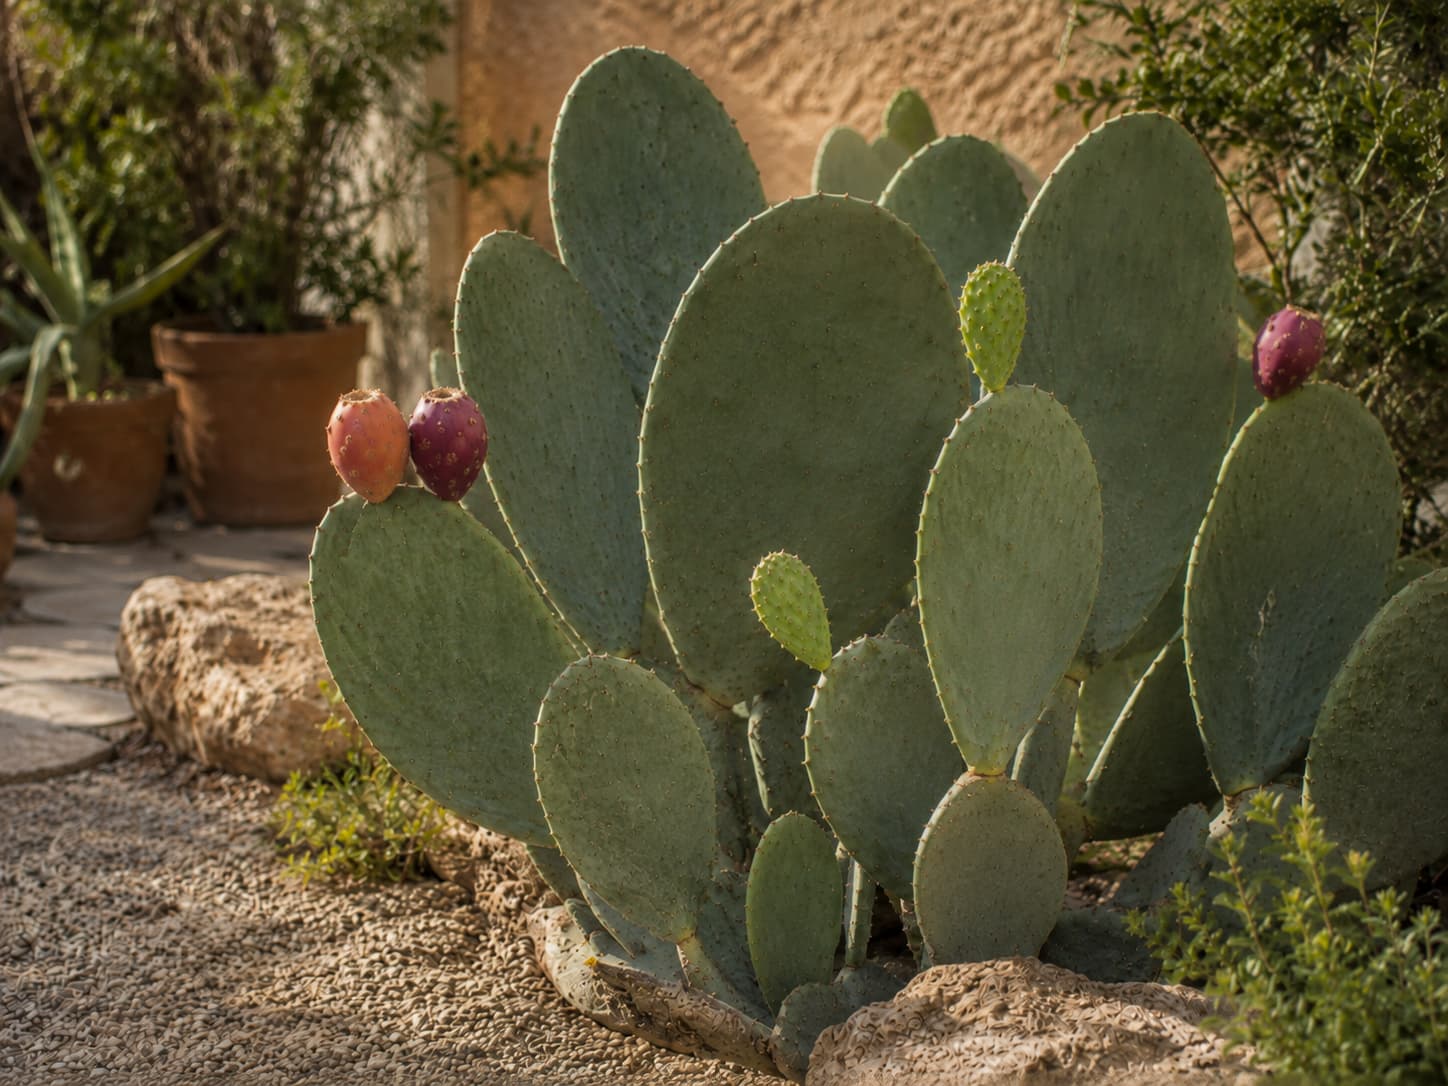
Mature, well-lit prickly pears can produce showy flowers on pad edges, followed by fruit on many species. Bloom color and season vary, so identify the plant before expecting a particular flower.
If an established plant is healthy but never flowers, check light first. Excess shade can produce green growth without strong flowering. A young cutting may also need time to mature. Excess nitrogen, repeated disturbance, or a species poorly matched to the local climate can also reduce flowering performance.
10. How to Harvest Prickly Pear Fruit
Only harvest fruit from a positively identified edible prickly pear that has not been treated with pesticides or other products that make it unsuitable for food use. Fruit color varies by cultivar, so use the normal ripe color for your plant rather than assuming every ripe fruit must be purple.
Ripe fruit should be fully colored and developed; prickly pear fruit does not continue ripening in the same way after picking. Use tongs and protective clothing, twist or cut fruit from the pad without putting your fingers near the areoles, and remove all glochids before preparation.
11. How to Harvest Nopales Safely
Nopales are young edible cactus pads, especially associated with cultivated edible prickly pears such as Opuntia ficus-indica. Do not assume every ornamental Opuntia in a nursery or landscape is intended for eating.
Choose young, tender, bright green pads before they become thick and woody. Hold the pad with tongs, cut it near the base, and remove all spines and glochids completely before cooking or eating. Even apparently spineless pads should be inspected carefully.
Use only correctly identified edible material from plants grown for food or known not to have been treated with unsuitable pesticides. Never use “spineless” appearance alone as proof that a pad or fruit is safe to handle or eat.
12. Common Prickly Pear Problems
Most established Opuntia are resilient when drainage and light are right. When a plant declines, start with the base, the soil, and recent weather rather than treating the visible symptom first.
| What you see | Possible cause | Check first |
|---|---|---|
| Soft, dark tissue near the base | Rot from prolonged moisture or damaged tissue | Drainage, soil wetness, crown condition |
| White cottony patches | Cochineal scale or another sap-feeding pest | Areoles and pad surfaces |
| Pale tan patches after moving outdoors | Sunburn | Recent increase in direct sun or heat |
| Wrinkled or flattened pads in winter | Possible normal cold response in hardy species | Species, season, pad firmness, soil moisture |
| Weak elongated growth | Insufficient light | Daily light exposure and indoor placement |
| No flowers on a mature plant | Low light, immaturity, excess feeding, climate mismatch | Species, plant age, sun exposure |
Cochineal and Scale
Cottony white patches on prickly pear may be cochineal scale rather than harmless dust. On a small plant, isolate it and inspect closely before spraying anything. Physical removal and a targeted treatment appropriate for cactus and the intended use of the plant are better than applying a broad pesticide without identification.
Rot
Rot usually calls for less water and better drainage, not more feeding. If a pad or base is turning soft, black, or foul-smelling, remove severely affected tissue with clean tools where practical and correct the wet conditions that allowed the problem to develop.
13. Cold-Hardy vs Warm-Climate Prickly Pears
Cold tolerance is species-specific. Eastern prickly pear (Opuntia humifusa) is a low-growing North American species adapted to much colder winters than many large fruiting types. By contrast, Indian fig prickly pear (Opuntia ficus-indica) is widely cultivated in mild and warm climates for fruit and pads.
This is why a title such as “all Opuntia are hardy in Zones 4–11” is misleading. Match the exact plant to your winter lows, summer heat, humidity, and drainage. In marginal climates, a container can give you the option to move a warm-climate plant to a brighter protected position for winter.
The Greenmuse 3-Step Prickly Pear Routine
Step 1: Match the Plant to the Place
Know which Opuntia you have, then give that species strong enough light, the drainage it needs, and a winter environment it can actually tolerate.
Step 2: Let the Root Zone Guide Watering
Water thoroughly when conditions call for it, then allow substantial drying. Do not carry a warm-season schedule into cold, wet, or dormant conditions.
Step 3: Handle First, Cut Second
Before pruning, propagating, or harvesting, plan how you will hold the pad without touching it. Long tongs make the job calmer, cleaner, and safer around spines and glochids.
Prickly pear rewards a slower kind of care. Most problems are easier to prevent than to fix: the right species, a dry-enough root zone, and a little respect for the plant's defenses go further than constant intervention.
Frequently Asked Questions
How often should I water a prickly pear cactus?
Do not use one fixed interval. During active warm-season growth, water when the root zone has dried substantially, then water thoroughly. In cold weather or dormancy, drying is slower and the plant usually needs less frequent irrigation.
Can prickly pear cactus survive freezing weather?
Some species can tolerate very cold winters, while others cannot. Identify the species or cultivar and use a regional hardiness reference instead of applying one zone range to the entire Opuntia genus.
Are prickly pear pads leaves?
No. The flat green pads are modified stems called cladodes. True leaves are small and short-lived on new growth.
How do you propagate prickly pear from a pad?
Remove a healthy mature pad at a joint, let the cut end form a dry callus, then plant it upright and shallowly in sharply draining mix. Deep burial increases rot risk.
What are the tiny hairs on prickly pear?
They are often glochids—tiny barbed bristles produced from areoles. They detach easily and can lodge in skin, so use tongs even when a plant appears spineless.
Can I grow prickly pear cactus in a pot?
Yes. Use a stable container with drainage holes, sharply draining cactus mix, strong light, and enough weight to support the pads. Avoid oversized pots that hold unused wet soil around a small root system.
Can you eat all prickly pear fruit?
Many Opuntia fruits are edible, but quality varies and not every ornamental plant should be treated as a food crop. Positively identify the plant, confirm it has not been treated with unsuitable chemicals, and remove all spines and glochids before preparation.
What is the best way to prune Opuntia?
Use long tongs to steady the pad and clean sharp tools to remove it at the natural joint when possible. This creates a smaller wound than cutting through the middle of a healthy pad.
Why is my prickly pear not flowering?
Check light, plant maturity, species, winter conditions, and feeding. Many Opuntia need strong light and sufficient maturity before they bloom well, and climate mismatch can also reduce flowering.
Final Thoughts
Prickly pear cactus care becomes much easier when you stop treating every Opuntia as the same desert plant. Choose a species that fits your climate, prioritize drainage, let the season influence watering, and use tools whenever you handle pads.
If you remember one safety rule, make it this: treat every prickly pear as if glochids are present. That habit improves pruning, propagation, fruit harvest, and everyday care without making the plant feel difficult to grow.
Sources & Further Reading
- NC State Extension — Opuntia / Prickly Pear Cactus
- NC State Extension — Eastern Prickly Pear
- University of Arizona Cooperative Extension — Prickly Pear Cactus: Food of the Desert
- University of Arizona Cooperative Extension — How to Transplant a Cactus
- UC Agriculture and Natural Resources — Prickly Pear Cactus