Aloe Vera Dying? Here’s What’s Wrong and How to Fix It
Quick Summary
If your aloe vera is dying, the first step is to identify what changed in its leaves, roots, soil moisture, or light conditions. Soft, mushy, yellow, or brown lower leaves can point to excess moisture or root problems, especially when the potting mix stays wet. Thin, curling, or puckered leaves often suggest water stress, particularly when the mix is very dry. Red or purple leaves can be linked to strong light, cold, or drought stress. The fastest way to save an aloe is to match the symptom to the cause before watering again.
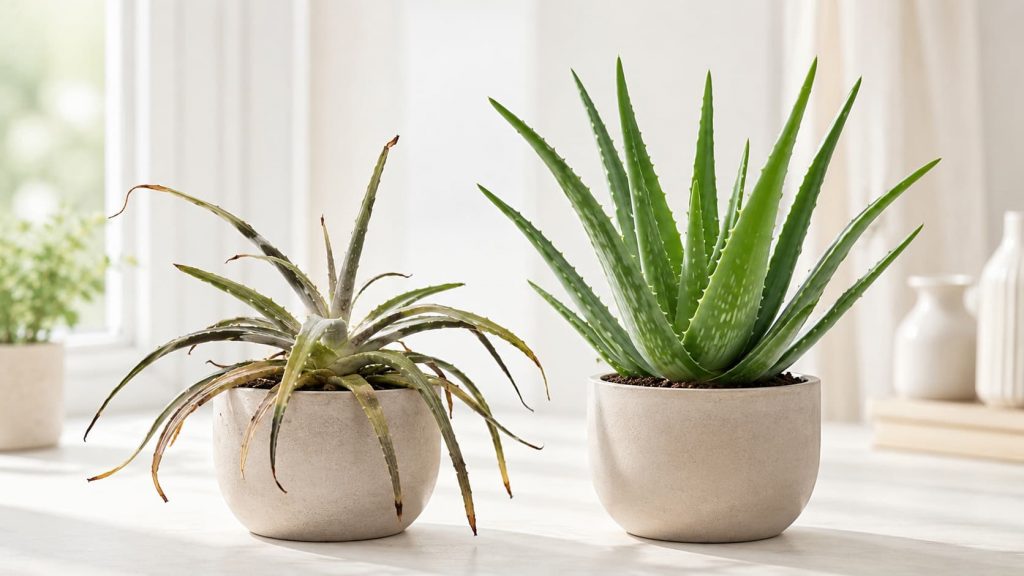
I killed my first aloe vera in about three weeks. At first, I thought I was dealing with aloe vera dying from thirst, so I kept watering it because the leaves looked “thirsty.” They were actually soft from root rot. By the time I pulled the plant out of the pot, the base had turned to brown sludge, and the smell told me everything.
That painful lesson taught me something many plant-care guides miss: aloe vera often declines because the symptoms are misread. Drooping leaves can occur with both excess moisture and severe water stress. Brown or damaged tissue can also have several causes, including sudden intense sun, root problems, or changes in growing conditions. Without checking the soil, roots, light, and leaf texture together, even careful gardeners can make the problem worse.
Below, we’ll walk through the most common symptoms — drooping, brown, mushy, yellow, curling, red, or purple leaves — and what to inspect first. The goal is not a full aloe encyclopedia. It is to help you figure out what your aloe actually needs before you water, repot, or cut anything.
In This Guide
- Aloe Vera Dying? Start With These Checks
- Why Is My Aloe Vera Drooping or Bending Over?
- Why Is My Aloe Vera Turning Brown?
- Why Is My Aloe Vera Mushy?
- Why Are My Aloe Vera Leaves Turning Yellow?
- Why Are My Aloe Vera Leaves Curling?
- Why Is My Aloe Vera Turning Red or Purple?
- How to Save an Overwatered Aloe Vera
- Long-Term Fix: Light, Water, Soil
- FAQ
Aloe Vera Dying? Start With These Checks
When you see signs of aloe vera dying, take 30 seconds before doing anything to identify what you are actually seeing. The same aloe can show very different signs depending on the cause. Use this chart to match the symptom to the most likely problem before you water, repot, fertilize, or cut the plant.
| What You See | Most Likely Cause | Urgency | What to Do First |
|---|---|---|---|
| Leaves drooping outward, soft at base | Overwatering or root rot | High | Stop watering and check the roots. |
| Leaves drooping but firm | Low light | Medium | Move to brighter light gradually. |
| Brown tips only | Mineral-heavy water, low humidity, or mild underwatering | Low | Check watering depth and consider filtered water. |
| Whole leaves brown and crispy | Sunburn or severe underwatering | Medium | Move out of harsh sun and check soil dryness. |
| Mushy, translucent leaves at the base | Root rot | Critical | Unpot today and inspect roots. |
| Yellow lower leaves first | Early overwatering or natural aging | Medium | Check whether the soil is staying wet. |
| Leaves curling inward and thinning | Underwatering or dry heat | Low | Water deeply once, then drain fully. |
| Red, purple, or rust-colored leaves | Light stress, cold stress, or drought stress | Medium | Check for harsh sun, cold drafts, and dry soil. |
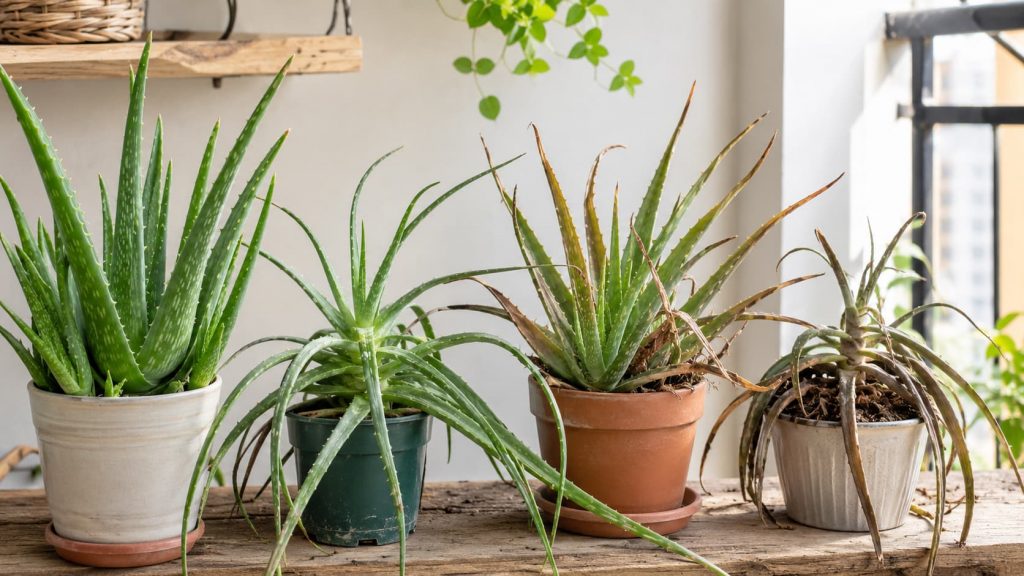
Common indoor pattern: Many struggling indoor aloes have wet soil and low light at the same time. If your aloe sits in a dim spot and the soil stays damp for days, treat overwatering as the starting point before adding more water.
Why Is My Aloe Vera Drooping or Bending Over?
Short answer: Drooping aloe leaves have two very different causes. If leaves feel soft and mushy, overwatering is likely. If leaves feel firm but bend outward, the plant probably needs stronger light. Always check the leaf texture before treating.
What drooping actually looks like
- Leaves fall outward instead of growing upright.
- The plant looks flat or splayed instead of vase-shaped.
- Lower leaves touch the soil or pot edge.
- Some leaves may feel soft, thin, or wrinkled.
Cause 1: low light
Aloe vera needs more light than many houseplants. In low light, leaves stretch outward looking for sun and eventually flop. This kind of drooping usually happens slowly over weeks.
How to identify it: leaves are firm when squeezed gently, the plant is pale or stretched, and it sits in a north-facing window, dim corner, or several feet away from a window.
The fix: move the plant to a brighter window gradually. A south or west window is usually best. If natural light is limited, use a full-spectrum grow light. Do not water more — drooping from low light is not a thirst problem.
Cause 2: overwatering
Soft, mushy drooping is more urgent. The leaves feel waterlogged because the roots are struggling or rotting. If the soil has stayed damp for many days, stop watering and check the roots.
Why Is My Aloe Vera Turning Brown?
Short answer: Aloe turns brown for several reasons: sunburn from sudden bright light, dry crispy stress from underwatering, brown tips from mineral buildup or low humidity, or brown mushy tissue from root rot. The texture and location of the brown area tell you what is happening.
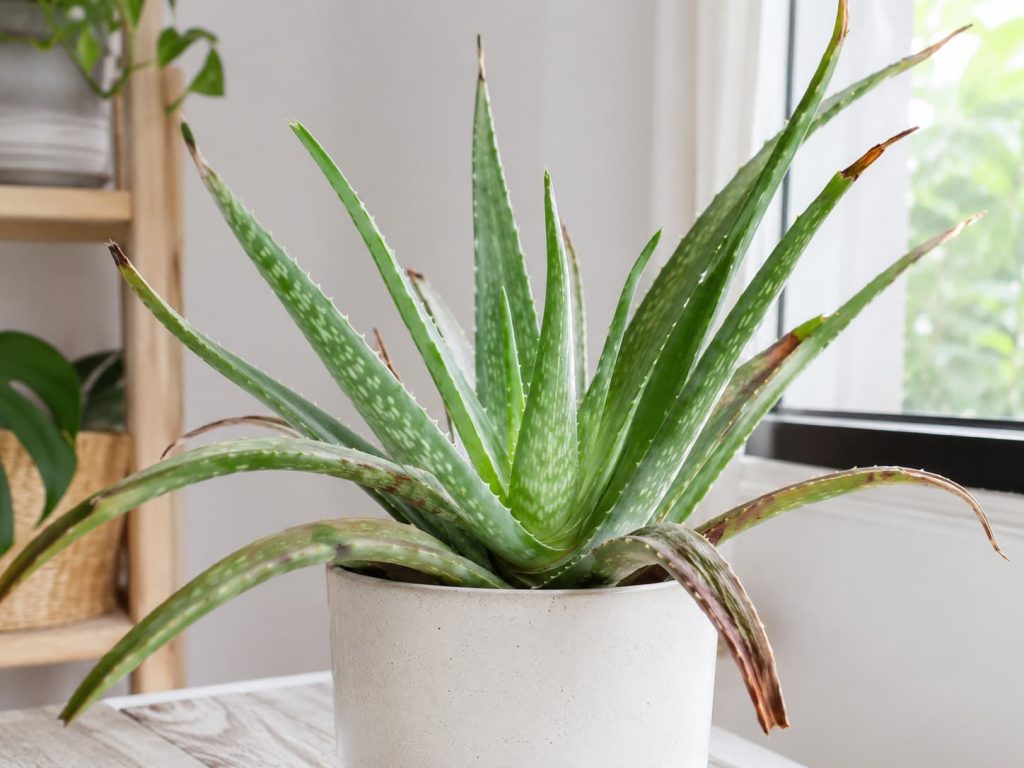
Brown tips only
If only the tips are brown and the rest of the leaf is firm and green, this is usually a low-risk issue. It can come from mineral-heavy tap water, low humidity, or a little underwatering. Trim brown tips if they bother you, but focus on new growth rather than trying to make old tips green again.
Brown crispy patches
Dry brown patches often mean sunburn, especially if you recently moved the aloe into strong direct sun. Move it back to bright indirect light for a week or two, then reintroduce direct sun gradually.
Why Is My Aloe Vera Mushy?
Short answer: Aloe vera dying with soft, mushy leaves often points to excess moisture and possible root or stem rot, especially when the potting mix stays wet for too long. Stop watering, remove the plant from the pot, and check the roots and lower stem for dark, soft, or collapsing tissue before adding more water.
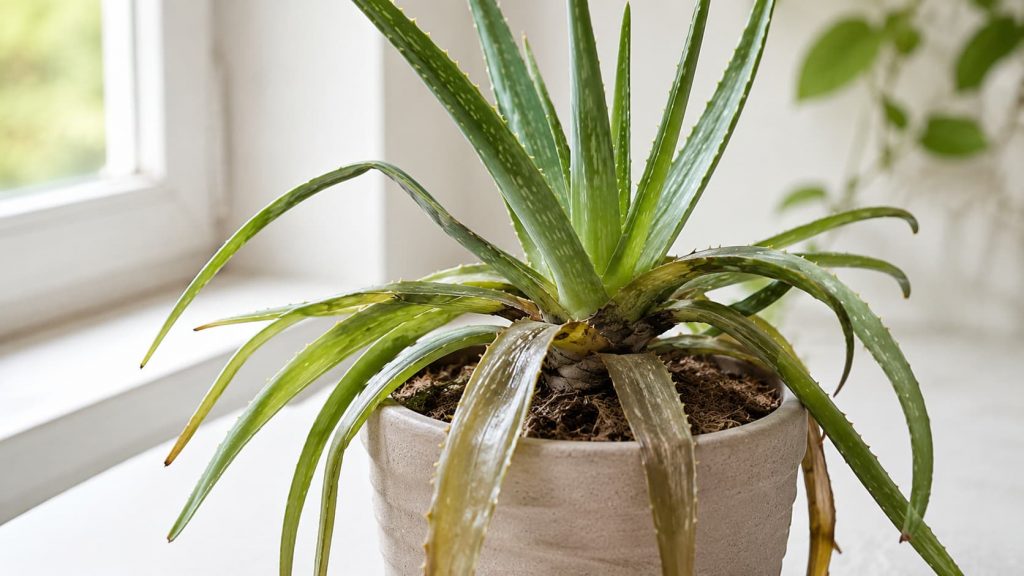
Short answer: Aloe vera dying with soft, mushy leaves often points to excess moisture and possible root or stem rot, especially when the potting mix stays wet for too long. Stop watering, remove the plant from the pot, and check the roots and lower stem for dark, soft, or collapsing tissue before adding more water.
Do not wait if the base is mushy: Once softness reaches the center of the plant, the parent aloe becomes much harder to save. Check the roots today and save any healthy pups if the main stem is collapsing.
Why Are My Aloe Vera Leaves Turning Yellow?
Short answer: Yellow aloe vera leaves are often an early warning sign of stress. If the lower leaves turn yellow and feel soft, overwatering may be starting. If the yellow leaves feel dry or crispy, the plant may be underwatered, sun-stressed, or adjusting to a new spot. Check the leaf texture and soil moisture before you change anything.
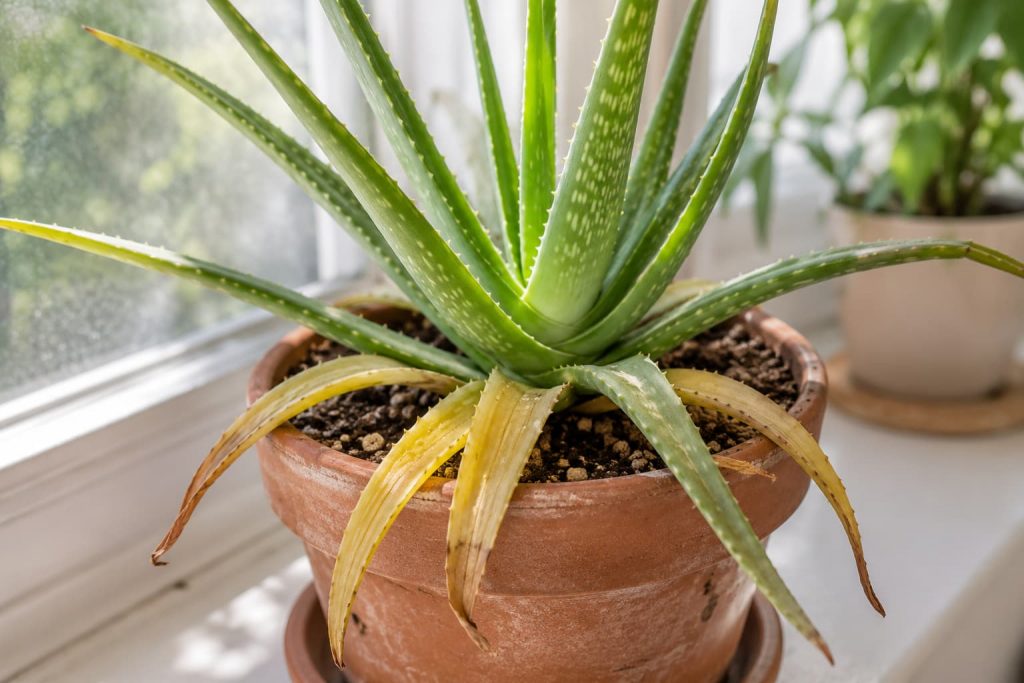
Yellow leaves are one of the first signs that an aloe vera is unhappy. The good news is that yellowing often appears before the plant becomes mushy, so this is your chance to slow down, check the plant, and fix the problem early.
The most important thing is not the color alone. It is where the yellowing starts and how the yellow leaf feels. A soft yellow lower leaf tells a different story from a dry yellow tip.
Pattern 1: Lower leaves turning yellow and soft
This is the pattern to watch most closely. When the oldest lower leaves turn yellow first and feel soft, heavy, or slightly translucent, the plant may be getting too much water. The roots may not be rotting yet, but the soil is likely staying wet for too long.
What to do: stop watering for now. Check the soil 2 inches down. If it still feels damp several days after watering, improve drainage, move the plant to brighter light, and consider checking the roots before the leaves become mushy.
Pattern 2: Yellow leaves with dry brown edges
If the yellowing comes with dry, crispy edges or brown tips, the issue may be underwatering, harsh sun, or a sudden change in light. This is less urgent than soft yellow leaves, but it still means the plant is under stress.
What to do: check the soil first. If the soil is bone dry, water deeply once and let the pot drain fully. If the plant was recently moved into strong direct sun, move it back to bright indirect light for a week before increasing sun again.
Pattern 3: One or two old leaves turning yellow
Not every yellow leaf is a problem. As aloe vera grows, it can naturally retire older outer leaves. If only one or two oldest leaves are yellow and the center growth looks firm and healthy, this may simply be normal aging.
What to do: trim the fully yellow old leaf at the base with clean scissors if it looks spent. Do not change your whole care routine unless more leaves start yellowing.
Pattern 4: New center growth turning yellow
Yellowing in the center is less common and deserves attention. It can happen after transplant shock, poor light, depleted soil, or root stress. If the center leaves are also soft, treat it as a possible overwatering problem.
What to do: check the roots and the potting mix. If the plant has not been repotted in years, refresh it with fast-draining cactus or succulent soil. Avoid heavy fertilizer while the plant is stressed.
Quick check: Soft yellow leaves usually point toward too much water. Dry yellow leaves usually point toward drought, sun stress, or adjustment stress. Touch the leaf and check the soil before deciding what to do next.
Why Are My Aloe Vera Leaves Curling?
Short answer: Curling aloe vera leaves usually mean the plant is using up the water stored in its leaves. This often happens from underwatering, dry indoor air, strong heat, or a potting mix that dries too fast. If the leaves feel thin, puckered, or folded inward and the soil is fully dry, water deeply once and let the pot drain completely.
Curling aloe leaves are usually a water-storage signal. Aloe vera holds water inside its thick leaves. When the plant starts using up that stored moisture, the leaves may look thinner, flatter, wrinkled, or folded inward.
The key difference from overwatering is texture. A mushy aloe feels soft and wet. A curling aloe usually feels thinner, drier, and less plump than normal.
What curling aloe leaves look like
- Leaves curl inward along the edges, almost like a shallow taco shape.
- Leaves feel thinner or less firm than usual.
- The surface may look slightly wrinkled or puckered.
- The plant may look deflated rather than mushy.
- The soil is usually dry several inches down.
Cause 1: Underwatering
This is the most common reason aloe leaves curl inward. The plant has used up some of the water stored in its leaves, so the leaves shrink slightly and fold in on themselves.
How to identify it: the soil is completely dry, the pot feels very light, and the leaves feel thin or puckered rather than soft and watery.
The fix: water deeply once until water runs from the drainage hole. Let the pot drain fully, then wait until the soil dries again before watering next time.
Cause 2: Dry heat or very dry indoor air
Indoor heating, hot windowsills, and dry rooms can make aloe leaves lose moisture faster. This does not mean you should mist the plant. Misting aloe leaves can create other problems and does not solve dry roots.
The fix: move the plant away from heating vents or very hot glass. Water only when the soil is dry, and make sure the pot drains well. A stable bright spot is better than a hot, harsh one.
Cause 3: Soil drying too fast
A fast-draining succulent mix is good, but sometimes the mix becomes too dry and hydrophobic. When this happens, water may run around the root ball and out of the pot without soaking the soil properly.
The fix: water slowly in two passes. First, moisten the surface. Wait a few minutes. Then water again until the root ball is evenly damp and water drains from the bottom.
What not to do
Do not start watering every day just because the leaves are curling. Aloe vera needs a deep drink followed by a dry period. Frequent small watering keeps the surface damp while the deeper roots may still stay unevenly dry or stressed.
Quick watering rule: Curling and thin leaves usually need one deep watering, not frequent small sips. Water fully, drain fully, then wait until the soil dries again.
Why Is My Aloe Vera Turning Red or Purple?
Short answer: Aloe vera turns red or purple when it is under stress from stronger light, cold drafts, drought, or a sudden change in environment. A slow reddish tint can be normal in bright light, but a sudden deep red or purple color means the plant is reacting to stress. Check light, temperature, and soil dryness before changing your watering routine.
Red or purple aloe leaves can look alarming, but they are not always a sign that the plant is dying. Aloe vera often changes color when it is reacting to stress. Think of it as the plant showing you that something in its environment has changed.
The key question is how quickly the color appeared. A slow reddish tint in bright light is often a normal adjustment. A sudden red, purple, or rusty color after a move, cold night, or dry spell means the plant needs a closer look.
Cause 1: Stronger light
Aloe vera likes bright light, but a sudden jump into stronger sun can stress the leaves. This often happens when a plant is moved from a dim indoor spot to a hot south-facing window, balcony, or outdoor sun.
How to identify it: the red or purple color appears on the side facing the window or sun. The leaf may still feel firm, but the color looks stronger on exposed areas.
The fix: move the aloe back to bright indirect light for a week. Then reintroduce stronger sun gradually. A little morning sun is easier on the plant than hot afternoon sun.
Cause 2: Cold stress
Aloe vera is not happy in cold drafts. In winter, a plant sitting right against a cold window can turn reddish or purple, especially at night when the glass gets colder than the room.
How to identify it: the color change appears during colder months, near a drafty window, door, or unheated room. The plant may also stop growing and look slightly dull.
The fix: move the aloe a little farther from cold glass and drafts. Keep it in bright light, but avoid chilly window contact overnight.
Cause 3: Drought stress
Red or purple leaves can also appear when the plant has been dry for too long. This usually comes with thinner leaves, curling edges, or a slightly wrinkled surface.
How to identify it: the pot feels very light, the soil is dry several inches down, and the leaves look thinner or curled rather than mushy.
The fix: water deeply once, let the pot drain completely, and then wait for the soil to dry before watering again. Do not start watering every day.
Cause 4: Sudden change in environment
Aloe vera can react to sudden changes even when the new conditions are not terrible. A new window, a new pot, outdoor summer light, a heat wave, or a colder night can all trigger color changes.
The fix: give the plant a stable spot and avoid making several changes at once. Adjust light gradually, keep watering conservative, and watch the center growth. If new growth looks firm and green, the plant is usually recovering.
When red or purple is not a big problem
If the color developed slowly, the leaves feel firm, the center growth looks healthy, and the soil is not staying wet, a mild red tint is usually not urgent. Treat it as a stress signal, not an emergency. The plant may simply be adapting to brighter light.
Do not rush to water: Red or purple aloe leaves do not automatically mean the plant is thirsty. Check light, temperature, and leaf texture first. Water only if the soil is fully dry and the leaves feel thin or puckered.
How to Save an Overwatered Aloe Vera from Root Rot
Short answer: If you find aloe vera dying in wet soil, stop watering and remove the plant from the pot so you can inspect the roots and lower stem. Trim away clearly rotten, dark, or collapsing tissue with a clean tool, then allow fresh cuts to dry before repotting in a clean container with a fast-draining succulent mix. Wait to water again until the plant has settled and the root zone is no longer staying damp.
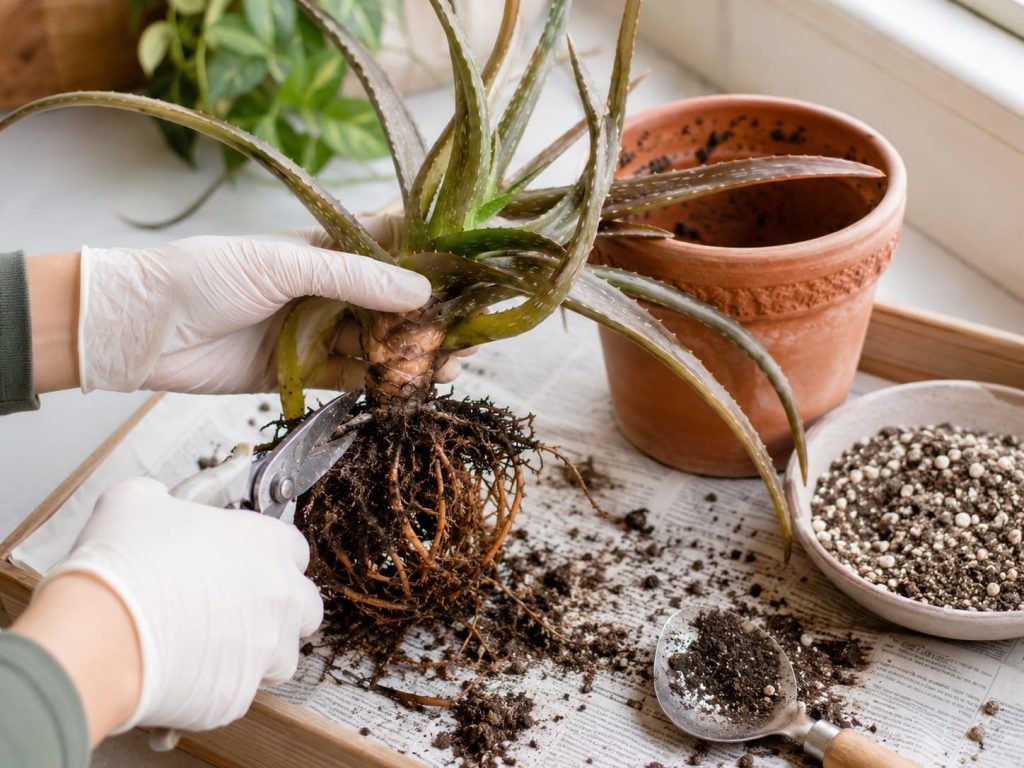
If you find aloe vera dying in wet soil, with mushy lower leaves, yellowing near the base, or potting mix that stays damp for too long, this is the section to follow. The goal is not to make the plant look perfect immediately. It is to stop further decline, remove clearly damaged tissue, and give the healthy roots and stem a cleaner, drier environment in which to recover.
What You Need
- Clean scissors or pruning shears.
- Rubbing alcohol or hot soapy water for cleaning the blades.
- Fresh cactus or succulent potting mix.
- A clean pot with drainage holes.
- Paper towels or a clean, dry tray.
Step 1: Stop Watering
Do not automatically add more water to a plant that is already sitting in wet mix. If the soil remains damp and the lower leaves or stem feel soft, more moisture can make the problem worse. Let the root zone begin drying while you inspect the plant.
Step 2: Remove the Aloe From the Pot
Hold the plant close to the base and slide it gently out of the container. If the root ball is stuck, squeeze the sides of a flexible pot or tap the bottom. Avoid pulling on soft or damaged leaves.
Step 3: Remove the Old Wet Mix
Gently shake or tease away as much of the old wet mix as you reasonably can so the roots are easier to inspect. Discard mix that is waterlogged, sour-smelling, or heavily compacted rather than reusing it for the rescue.
Step 4: Trim Clearly Rotten Roots and Tissue
Healthy aloe roots are generally firm. Rotten roots or lower-stem tissue may appear dark, soft, collapsing, hollow, or slimy. Use a clean tool to remove tissue that is clearly dead or rotten, and keep firm healthy roots, leaves, and offsets whenever possible.
Clean the blades before cutting and again if you move from rotten tissue to healthy tissue. This reduces the chance of transferring decaying material across fresh cuts.
Step 5: Let Fresh Cuts Dry
Place the aloe on a clean, dry surface in a shaded, airy location and allow fresh cut surfaces to dry before repotting. The exact time depends on the size of the cuts, temperature, and airflow, so use the condition of the tissue rather than a fixed countdown.
Step 6: Repot in Fresh, Fast-Draining Mix
Repot into a clean container with drainage holes using fresh cactus or succulent mix that drains freely. Terracotta can help the mix dry faster, but plastic or glazed ceramic can also work when drainage is reliable and watering is adjusted. Choose a pot only modestly larger than the remaining root system rather than an oversized container that holds a large volume of wet mix.
Step 7: Resume Watering Carefully
Do not water immediately just because the plant has been repotted. Give damaged roots and fresh cuts time to settle, then water only when the root zone is no longer staying damp and the plant is ready to resume normal care.
When watering resumes, moisten the potting mix thoroughly enough to wet the root zone, let excess water drain completely, and then wait for the mix to dry substantially before watering again.
Do not water right after repotting: A rescued aloe needs dry time more than it needs comfort watering. Wait 7–10 days after repotting, then water lightly and let the pot drain fully.
What recovery looks like: Old damaged leaves may not look better, and that is normal. Watch the center of the plant. If new growth stays firm and the base no longer feels soft, your aloe is moving in the right direction.
Long-Term Fix: Light, Water, Soil, and Pot Choice
Short answer: To prevent aloe vera dying again, give the plant bright appropriate light, water only after the potting mix has dried substantially, use a fast-draining cactus or succulent mix, and choose a container with reliable drainage holes. Many indoor aloe problems become more likely when low light, excess moisture, and slow-drying soil happen at the same time.
Once your aloe is stable again, the goal is not to fuss over it every day. Preventing aloe vera dying again comes down to a setup that works with the plant: bright appropriate light, reliable drainage, and enough time for the potting mix to dry substantially between waterings.
Aloe problems often overlap. Lower light can slow drying, a moisture-retentive mix can keep the root zone wet for longer, and a large or non-porous container may dry more slowly than expected. When several of these conditions occur together, the plant may begin to show drooping, yellowing, soft tissue, brown patches, or weak growth.
Light: Brighter Than Many Beginners Expect
Aloe vera generally performs best in very bright indoor light. A south- or southwest-facing window can be one of the strongest indoor positions in the Northern Hemisphere, while east- or west-facing windows may also work depending on season, latitude, nearby buildings, trees, and how far the plant sits from the glass.
Signs light may be too weak: leaves stretch outward, the plant leans strongly toward the window, new growth looks pale or elongated, and the potting mix takes noticeably longer to dry.
How to fix it: move the plant gradually into a brighter position rather than making a sudden jump into intense direct sun. If natural light is limited, a suitable grow light can help provide more consistent illumination.
Water: Deep Drinks, Not Frequent Sips
The safer watering pattern is to water thoroughly, let excess water drain, and then wait until the potting mix has dried substantially before watering again. Avoid relying on a strict weekly or biweekly schedule because drying speed changes with light, temperature, season, pot size, and container material.
Before watering: check below the surface and compare the weight of the pot with how it feels just after watering. If the root zone still feels meaningfully damp, wait. If the mix has dried and the leaves are beginning to look thinner or slightly puckered, the plant may be ready for water.
Avoid this mistake: giving small sips every few days. Frequent shallow watering can keep part of the root zone damp without allowing a normal wet-dry cycle.
Soil: Fast-Draining, Not Dense and Water-Retentive
A cactus or succulent potting mix is a practical starting point for aloe vera, but mixes vary widely in how much moisture they hold. If your mix stays wet for too long, improve aeration with a coarse mineral amendment such as pumice, perlite, or horticultural grit.
A suitable mix should: wet evenly, drain freely, regain air space as it dries, and avoid remaining saturated around the roots for long periods.
A problem mix may: feel dense or compacted, remain wet for an unusually long time, smell sour, or cling heavily around declining roots.
Pot Choice: Drainage Holes Matter Most
The most important feature of an aloe container is a reliable drainage route. Decorative pots without drainage can allow water to collect around the roots even when the surface of the mix appears dry.
Terracotta can help the potting mix lose moisture through its porous walls, but plastic and glazed ceramic can also work when the mix is airy and watering is adjusted. Avoid dramatically oversized pots because a large volume of unused mix can remain wet longer than a smaller root system needs.
A Simple Indoor Aloe Routine
- Keep the plant in a bright, stable position.
- Rotate the pot occasionally if growth leans strongly toward the light.
- Check the potting mix and pot weight before every watering.
- Water thoroughly only after the root zone has dried substantially.
- Empty standing water from saucers or decorative cachepots.
- Repot when drainage has deteriorated, roots are severely crowded, or the plant needs root inspection.
Greenmuse rule: A healthy aloe setup should dry out between waterings. If the pot, soil, and location keep the roots wet for days, the plant will keep showing the same problems no matter how carefully you water.
| Care Factor | Best Setup | Problem Sign |
|---|---|---|
| Light | Bright window or grow light | Stretching, leaning, pale growth |
| Water | Deep watering after soil dries | Mushy leaves or curling leaves |
| Soil | Cactus mix with extra drainage | Wet soil for many days |
| Pot | Drainage holes, not oversized | Sour soil, root rot, slow drying |
FAQ
01 Can a dying aloe vera come back to life?
Yes. If some healthy roots remain and the central stem is not fully rotted, the plant may recover. A rescued aloe usually improves through new growth rather than old damaged leaves becoming perfect again. If the base is soft and collapsing, check for healthy pups around the parent plant and save those first.
02 Why is my aloe vera dying even though I water it regularly?
Regular watering may be the problem. Aloe vera does not like small drinks on a fixed schedule. It needs deep watering only after the soil has dried. If you water every few days or every week without checking the soil, the roots may stay too wet and start to rot.
03 How often should I water aloe vera indoors?
Water aloe vera only when the soil has dried. Indoors, that may be every 2 to 3 weeks in bright warm months and every 4 to 6 weeks in winter. The exact timing depends on light, pot size, soil, and temperature. Always check the soil before watering.
04 Should I cut off mushy aloe leaves?
Yes. Fully mushy, blackened, or collapsed aloe leaves should be removed with clean scissors. Cut them at the base and avoid tearing the stem. Do not remove firm leaves just because they have brown tips. Brown tips can be trimmed lightly, but healthy leaf tissue still helps the plant recover.
05 Can aloe vera recover from root rot?
Sometimes. Aloe vera can recover from root rot if there are still firm healthy roots or a firm central stem. Remove rotten roots, let the plant dry, and repot it in fresh dry succulent mix. If the central stem is soft, the parent plant may not recover, but healthy pups may survive.
06 Why are my aloe vera leaves turning brown at the tips?
Brown tips are usually less urgent than mushy brown tissue. They can come from mineral-heavy tap water, dry indoor air, mild underwatering, or old stress. If the rest of the leaf is firm and green, focus on better watering habits and new growth rather than trying to reverse old brown tips.
07 Is aloe vera toxic to cats and dogs?
Yes. Aloe vera is listed as toxic to cats and dogs by the ASPCA. If pets chew the leaves, it may cause digestive upset. Keep aloe vera out of reach of curious pets.
08 Can I grow a new aloe vera from a single leaf?
Usually not reliably. Aloe vera does not propagate from single leaves as easily as many other succulents. The fleshy leaf often rots before it roots. The best way to propagate aloe vera is by separating pups, which are the small baby plants that grow from the base.
The Short Version
If you remember only three things:
- Soft or mushy leaves usually mean overwatering. Check the roots before watering again.
- Curling or thin leaves usually mean underwatering. Water deeply once, then let the pot dry.
- Always check soil and leaf texture first. Guessing is what usually kills aloe.
Aloe vera is a forgiving plant once you understand its signals. It does not need constant attention. It needs bright light, fast-draining soil, and a gardener who checks before watering.
Still not sure what your aloe is doing?
Leave a comment with what you see: soft or firm leaves, wet or dry soil, where the plant sits, and how often you water. A few details are usually enough to narrow down the problem.
What to Read Next
Sources: The Old Farmer’s Almanac, Royal Horticultural Society, ASPCA Pet Plant Database.